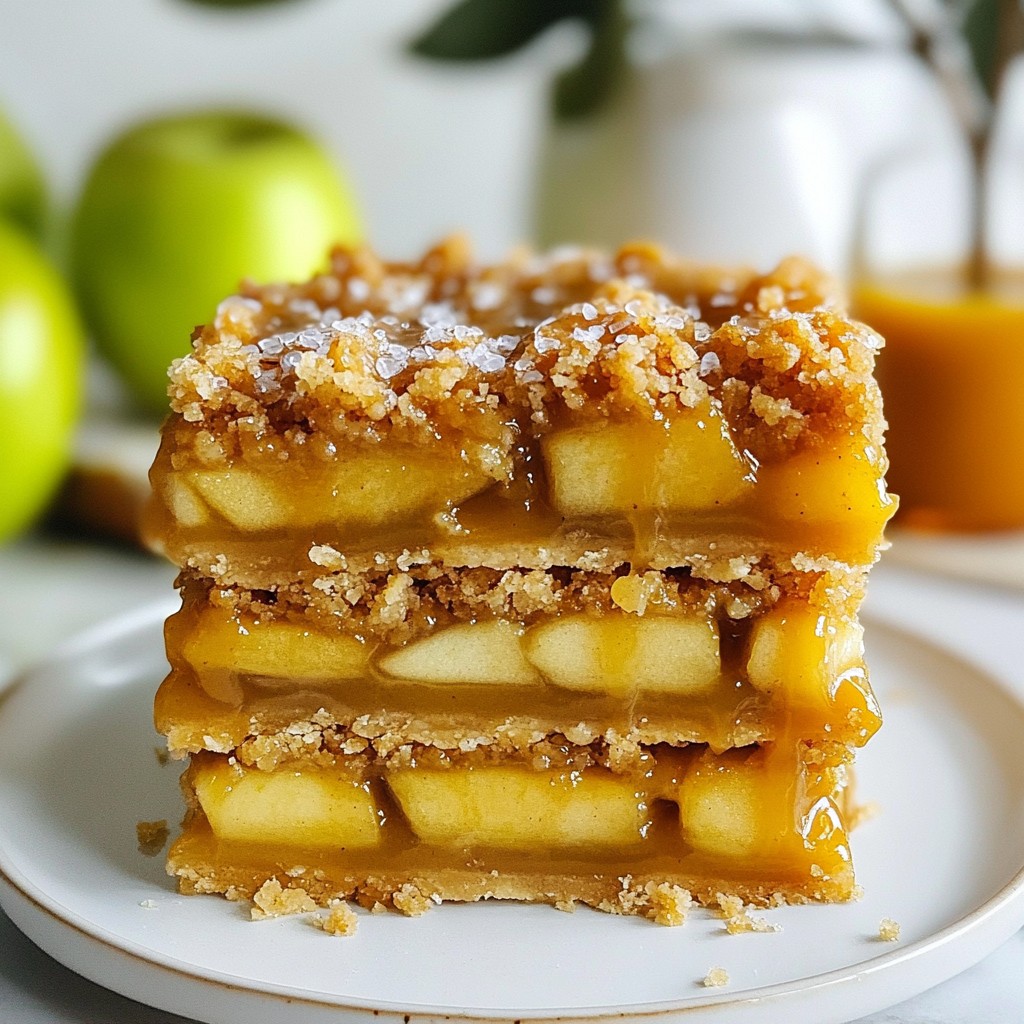
Are you ready for a dessert that brings fall's best flavors right to your table? These Salted Caramel Apple Pie Bars are a treat you won't want to miss. With a buttery crust, sweet apple filling, and rich caramel, each bite delivers pure bliss. I'll guide you step-by-step, from choosing the right apples to the perfect baking tips. Let's dive into this delightful recipe together and turn your kitchen into a cozy haven!
Why I Love This Recipe
- Delicious Flavor Combination: The sweet and tart apples paired with rich caramel create a perfect balance of flavors.
- Easy to Make: This recipe simplifies the traditional apple pie into convenient bars, making it accessible for bakers of all skill levels.
- Perfect for Sharing: These bars are easy to cut and serve, making them ideal for gatherings and potlucks.
- Customizable: You can easily adapt this recipe by adding nuts, substituting different fruits, or using your favorite caramel sauce.
Ingredients
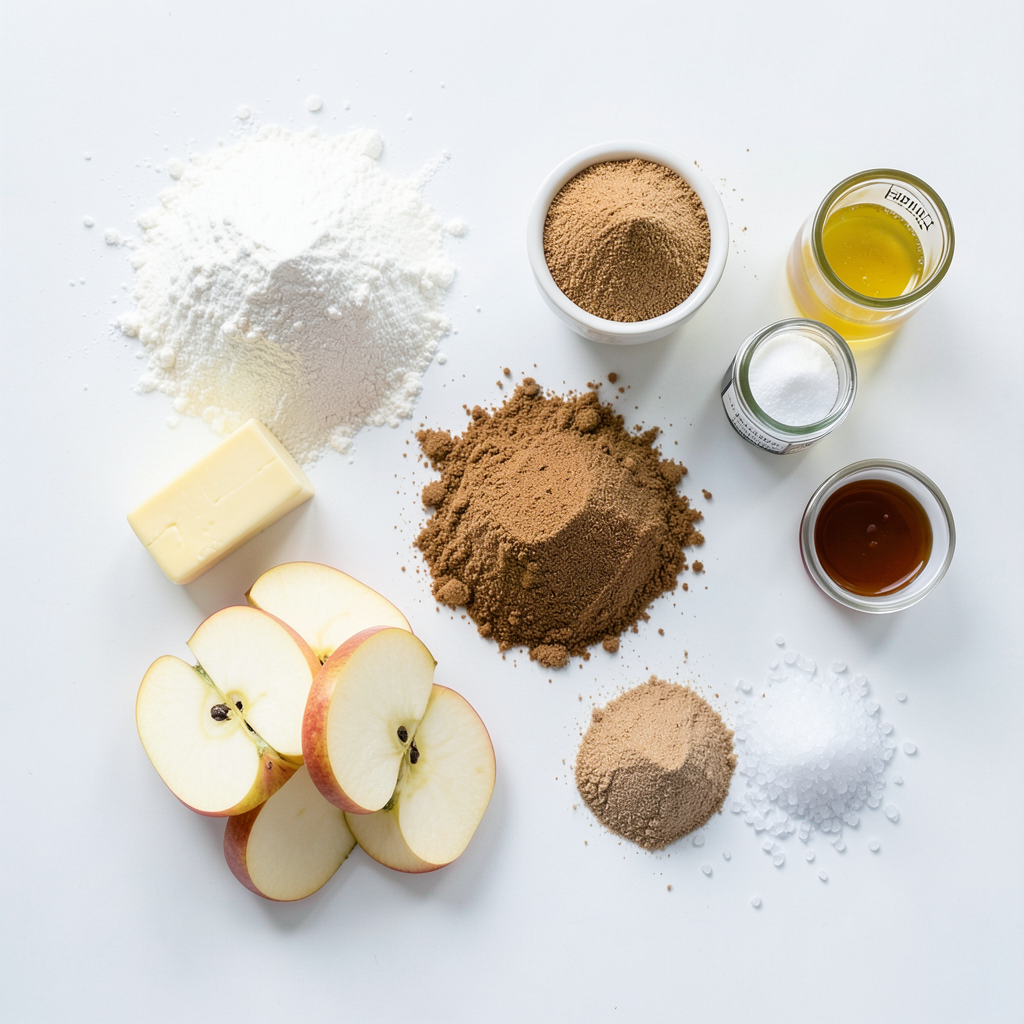
Here’s what you need to make these tasty Salted Caramel Apple Pie Bars:
- 2 cups all-purpose flour
- 1 cup unsalted butter, softened
- 1/2 cup granulated sugar
- 1/2 cup brown sugar, packed
- 1/4 teaspoon salt
- 1 teaspoon vanilla extract
- 1/2 teaspoon baking powder
- 3 large apples, peeled and thinly sliced
- 1 teaspoon cinnamon
- 1 tablespoon lemon juice
- 1 cup caramel sauce
- Sea salt, for sprinkling
These ingredients blend together to create a warm, sweet treat. The apples give a nice crunch, while the caramel adds a rich taste. The sea salt on top balances the sweetness perfectly. You can use Granny Smith or Honeycrisp apples for the best flavor. Each bite will take you to dessert heaven!
Step-by-Step Instructions
Preheating and Preparing the Baking Dish
1. Start by preheating your oven to 350°F (175°C).
2. Grease a 9x13 inch baking dish with butter or oil.
3. Line the dish with parchment paper, leaving some overhang to lift the bars later.
Making the Dough
1. In a large bowl, cream together 1 cup of softened unsalted butter, 1/2 cup of granulated sugar, and 1/2 cup of brown sugar. Mix until the mixture looks light and fluffy.
2. Add in 1 teaspoon of vanilla extract, 1/4 teaspoon of salt, and 1/2 teaspoon of baking powder. Mix until all the ingredients blend well.
3. Gradually add in 2 cups of all-purpose flour. Mix until a dough forms.
Assembling the Bars
1. Press about 2/3 of the dough evenly into the bottom of the prepared baking dish. This will be your crust.
2. In another bowl, toss together 3 large apples, peeled and thinly sliced, with 1 tablespoon of lemon juice and 1 teaspoon of cinnamon. You can add a pinch of sugar if you like it sweeter.
3. Spread the apple mixture evenly over the crust in the baking dish.
4. Drizzle 1 cup of caramel sauce over the apples, making sure to cover them well.
5. Crumble the remaining dough on top of the caramel and apples. This creates a lovely crumble topping.
Baking and Cooling
1. Bake in your preheated oven for 35-40 minutes. Keep an eye on it until the topping is golden brown and the apples feel tender.
2. Once done, take the dish out of the oven. Let it cool in the pan for about 10 minutes.
3. While it’s still warm, sprinkle sea salt over the top for that perfect salty-sweet touch.
4. Allow the bars to cool completely before using the parchment overhang to lift them out. Cut into squares or bars for serving.
Tips & Tricks
Choosing the Right Apples
For the best apple pie bars, choose apples with a firm texture. I love using Granny Smith apples. They offer a nice tartness. Honeycrisp apples are also great. They bring a sweet crunch. Mixing these two kinds gives a nice flavor balance. Look for apples that are fresh and crisp. Avoid soft or mushy apples, as they won't hold up well during baking.
Perfecting the Crumble Topping
The crumble topping needs to be just right. You want it to be crumbly but not too dry. Mix the remaining dough lightly, so it stays fluffy. Use your fingers to break it into small pieces. This helps create a nice texture. Make sure to sprinkle it evenly on top of the apples. This way, every bite gets that sweet, crunchy topping.
Serving Suggestions
Presentation matters, even for a simple dessert. Serve these bars on a rustic wooden board. Drizzle extra caramel sauce over the top for flair. A sprinkle of sea salt adds a nice touch, too. It gives a pop of flavor that pairs well with the sweet caramel. Cut the bars into even squares for a nice look. This makes them easy to grab and enjoy!
Pro Tips
- Use Fresh Apples: For the best flavor and texture, opt for fresh, tart apples like Granny Smith or Honeycrisp. These varieties hold their shape well during baking and provide a nice balance to the sweetness of the caramel.
Variations
Gluten-Free Option
You can make these bars gluten-free! Simply swap all-purpose flour for almond flour or a gluten-free blend. Both options give a nice texture while keeping the bars soft. Almond flour adds a nutty flavor. A blend often includes xanthan gum, which helps bind the ingredients. Just make sure the blend you choose is safe for gluten-free diets.
Additional Flavorings
Want to mix it up? Add nuts or spices to your filling! Chopped pecans or walnuts add a great crunch. You can also sprinkle in some nutmeg for warmth or ginger for a zing. A little vanilla can enhance the overall flavor too. Experiment to find your favorite combo!
Caramel Sauce Alternatives
You have choices when it comes to caramel sauce. You can make your own with sugar, butter, and cream for a rich taste. It’s simple and fun! If you're short on time, store-bought caramel works well too. Look for a high-quality brand to keep that gourmet touch. Either way, drizzle it generously for a sweet finish!
Storage Info
Storing the Bars
To keep your salted caramel apple pie bars fresh, store them in an airtight container. Place parchment paper between layers to prevent sticking. This method helps maintain texture and flavor. If you have a large batch, cut them into smaller pieces for easy access. Keep the bars at room temperature for a short time, but refrigerate them for longer freshness.
Freezing Guidelines
If you want to freeze these bars, first let them cool completely. Then, wrap them tightly in plastic wrap. You can also use aluminum foil for extra protection. Label your package with the date. To thaw, place the bars in the fridge overnight. If you're in a hurry, you can leave them at room temperature for a few hours.
Shelf Life
At room temperature, the bars last about three days. In the fridge, they can last up to a week. Freezing can extend their life to three months. Just remember to check for any signs of freezer burn, as that can affect taste. Enjoy your bars fresh for the best experience!
FAQs
Can I make these bars ahead of time?
Yes, you can make these bars ahead of time. To prepare in advance, follow these steps:
- Make the dough and fill the bars as directed.
- Before baking, cover the dish tightly with plastic wrap.
- Store in the fridge for up to one day.
- When ready, bake them straight from the fridge. This helps the flavors blend well.
What can I substitute for unsalted butter?
If you need a substitute for unsalted butter, try these options:
- Use salted butter, but reduce extra salt in the recipe.
- Coconut oil works well for a dairy-free option.
- Use vegan butter for a plant-based choice.
- Applesauce can replace some butter for a lighter texture.
How do I know when the bars are done baking?
To check if the bars are done baking, look for these signs:
- The top should be golden brown.
- The apples should be tender when poked with a fork.
- If the edges pull away from the pan slightly, they are likely done.
These clues will help you bake perfect salted caramel apple pie bars every time!
This blog post covered all the key steps for making delicious apple caramel bars. We looked at the ingredients, step-by-step instructions, and tips for a perfect bake. Don’t forget to choose the best apples and try out different toppings. You can even make a gluten-free version if needed. Remember to store any leftovers properly to keep them fresh. With these easy tips, you can enjoy these tasty treats anytime. Happy baking!