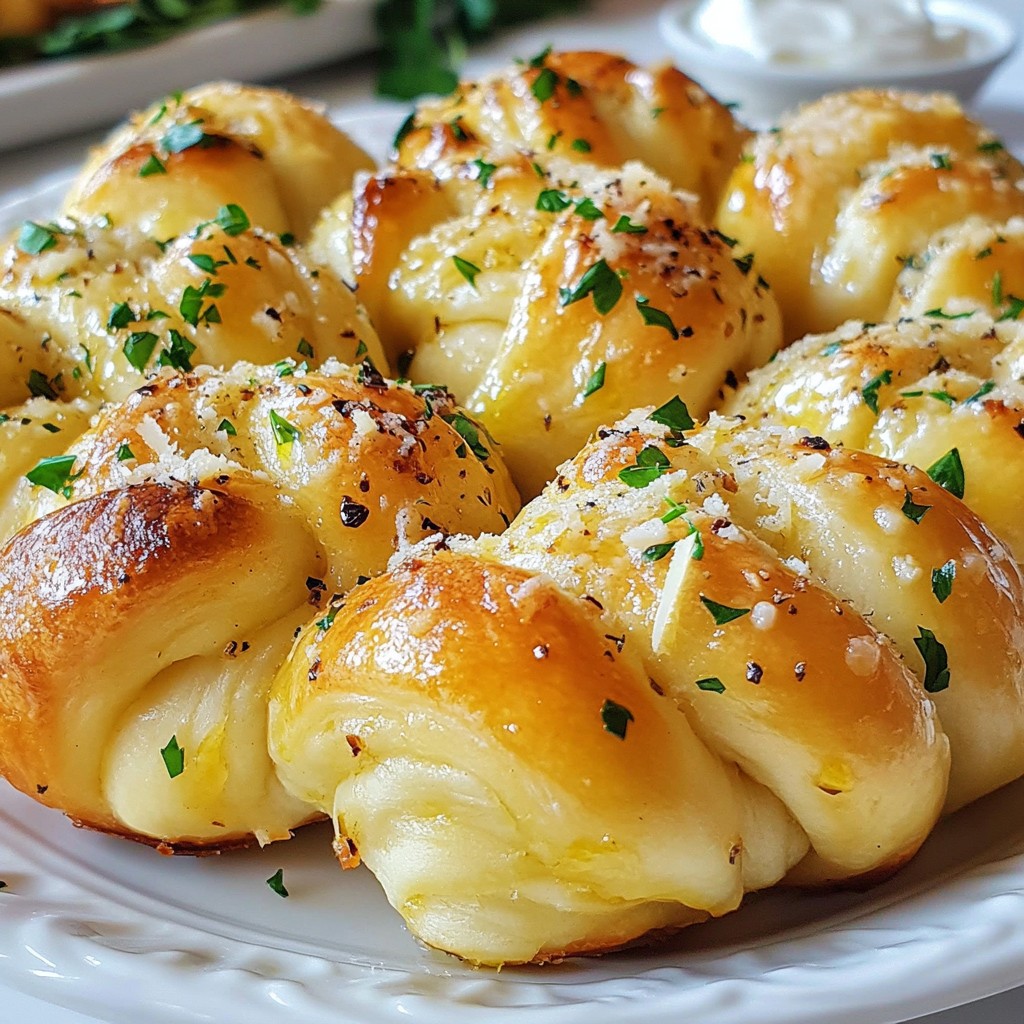
Are you ready to impress your friends and family with a tasty bite? In this post, I’ll show you how to make Pillsbury Biscuit Garlic Butter Cheese Bombs that are a hit at any gathering. These cheesy, buttery bites are easy to prepare and packed with flavor. Perfect for snacks, appetizers, or brunch, these bombs will have everyone asking for more. Let’s dive into the recipe and get cooking!
Ingredients
List of Ingredients for Pillsbury Biscuit Garlic Butter Cheese Bombs
To make these tasty cheese bombs, you need the following ingredients:
– 1 can (16.3 oz) Pillsbury Grands!™ Flaky Layers Biscuits
– 4 tablespoons unsalted butter, melted
– 3 cloves garlic, minced
– 1 teaspoon Italian seasoning
– 1 cup shredded mozzarella cheese
– 1/2 cup grated Parmesan cheese
– 1/4 teaspoon salt
– 1/4 teaspoon black pepper
– Fresh parsley, chopped (for garnish)
Substitutions for Ingredients
You can swap some ingredients for a twist:
– Use garlic powder instead of fresh garlic.
– Try other cheeses like cheddar or gouda.
– Use olive oil if you don’t have butter.
– Italian seasoning can be replaced with herbs de Provence.
Recommended Tools and Equipment
For this recipe, here are the tools you will need:
– Baking sheet
– Parchment paper
– Mixing bowl
– Measuring cups and spoons
– Knife and cutting board
– Small brush for butter
When you gather these items, you will be ready to create your delicious garlic butter cheese bombs.Enjoy cooking!
Step-by-Step Instructions
Preparation Steps
1. Preheat the oven to 375°F (190°C). This step ensures even baking.
2. Line a baking sheet with parchment paper. This will help with cleanup later.
3. In a small bowl, mix the melted butter, minced garlic, Italian seasoning, salt, and pepper. This mix adds great flavor.
4. Open the can of Pillsbury Grands!™ Biscuits. Be careful when separating them.
5. Flatten each biscuit slightly in your palm. This makes room for cheese.
6. Add about 1 tablespoon of mozzarella cheese and a sprinkle of Parmesan cheese to the center.
7. Pinch the edges of the biscuit together to seal in the cheese. Make sure it’s tight!
8. Roll the biscuit into a ball and place it seam-side down on the baking sheet. Repeat this for all biscuits.
Baking Instructions
9. Brush the garlic butter mixture generously over each biscuit bomb. More butter means more flavor!
10. Bake in the preheated oven for 15 to 18 minutes. Look for a nice golden brown color.
11. Remove from the oven and let them cool for a few minutes. Drizzling extra garlic butter on top adds great taste.
12. Garnish with fresh parsley before serving. This adds a pop of color and flavor.
Tips for Ensuring Cheese Melts Perfectly
– Use room temperature cheese. It melts easier than cold cheese.
– Don’t overstuff the biscuits. Too much cheese can make sealing hard.
– Make sure the oven is fully preheated before baking. This helps the cheese melt evenly.
– Keep an eye on them while baking. Ovens vary, so check for golden brown.
These steps will guide you to make perfect Pillsbury Biscuit Garlic Butter Cheese Bombs.
Tips & Tricks
Common Mistakes to Avoid
When making Pillsbury Biscuit Garlic Butter Cheese Bombs, avoid using cold butter. Cold butter won’t mix well with garlic and spices. Also, don’t skip the step of sealing the biscuits tightly. If they are not sealed, the cheese will leak out while baking. Another mistake is overbaking. Keep an eye on them to avoid dryness.
How to Make Ahead for Quick Serving
You can prepare these cheese bombs a few hours in advance. After shaping them, place the bombs on the baking sheet. Cover them with plastic wrap and refrigerate. When ready to serve, preheat your oven and bake them straight from the fridge. This saves time and keeps the flavor fresh.
Serving Suggestions for Best Flavor
For the best flavor, serve these cheese bombs warm. Pair them with marinara sauce for a tasty dip. You can also sprinkle extra parsley on top for color. A side salad with a light dressing makes a perfect match too. Enjoy these cheesy bites as an appetizer or a fun snack.

Variations
Different Cheese Options to Try
You can mix up the cheese in your cheese bombs. Try using cheddar for a sharp taste. Pepper jack adds a nice kick. Cream cheese gives a rich and smooth texture. You can even use feta for a tangy twist. The choice is yours!
Herb or Spice Additions for Extra Flavor
Want to add more flavor? Toss in some dried herbs like basil or oregano. A pinch of red pepper flakes gives a spicy touch. Fresh herbs like chives or thyme work well too. These additions make each bite more exciting.
Gluten-Free Alternatives
If you need gluten-free options, use gluten-free biscuits. Many brands offer tasty choices. You can also make your own using almond flour or coconut flour. Just follow a gluten-free biscuit recipe, and you will be set for tasty cheese bombs.
Storage Info
How to Store Leftovers
Once you finish your Pillsbury Biscuit Garlic Butter Cheese Bombs, store them in an airtight container. Place a piece of parchment paper between layers to keep them from sticking. This helps them stay fresh. You can keep them in the fridge for up to three days.
Reheating Instructions
To reheat your cheese bombs, preheat your oven to 350°F (175°C). Place the bombs on a baking sheet. Heat them for about 10-12 minutes. This warms them up and makes them crispy again. Avoid using a microwave, as it can make them soggy.
Freezing for Future Enjoyment
You can freeze these cheese bombs for later. First, let them cool completely. Then, place them in a single layer on a baking sheet. Freeze them for about an hour until firm. After that, transfer them to a freezer-safe bag. They will stay good for up to three months. When ready to enjoy, bake from frozen at 375°F (190°C) for about 20-25 minutes.
FAQs
How long do Pillsbury Biscuit Garlic Butter Cheese Bombs last?
Pillsbury Biscuit Garlic Butter Cheese Bombs taste best fresh. They can last up to three days in the fridge. Make sure to store them in an airtight container. This keeps them soft and tasty. After that, the flavor may fade.
Can I make these cheese bombs in advance?
Yes, you can prepare the cheese bombs ahead of time. You can assemble them and keep them in the fridge for up to a day. Just cover them with plastic wrap. Bake them when you’re ready to enjoy. For longer storage, consider freezing them before baking.
What can I serve with garlic butter cheese bombs?
These cheese bombs pair well with many dishes. Consider serving them with marinara sauce for dipping. You can also enjoy them with a side salad for a meal. They make a great appetizer for parties too. Feel free to get creative with your pairings!
In this post, we covered how to make Pillsbury Biscuit Garlic Butter Cheese Bombs. I shared the ingredients list, substitutions, and tools you need. We walked through preparation and baking steps. I also included tips for melting cheese just right.
You can avoid common mistakes and meal prep for fast serving. After trying different cheese and flavors, store any leftovers correctly. Now, you can enjoy these cheesy treats anytime!