Looking for a sweet treat that’s both simple and delicious? You’re in the right place! Peanut Butter Blossom Bars combine rich peanut butter with melted chocolate for a tasty twist on a classic. In this article, I’ll share the easy steps to create these bars, tips for making them perfect, and fun variations to try. Let’s dive in and whip up some joy in your kitchen!
Ingredients
Essential Ingredients for Peanut Butter Blossom Bars
To make these tasty bars, you need some key ingredients. Each one plays a big part in the flavor and texture. Here’s what you need:
– 1 cup creamy peanut butter
– 1/2 cup unsalted butter, softened
– 1 cup brown sugar, packed
– 1/2 cup granulated sugar
– 2 large eggs
– 1 teaspoon vanilla extract
– 2 cups all-purpose flour
– 1 teaspoon baking soda
– 1/2 teaspoon salt
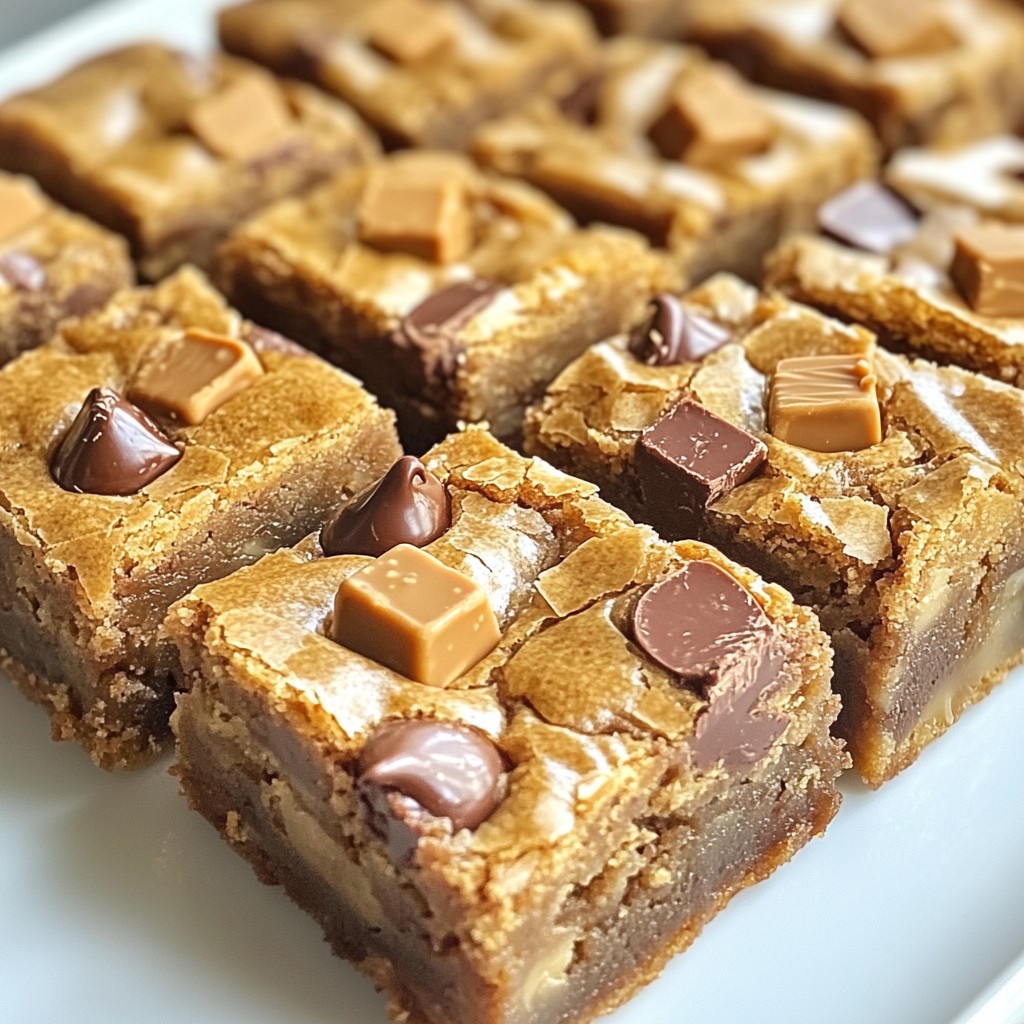
– 1 cup chocolate kisses (unwrapped)
These ingredients blend together to create a rich, sweet base. The creamy peanut butter gives it that nutty flavor. The chocolate kisses add a sweet finish on top.
Optional Add-ins for Enhanced Flavor
You can make these bars even more fun with some add-ins. Here are a few ideas to consider:
– Chopped nuts like peanuts or walnuts for crunch.
– Mini chocolate chips for extra chocolate flavor.
– A sprinkle of sea salt on top for balance.
– Swirls of caramel or nut butter for a sweet twist.
Mixing in these extras can add texture and flavor. Experiment and find what you like best!
Substitute Options for Allergies or Dietary Preferences
If you have allergies or special diets, there are easy swaps. Here are some ideas:
– Use almond butter or sunflower seed butter instead of peanut butter.
– Swap unsalted butter for coconut oil or dairy-free butter.
– For a vegan option, replace eggs with flaxseed meal mixed with water.
– You can use gluten-free flour for a gluten-free version.
These substitutes help everyone enjoy peanut butter blossom bars. You can still keep the taste while meeting dietary needs.
Step-by-Step Instructions
Prepping Your Baking Dish
First, you need to prepare your baking dish. Take a 9×13-inch dish and grease it. You can also use parchment paper. This makes it easy to remove the bars later. Preheating your oven to 350°F is next. This helps your bars bake evenly.
Mixing Wet Ingredients
Now, grab a large mixing bowl. Combine 1 cup of creamy peanut butter and 1/2 cup of softened unsalted butter. Mix them well until smooth. Then, add 1 cup of packed brown sugar and 1/2 cup of granulated sugar. Beat this mixture until it is light and fluffy, which takes about 2-3 minutes. Next, add two large eggs one at a time. Make sure to mix well after each egg. Finally, stir in 1 teaspoon of vanilla extract.
Combining Dry Ingredients and Baking
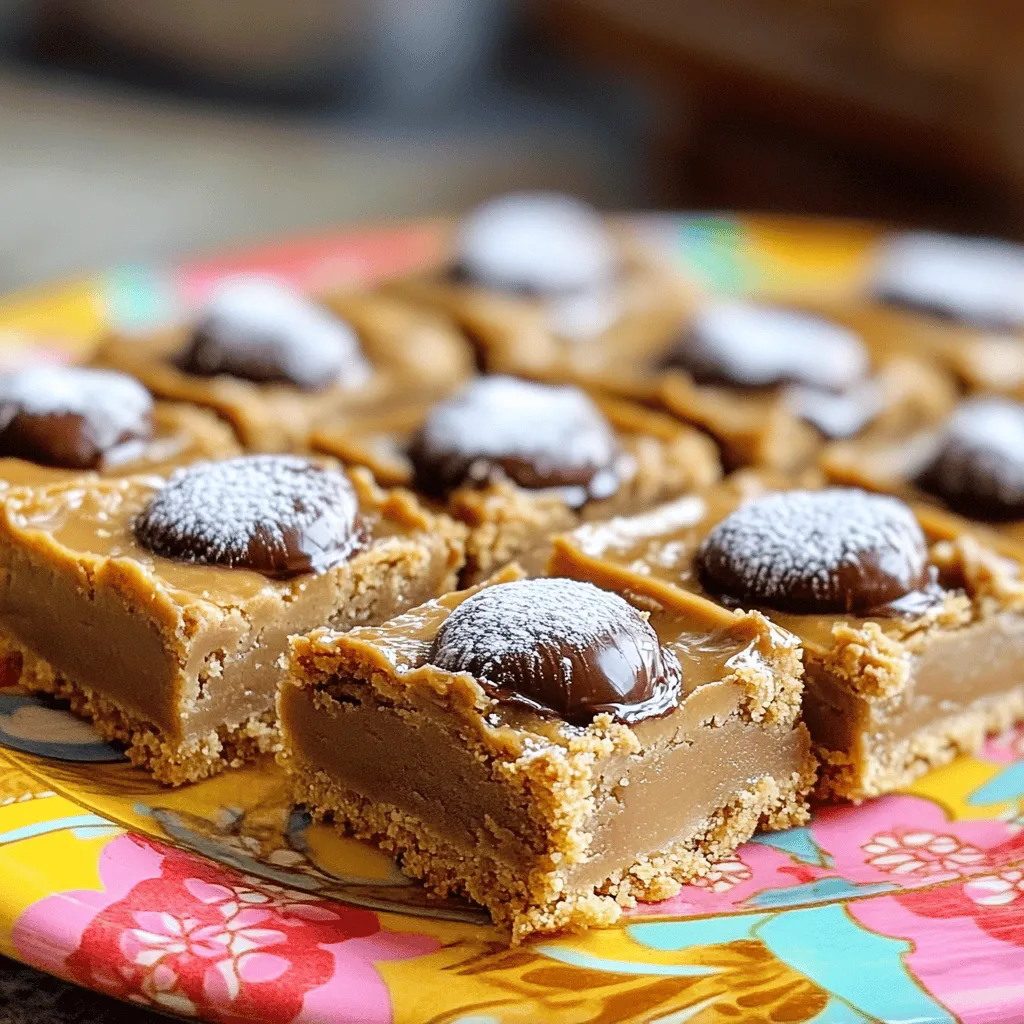
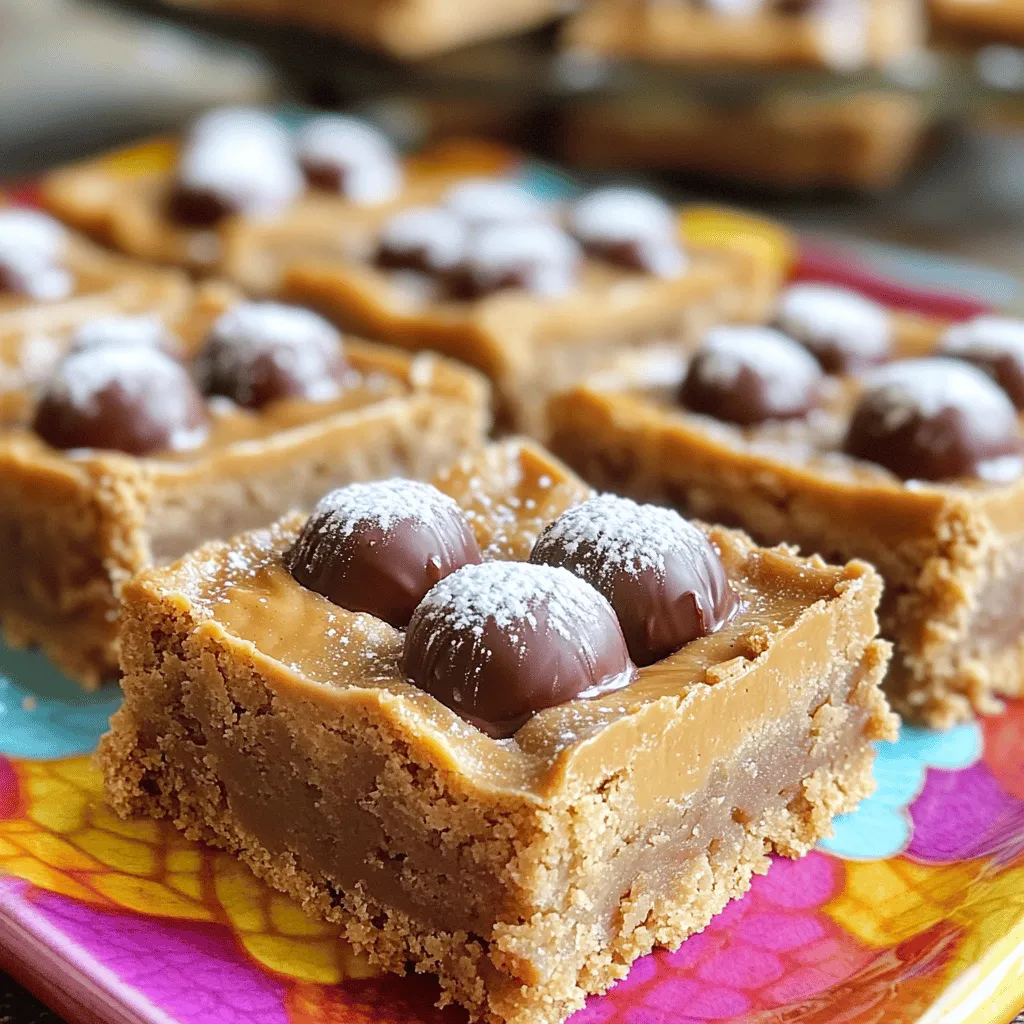
In a separate bowl, whisk together 2 cups of all-purpose flour, 1 teaspoon of baking soda, and 1/2 teaspoon of salt. Gradually add this to the wet ingredient mixture. Mix just until combined; don’t overmix. Spread the batter evenly in your prepared baking dish. Bake for 20-25 minutes. Look for golden edges and a clean toothpick in the center. After baking, cool the bars for 15 minutes. Then, press chocolate kisses into the center of each bar while they are warm. Let them cool completely before cutting. Enjoy your Peanut Butter Blossom Bars!
Tips & Tricks
How to Ensure Perfectly Soft Bars
To get soft and chewy bars, do not overmix the dough. Mixing too much can make them tough. When you add the dry ingredients, mix until just combined. Also, watch your baking time. If you bake them too long, they will be dry. Aim for 20-25 minutes in the oven. You want the edges golden and the center soft. Let them cool in the pan for 15 minutes before adding the chocolate kisses. This will help keep them soft.
Best Practices for Melting Chocolate Kisses
Melting chocolate kisses is simple and fun. Use a microwave-safe bowl and heat in short bursts. Start with 30 seconds, then stir. If you need more time, heat in 15-second intervals. Stirring helps avoid burning. You can also melt them in a double boiler. This method is gentle and keeps the chocolate smooth. Whichever method you choose, be sure to let the chocolate cool slightly before pressing into the bars.
Serving and Presentation Suggestions
Presentation makes a big difference! Once your bars cool, cut them into squares. Serve them on a bright platter to catch the eye. For added flair, dust with powdered sugar. A drizzle of melted chocolate on top looks fancy, too. You can even add some colorful sprinkles for a fun touch. This will make your bars look as good as they taste!
Variations
Gluten-Free Adaptation for Peanut Butter Blossom Bars
You can make Peanut Butter Blossom Bars gluten-free. Use gluten-free flour instead of regular flour. Brands like almond or coconut flour work well. Adjust the amount since these flours can absorb moisture differently. The bars will still taste great, and everyone can enjoy them!
Creative Flavor Additions
Want to spice up your bars? You can add fun flavors. Try mixing in caramel bits for a sweet twist. Chopped nuts, like peanuts or walnuts, can add crunch. You might even add a scoop of cocoa powder for a chocolatey kick. These changes keep the bars exciting and unique.
Seasonal Variations
You can change up the toppings based on the season. For fall, add a sprinkle of cinnamon or nutmeg. For winter holidays, top with crushed candy canes or festive sprinkles. In spring, consider adding chopped dried fruit for a fresh touch. These seasonal ideas make your bars perfect for any occasion!
Storage Info
How to Store Leftover Peanut Butter Blossom Bars
To keep your Peanut Butter Blossom Bars fresh, store them in an airtight container. Layer parchment paper between the bars to prevent sticking. Place the container in a cool, dry place. They can last for up to a week this way.
Freezing Instructions for Long-Term Storage
If you want to save some bars for later, freezing is a great option. Cut the bars into squares first. Wrap each square in plastic wrap tightly. Then, place the wrapped bars in a freezer-safe bag or container. They can last for up to three months in the freezer.
Tips for Reheating for Optimal Taste
When you’re ready to enjoy your bars again, you can reheat them. Preheat your oven to 350°F (175°C). Place the bars on a baking sheet. Heat them for about 5-10 minutes. This helps restore their soft texture and melt the chocolate kisses slightly. Enjoy your warm treat!
FAQs
Can I make Peanut Butter Blossom Bars ahead of time?
Yes, you can make Peanut Butter Blossom Bars ahead of time. Just bake and cool them completely. Once cooled, store them in an airtight container. They stay fresh for up to five days. If you want to keep them longer, consider freezing them. Wrap the bars tightly in plastic wrap and place them in a freezer bag. They can last for three months in the freezer. When you’re ready to enjoy them, thaw them at room temperature.
What can I use instead of unsalted butter?
You can use salted butter if you do not have unsalted butter. Just reduce the added salt in the recipe to keep the flavor balanced. You can also try coconut oil or vegan butter as a dairy-free option. Both will work well in the recipe. Keep in mind that these options may change the flavor slightly, but they can still make delicious bars!
How do I know when my bars are done baking?
To check if your bars are done, look for golden edges. An inserted toothpick should come out clean or with a few moist crumbs. If it comes out wet, give them a few more minutes. Baking time can vary, so start checking around the 20-minute mark. Remember, they will continue to cook slightly as they cool in the pan. Enjoy your Peanut Butter Blossom Bars!
In this blog post, we explored everything about Peanut Butter Blossom Bars. We covered essential ingredients, step-by-step baking instructions, and helpful tips for perfect results. Variations allow for fun twists, and storage info keeps your bars fresh.
These treats are easy to make and perfect for all occasions. Now, get baking and enjoy these sweet bars with your friends and family!