Homemade Granola Bars Easy and Healthy Snack Recipe

WANT TO SAVE THIS RECIPE?

Looking for a quick, healthy snack? Homemade granola bars are your answer! In this easy recipe, I’ll show you how simple it is to make chewy, tasty bars right at home. You can use just a few ingredients and get creative with your favorite mix-ins. Whether you crave something sweet or need a nut-free option, I’ve got you covered. Let’s dive into the delicious world of homemade granola bars!

Ingredients

Essential Ingredients for Homemade Granola Bars

To make my chewy coconut almond granola bars, gather these key ingredients:

– 2 cups rolled oats

– 1 cup unsweetened shredded coconut

– 1/2 cup sliced almonds

– 1/2 cup honey or maple syrup

– 1/4 cup smooth almond butter

– 1/2 teaspoon vanilla extract

– 1/4 teaspoon salt

These ingredients give the bars a great blend of texture and flavor. The oats provide a hearty base. The coconut adds sweetness, while the almonds bring crunch. Honey or maple syrup works to bind it all together.

Optional Add-ins for Customization

You can easily tweak these bars to fit your taste. Here are some fun add-ins:

– 1/2 cup dried cranberries

– 1/2 cup chocolate chips

– 1/4 cup chia seeds

– 1/4 cup sunflower seeds

– Spices like cinnamon or nutmeg

Adding dried fruit or chocolate can make the bars sweeter. Chia seeds and sunflower seeds boost the nutrition. Feel free to mix and match based on what you have!

Nutritional Information

These homemade bars are not just tasty but also filling. Each bar packs a good amount of fiber from oats and healthy fats from nuts. Here’s a rough breakdown per bar:

– Calories: 150

– Protein: 4g

– Carbohydrates: 22g

– Fiber: 3g

– Sugars: 8g

This makes them a great snack choice. They keep you full and give you energy. You can feel good about enjoying these. For the full recipe, check out the earlier section.

Step-by-Step Instructions

Preparation Steps for Chewy Coconut Almond Granola Bars

To start, gather your ingredients. You will need rolled oats, shredded coconut, sliced almonds, honey, almond butter, vanilla extract, salt, and optional add-ins like dried cranberries or chocolate chips.

1. Preheat the oven to 350°F (175°C).

2. Line an 8×8 inch baking dish with parchment paper. Leave some paper hanging over the sides. This will help you lift the bars out later.

3. In a large bowl, mix together the rolled oats, shredded coconut, and sliced almonds. Make sure they are well combined.

Baking Instructions

Now, let’s make the sticky mixture that will hold everything together.

1. In a small saucepan, melt the almond butter and honey (or maple syrup) over low heat. Stir it often until it’s smooth.

2. Remove from heat and add the vanilla extract and salt. Stir well.

3. Pour this mixture over the oat mixture in the bowl. Use a spatula to stir everything until the oats are fully coated. If you want, fold in dried cranberries or chocolate chips now.

Cooling and Cutting Techniques

After you bake your granola bars, cooling and cutting them properly is essential.

1. Transfer the mixture to the prepared baking dish. Press it down firmly. Use the back of a spatula or your hands to create an even layer.

2. Bake for 20-25 minutes. Keep an eye on the edges; they should turn golden brown.

3. Remove from the oven and let it cool in the pan for about 10 minutes.

4. Use the parchment paper to lift the bars from the pan. Place them on a wire rack to cool for another 30 minutes.

5. Once the bars are cool, cut them into shapes you like. Store them in an airtight container for up to a week.

For more details, check out the Full Recipe.

Tips & Tricks

How to Achieve the Perfect Texture

To get that perfect chewy texture, pack your mixture tightly in the pan. Use the back of a spatula or your hands to press it down well. This helps your bars hold together when you cut them. Bake until the edges turn golden brown, but don’t overdo it. You want them chewy, not hard. If you like a crunch, add more nuts or seeds to your mix.

Common Mistakes to Avoid

One common mistake is not measuring your ingredients correctly. If you use too much honey, your bars can be too sticky. If you add too few oats, they might fall apart. Always follow the recipe closely. Another mistake is not letting the bars cool enough before cutting. If you cut them too soon, they may crumble. Give them at least 30 minutes to cool completely.

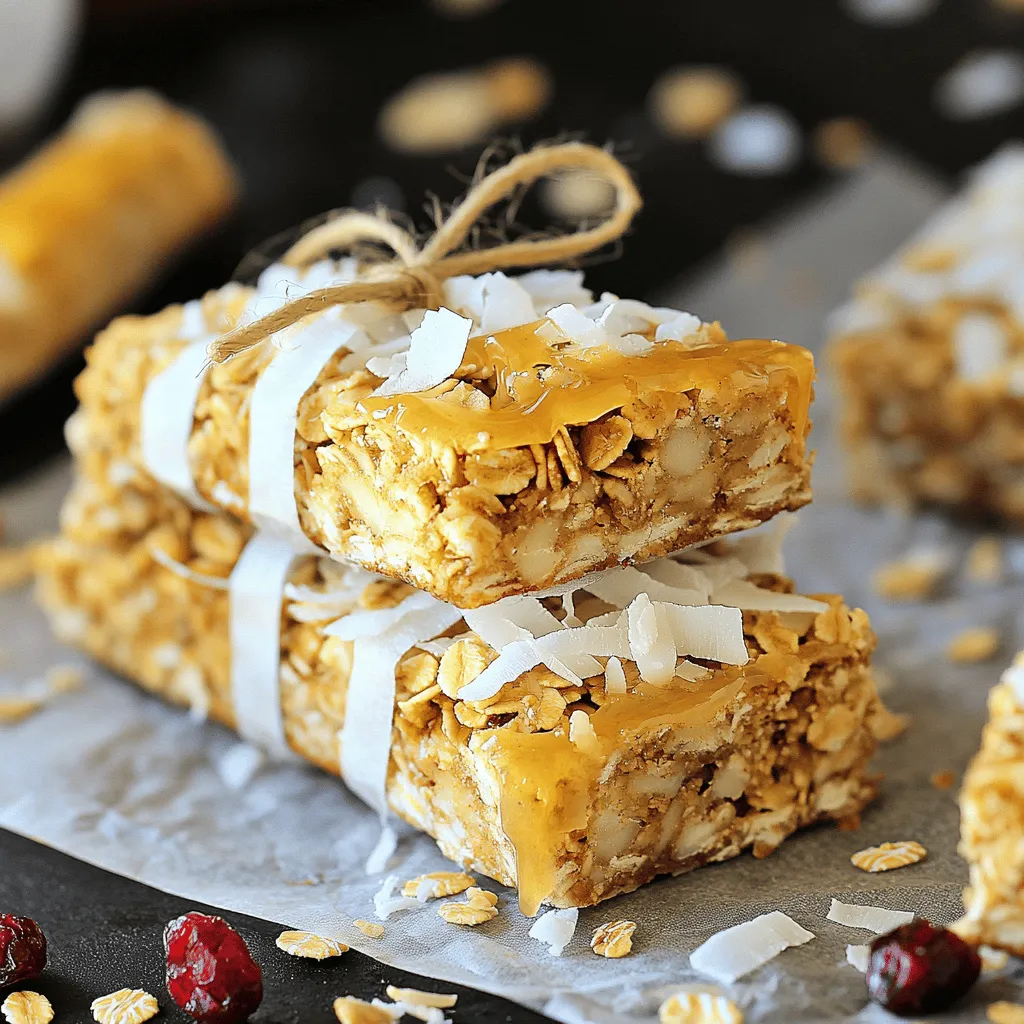
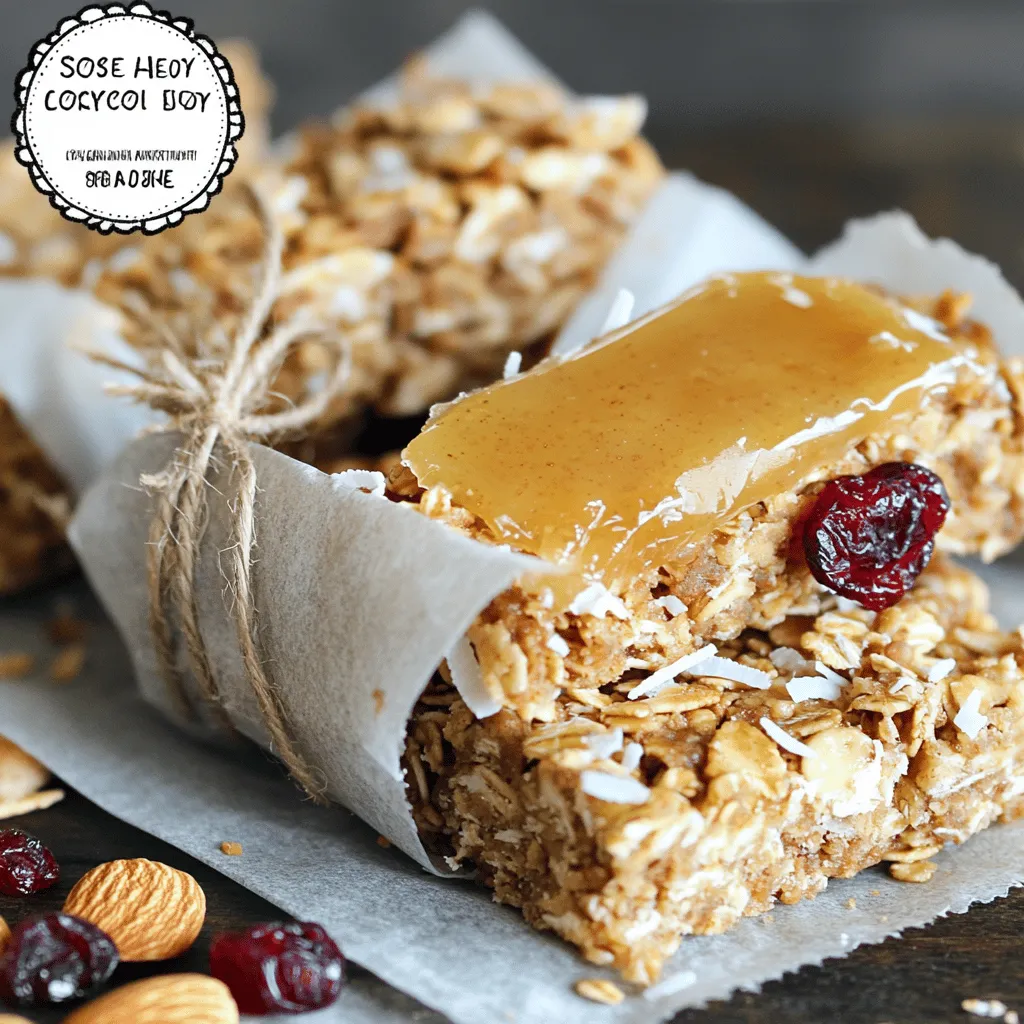
Presentation Tips for Serving

For a nice touch, wrap each bar in parchment paper and tie with twine. This gives a rustic feel and makes them easy to grab. You can also stack them on a plate. Serve with fresh fruit or yogurt on the side for a fun snack. A pop of color will make your presentation even better. Enjoy your homemade granola bars!

Variations

Flavor Variations

You can easily change the flavor of your granola bars. Try adding peanut butter for a nutty taste. Chocolate chips can make them sweet and fun. You can also add spices like cinnamon for warmth. Dried fruits like apricots or raisins add a fruity burst. Mix and match to find your favorite combination.

Alternatives for Dietary Restrictions

If you follow a vegan diet, you can swap honey for maple syrup. Use a plant-based butter instead of almond butter. For gluten-free options, choose certified gluten-free oats. This way, everyone can enjoy these tasty treats. Customizing to fit dietary needs makes your granola bars friendly for all.

Nut-Free Options

For those with nut allergies, you can still enjoy these bars. Use sunflower seed butter instead of almond butter. You can also add seeds like pumpkin or sunflower for crunch. Omit nuts entirely and focus on oats and fruits. This keeps your snack safe and delicious without any nuts.

Feel free to explore the [Full Recipe] for ideas and inspiration.

Storage Info

Best Practices for Storing Granola Bars

To keep your homemade granola bars fresh, place them in an airtight container. This will keep moisture out. If you can, stack the bars with parchment paper in between. This prevents them from sticking together.

Freezing Granola Bars for Longer Shelf Life

You can freeze granola bars for up to three months. Wrap each bar in plastic wrap or foil. Then, place them in a freezer-safe bag. When you want to eat one, just take it out and let it thaw at room temperature.

How to Keep Granola Bars Fresh

Store the bars in a cool, dry place. Avoid direct sunlight and heat. Check them for any signs of spoilage. If they smell off or feel sticky, it’s best to throw them out. You can also add a slice of bread in the container to keep them moist longer.

FAQs

How long do homemade granola bars last?

Homemade granola bars stay fresh for about a week. Store them in an airtight container. If you want them to last longer, freeze them. They can keep in the freezer for up to three months. Just take them out when you want a quick snack.

Can I use other nut butters?

Yes, you can use other nut butters! Peanut butter, cashew butter, or sunflower seed butter work well. Each nut butter changes the taste a bit. Choose one you like. Just make sure it is smooth for easy mixing.

What is the best way to cut granola bars?

To cut granola bars, wait until they are cool. Use a sharp knife for clean cuts. If you dampen the knife with water, it helps to cut through the bars easily. Cut them into rectangles or squares, depending on your preference. If you want a fun shape, use cookie cutters!

You learned how to make tasty homemade granola bars using simple ingredients. We covered essential ingredients, fun add-ins, and nutrition facts. Step-by-step, you can prepare, bake, cool, and cut your bars perfectly. I shared tips to enhance texture and avoid common mistakes. You can also explore flavor variations and storage methods.

Now you can create your own unique granola bars. Enjoy making these snacks and sharing them with friends and family!

To make my chewy coconut almond granola bars, gather these key ingredients: - 2 cups rolled oats - 1 cup unsweetened shredded coconut - 1/2 cup sliced almonds - 1/2 cup honey or maple syrup - 1/4 cup smooth almond butter - 1/2 teaspoon vanilla extract - 1/4 teaspoon salt These ingredients give the bars a great blend of texture and flavor. The oats provide a hearty base. The coconut adds sweetness, while the almonds bring crunch. Honey or maple syrup works to bind it all together. You can easily tweak these bars to fit your taste. Here are some fun add-ins: - 1/2 cup dried cranberries - 1/2 cup chocolate chips - 1/4 cup chia seeds - 1/4 cup sunflower seeds - Spices like cinnamon or nutmeg Adding dried fruit or chocolate can make the bars sweeter. Chia seeds and sunflower seeds boost the nutrition. Feel free to mix and match based on what you have! These homemade bars are not just tasty but also filling. Each bar packs a good amount of fiber from oats and healthy fats from nuts. Here’s a rough breakdown per bar: - Calories: 150 - Protein: 4g - Carbohydrates: 22g - Fiber: 3g - Sugars: 8g This makes them a great snack choice. They keep you full and give you energy. You can feel good about enjoying these. For the full recipe, check out the earlier section. To start, gather your ingredients. You will need rolled oats, shredded coconut, sliced almonds, honey, almond butter, vanilla extract, salt, and optional add-ins like dried cranberries or chocolate chips. 1. Preheat the oven to 350°F (175°C). 2. Line an 8x8 inch baking dish with parchment paper. Leave some paper hanging over the sides. This will help you lift the bars out later. 3. In a large bowl, mix together the rolled oats, shredded coconut, and sliced almonds. Make sure they are well combined. Now, let’s make the sticky mixture that will hold everything together. 1. In a small saucepan, melt the almond butter and honey (or maple syrup) over low heat. Stir it often until it’s smooth. 2. Remove from heat and add the vanilla extract and salt. Stir well. 3. Pour this mixture over the oat mixture in the bowl. Use a spatula to stir everything until the oats are fully coated. If you want, fold in dried cranberries or chocolate chips now. After you bake your granola bars, cooling and cutting them properly is essential. 1. Transfer the mixture to the prepared baking dish. Press it down firmly. Use the back of a spatula or your hands to create an even layer. 2. Bake for 20-25 minutes. Keep an eye on the edges; they should turn golden brown. 3. Remove from the oven and let it cool in the pan for about 10 minutes. 4. Use the parchment paper to lift the bars from the pan. Place them on a wire rack to cool for another 30 minutes. 5. Once the bars are cool, cut them into shapes you like. Store them in an airtight container for up to a week. For more details, check out the Full Recipe. To get that perfect chewy texture, pack your mixture tightly in the pan. Use the back of a spatula or your hands to press it down well. This helps your bars hold together when you cut them. Bake until the edges turn golden brown, but don’t overdo it. You want them chewy, not hard. If you like a crunch, add more nuts or seeds to your mix. One common mistake is not measuring your ingredients correctly. If you use too much honey, your bars can be too sticky. If you add too few oats, they might fall apart. Always follow the recipe closely. Another mistake is not letting the bars cool enough before cutting. If you cut them too soon, they may crumble. Give them at least 30 minutes to cool completely. For a nice touch, wrap each bar in parchment paper and tie with twine. This gives a rustic feel and makes them easy to grab. You can also stack them on a plate. Serve with fresh fruit or yogurt on the side for a fun snack. A pop of color will make your presentation even better. Enjoy your homemade granola bars! {{image_2}} You can easily change the flavor of your granola bars. Try adding peanut butter for a nutty taste. Chocolate chips can make them sweet and fun. You can also add spices like cinnamon for warmth. Dried fruits like apricots or raisins add a fruity burst. Mix and match to find your favorite combination. If you follow a vegan diet, you can swap honey for maple syrup. Use a plant-based butter instead of almond butter. For gluten-free options, choose certified gluten-free oats. This way, everyone can enjoy these tasty treats. Customizing to fit dietary needs makes your granola bars friendly for all. For those with nut allergies, you can still enjoy these bars. Use sunflower seed butter instead of almond butter. You can also add seeds like pumpkin or sunflower for crunch. Omit nuts entirely and focus on oats and fruits. This keeps your snack safe and delicious without any nuts. Feel free to explore the [Full Recipe] for ideas and inspiration. To keep your homemade granola bars fresh, place them in an airtight container. This will keep moisture out. If you can, stack the bars with parchment paper in between. This prevents them from sticking together. You can freeze granola bars for up to three months. Wrap each bar in plastic wrap or foil. Then, place them in a freezer-safe bag. When you want to eat one, just take it out and let it thaw at room temperature. Store the bars in a cool, dry place. Avoid direct sunlight and heat. Check them for any signs of spoilage. If they smell off or feel sticky, it’s best to throw them out. You can also add a slice of bread in the container to keep them moist longer. Homemade granola bars stay fresh for about a week. Store them in an airtight container. If you want them to last longer, freeze them. They can keep in the freezer for up to three months. Just take them out when you want a quick snack. Yes, you can use other nut butters! Peanut butter, cashew butter, or sunflower seed butter work well. Each nut butter changes the taste a bit. Choose one you like. Just make sure it is smooth for easy mixing. To cut granola bars, wait until they are cool. Use a sharp knife for clean cuts. If you dampen the knife with water, it helps to cut through the bars easily. Cut them into rectangles or squares, depending on your preference. If you want a fun shape, use cookie cutters! You learned how to make tasty homemade granola bars using simple ingredients. We covered essential ingredients, fun add-ins, and nutrition facts. Step-by-step, you can prepare, bake, cool, and cut your bars perfectly. I shared tips to enhance texture and avoid common mistakes. You can also explore flavor variations and storage methods. Now you can create your own unique granola bars. Enjoy making these snacks and sharing them with friends and family!

Homemade Granola Bars

Craving a quick and healthy snack? Dive into the delicious world of homemade granola bars with this easy recipe! Made with just a few pantry staples, these chewy bars are perfect for customizing with your favorite mix-ins. Whether you prefer sweet chocolate chips or nourishing seeds, these bars are packed with flavor and nutrition. Check out the full recipe and start making your own homemade granola bars today!

Ingredients
  

2 cups rolled oats

1 cup unsweetened shredded coconut

1/2 cup sliced almonds

1/2 cup honey or maple syrup

1/4 cup smooth almond butter

1/2 teaspoon vanilla extract

1/4 teaspoon salt

1/2 cup dried cranberries or chocolate chips (optional for extra flavor)

Instructions
 

Preheat your oven to 350°F (175°C) and line an 8x8 inch baking dish with parchment paper, leaving some overhang for easy removal later.

    In a large mixing bowl, combine the rolled oats, shredded coconut, and sliced almonds. Stir well to combine.

      In a small saucepan over low heat, melt the almond butter and honey (or maple syrup) together, stirring frequently until smooth and well blended. Remove from heat and add in the vanilla extract and salt.

        Pour the almond butter mixture over the oat mixture and mix thoroughly until everything is evenly coated. If using, fold in the dried cranberries or chocolate chips for added sweetness.

          Transfer the mixture to the prepared baking dish, pressing it down firmly with the back of a spatula or your hands to create an even layer. Ensure it’s tightly packed for a solid bar.

            Bake for about 20-25 minutes, or until the edges start to turn golden brown.

              Remove from the oven and let cool in the pan for about 10 minutes. Use the parchment paper to lift the bars from the pan and cool on a wire rack for an additional 30 minutes.

                Once completely cooled, cut into desired bar shapes and sizes. Store in an airtight container for up to a week.

                  Prep Time: 10 minutes | Total Time: 1 hour | Servings: 12 bars

                    - Presentation Tips: Serve the granola bars wrapped in parchment paper tied with twine for a rustic look, or stack them neatly on a plate arranged with fresh fruit on the side.

                      WANT TO SAVE THIS RECIPE?

                      Leave a Comment

                      Recipe Rating