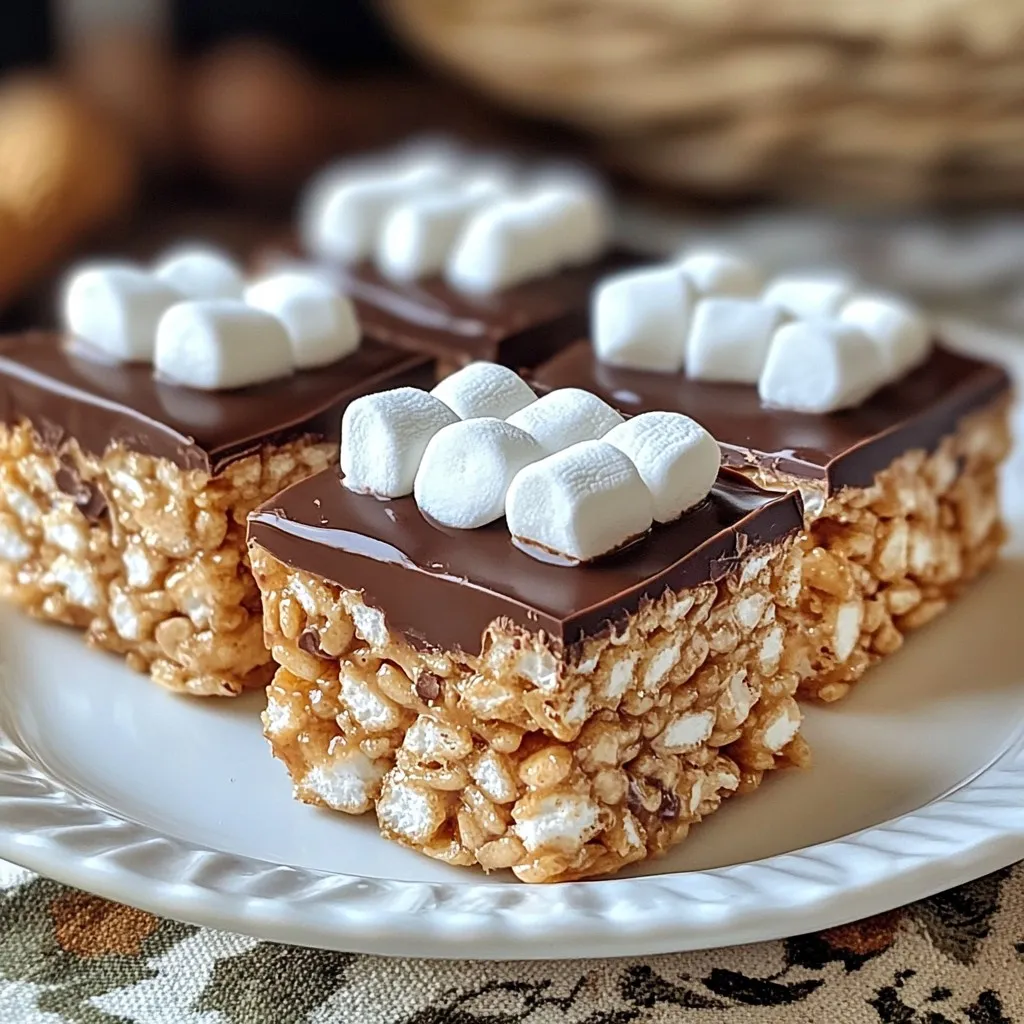
Are you ready for a treat that combines the rich flavors of chocolate and creamy peanut butter with the crunch of Rice Krispies? In this article, I’ll guide you through making Chocolate Peanut Butter Rice Krispie Treats that are simple, fun, and delicious. With just a few ingredients and easy steps, you’ll be enjoying these delightful snacks in no time. Let’s dive into the sweet details!
Why I Love This Recipe
- Delicious Flavor Combination: The rich taste of chocolate paired with creamy peanut butter creates a heavenly treat that is hard to resist.
- Easy to Make: This recipe requires no baking, making it quick and simple for anyone to whip up in no time.
- Fun for Kids: Involving kids in the kitchen is a blast with this recipe, as they can help mix and press the treats into the pan.
- Customizable: You can easily add your favorite toppings or mix-ins, such as nuts or dried fruits, to make it your own.
Ingredients
List of Ingredients
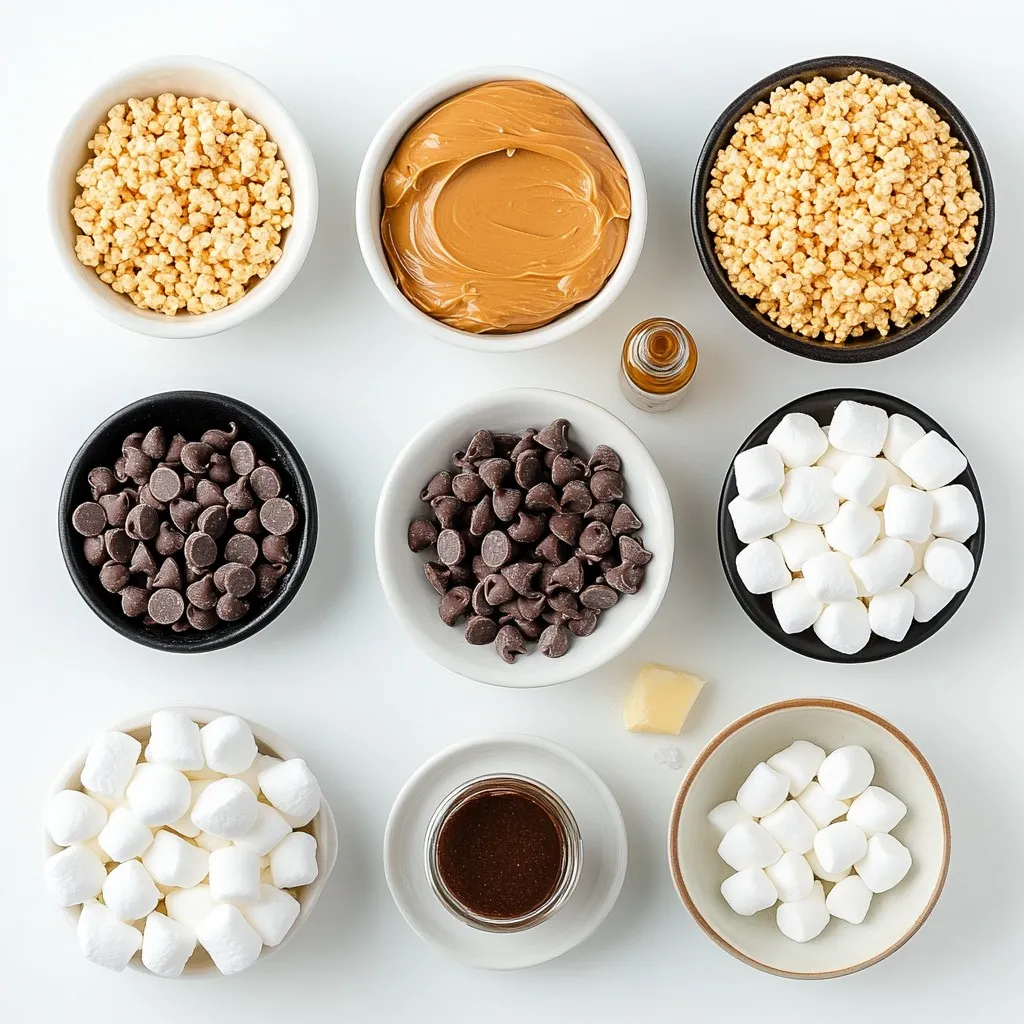
– 4 cups Rice Krispies cereal
– 1 cup creamy peanut butter
– 1 cup semi-sweet chocolate chips
– 1 cup mini marshmallows
– 1/4 cup unsalted butter
– 1/2 teaspoon vanilla extract
– Pinch of salt
Gathering the right ingredients is key. First, I use Rice Krispies cereal. This adds that crisp texture we love. Next, creamy peanut butter gives a rich, nutty flavor. I always go for semi-sweet chocolate chips; they balance the sweetness well. Mini marshmallows add a soft, gooey touch. Unsalted butter brings all the flavors together. A bit of vanilla extract enhances the taste. Finally, a pinch of salt rounds it out.
Make sure to measure each ingredient carefully. This helps the treats set perfectly. Having everything ready also makes the process smoother. Trust me; it’s worth it for these delightful treats!
Step-by-Step Instructions
Preparation Overview
To make Chocolate Peanut Butter Rice Krispie Treats, you need to gather your ingredients. You will need Rice Krispies cereal, creamy peanut butter, semi-sweet chocolate chips, mini marshmallows, unsalted butter, vanilla extract, and a pinch of salt. The whole process takes about 45 minutes, with only 15 minutes of active work.
Detailed Cooking Steps
1. Prepare the Baking Dish: First, grease a 9×13 inch baking dish with butter. You can also use parchment paper for easy removal later.
2. Melt the Butter and Chocolate: In a large pot, add the unsalted butter and semi-sweet chocolate chips. Heat them over low heat. Stir constantly until smooth and melted.
3. Incorporate Peanut Butter: Take the pot off the heat. Now, stir in the creamy peanut butter. Mix until it is creamy and well combined.
4. Add Marshmallows and Vanilla: Gently fold in the mini marshmallows, salt, and vanilla extract. The heat will melt the marshmallows a bit, which is fine.
5. Combine with Rice Krispies: Slowly add the Rice Krispies cereal to the chocolate-peanut butter mix. Use a spatula to fold everything together until the cereal is fully coated.
6. Transfer to Baking Dish: Pour the mixture into your prepared baking dish. With a spatula or your clean hands, press the mixture down evenly and firmly.
Cooling and Slicing the Treats
Allow the treats to cool at room temperature for about 30 minutes. Once they are set, cut them into squares or rectangles. If you want to make them even better, melt some extra chocolate and drizzle it on top before serving. Enjoy your delicious treats!
Tips & Tricks
Common Mistakes to Avoid
– Not measuring ingredients: Precision is key. Use measuring cups for the Rice Krispies and chocolate.
– Skipping the greasing step: Always grease the baking dish. This helps with easy removal later.
– Overheating the chocolate: Melt on low heat. High heat can burn the chocolate.
– Not pressing firmly: Press the mixture down well in the dish. This keeps the treats from falling apart.
How to Make Them Extra Special
– Add nuts: Chopped peanuts or almonds add a nice crunch.
– Use flavored chocolate: Try milk or dark chocolate chips for a different taste.
– Add a sprinkle of sea salt: This enhances the flavor and adds a nice touch.
– Drizzle with more chocolate: Melt extra chocolate and drizzle on top before serving.
Tools and Equipment Needed
– Large pot: For melting the chocolate and butter together.
– Spatula: A rubber spatula works best for mixing and folding.
– Measuring cups: Essential for accurate ingredient amounts.
– 9×13 inch baking dish: Use this for setting the treats.
– Parchment paper (optional): Line the dish for easy removal.
Pro Tips
- Use Fresh Ingredients: Ensure your peanut butter and chocolate chips are fresh for the best flavor and texture.
- Press Firmly: When transferring the mixture to the baking dish, press down firmly to eliminate air pockets and create a denser treat.
- Storage Tips: Store the treats in an airtight container at room temperature to maintain their chewy texture.
- Chocolate Variations: Feel free to experiment with different types of chocolate, such as dark or milk chocolate, for varied flavors.
Variations
Alternative Ingredients
You can switch things up with different ingredients. For a nut-free option, use sun butter instead of peanut butter. This keeps the flavor rich while making it safe for kids with nut allergies. If you want a crunchy texture, try using puffed rice or cornflakes instead of Rice Krispies. You can also add a scoop of protein powder if you want a boost.
Flavor Additions
Want to make your treats more exciting? Add some fun mix-ins! Sprinkle in some chopped nuts for a nice crunch. You can use walnuts, almonds, or even pecans. If you love a salty flavor, sprinkle in a bit of sea salt on top after you press down the mixture. For a fruity twist, add mini chocolate-covered raisins or dried cherries. They add a sweet burst to each bite!
Dietary Adjustments
If you need a healthier version, swap the butter for coconut oil. It gives a slight coconut flavor that pairs well with chocolate. To make these treats vegan, use dark chocolate chips and maple syrup instead of butter. You can also look for vegan marshmallows to keep the recipe plant-based. Always check labels to ensure all ingredients fit your dietary needs.
Storage Info
Best Way to Store
To keep your chocolate peanut butter rice Krispie treats fresh, place them in an airtight container. Use parchment paper between layers to avoid sticking. This method helps them stay soft and tasty for longer.
How Long They Last
When stored correctly, these treats can last up to one week at room temperature. If you keep them in the fridge, they may last a bit longer. Just remember, chilling can change their texture.
Freezing Instructions
You can freeze these treats for up to three months. First, cut them into squares. Wrap each piece in plastic wrap and then place them in a freezer-safe bag. When ready to eat, let them thaw at room temperature. Enjoy the same great taste!
FAQs
What are Chocolate Peanut Butter Rice Krispie Treats?
Chocolate Peanut Butter Rice Krispie Treats are a sweet snack made with Rice Krispies, peanut butter, and chocolate. They blend crispy, chewy, and creamy textures. These treats are easy to make and perfect for any occasion. The mix of flavors makes them a favorite for kids and adults alike.
Can I use different types of chocolate?
Yes, you can use different types of chocolate. You might try dark chocolate or milk chocolate. Each type gives a unique taste. Some people like to mix chocolates for added flavor. Just make sure to melt the chocolate slowly to keep it smooth.
How can I make them gluten-free?
To make these treats gluten-free, use gluten-free Rice Krispies. Many brands offer gluten-free options. Always check the label to be safe. The other ingredients, like peanut butter and chocolate, are usually gluten-free too.
In this blog post, we explored how to make Chocolate Peanut Butter Rice Krispie Treats. We covered the key ingredients and detailed cooking steps, plus tips to avoid common mistakes. You learned how to customize these treats with variations and how to store them properly.
These treats are quick and simple to make. With a few easy steps, you can enjoy a delicious snack. Try experimenting with flavors to make them your own. Enjoy your tasty creation