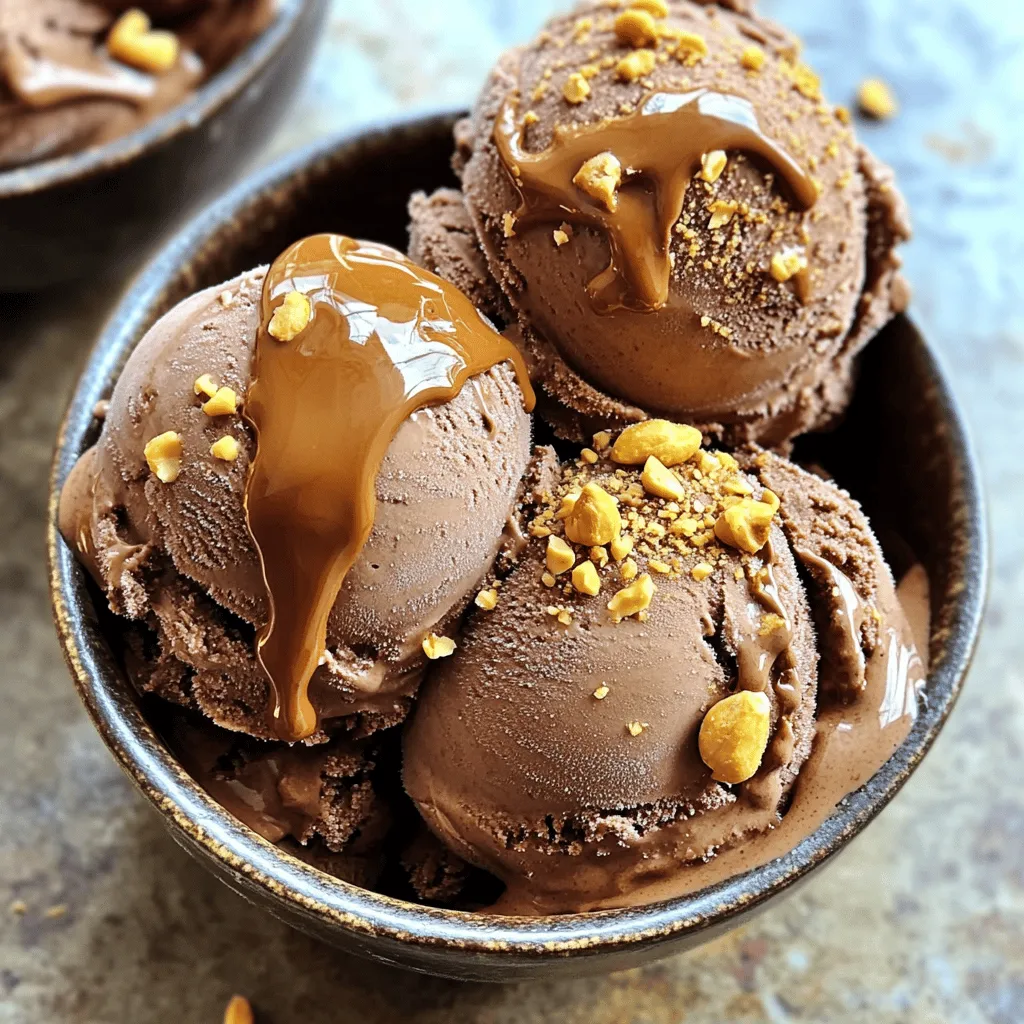
Want to enjoy a rich, creamy treat that fits your healthy lifestyle? This Chocolate Peanut Butter Protein Ice Cream Delight is the answer! Packed with protein and a deep chocolate flavor, it’s a guilt-free indulgence. I’ll guide you through the easy steps to make this delicious ice cream. Plus, you’ll find tips to customize it just the way you like. Get ready to treat yourself without the guilt!
Ingredients
List of Essential Ingredients
To make Chocolate Peanut Butter Protein Ice Cream, you need these key ingredients:
– 2 ripe bananas, sliced and frozen
– 1 cup unsweetened almond milk
– 1/2 cup natural peanut butter
– 1/4 cup cocoa powder
– 1/4 cup chocolate protein powder
– 1 teaspoon vanilla extract
– A pinch of sea salt
These items create a creamy and delicious base. The bananas add natural sweetness. The almond milk keeps it light and smooth. Peanut butter brings rich flavor, while cocoa powder adds that chocolate kick.
Optional Ingredients for Extra Sweetness
If you like your ice cream sweeter, you can add:
– 2 tablespoons maple syrup
This ingredient is not a must, but it can enhance the taste. Adjust it based on your preference. You can also use honey or agave syrup if you prefer.
Nutritional Highlights of Ingredients
Each ingredient in this ice cream has its benefits:
– Bananas are high in potassium and fiber.
– Almond milk is low in calories and dairy-free.
– Peanut butter provides protein and healthy fats.
– Cocoa powder is rich in antioxidants.
– Chocolate protein powder adds extra protein for muscle recovery.
These ingredients together create a treat that is not only tasty but also good for you. Enjoy your ice cream without the guilt!
Step-by-Step Instructions
Preparation of the Base Mixture
To start, gather your ingredients. You need frozen banana slices, almond milk, and peanut butter. Place the frozen bananas and almond milk in a high-speed blender or food processor. Blend them together until the mix is smooth and creamy. This is the base of your ice cream. Next, add in the peanut butter, cocoa powder, chocolate protein powder, maple syrup, vanilla extract, and a pinch of sea salt. Blend again until everything combines well. You want a thick, ice cream-like texture.
Freezing Process and Texture Tips
Now, it’s time to freeze your mixture. Transfer it into a freezer-safe container. Spread the mixture evenly and cover it tightly with a lid or plastic wrap. Let it freeze for at least 2-4 hours. If you want a firmer texture, freeze it overnight. When ready to enjoy, take the container out of the freezer. Allow it to sit for about 5 minutes. This makes it easier to scoop.
Serving Suggestions for Best Enjoyment
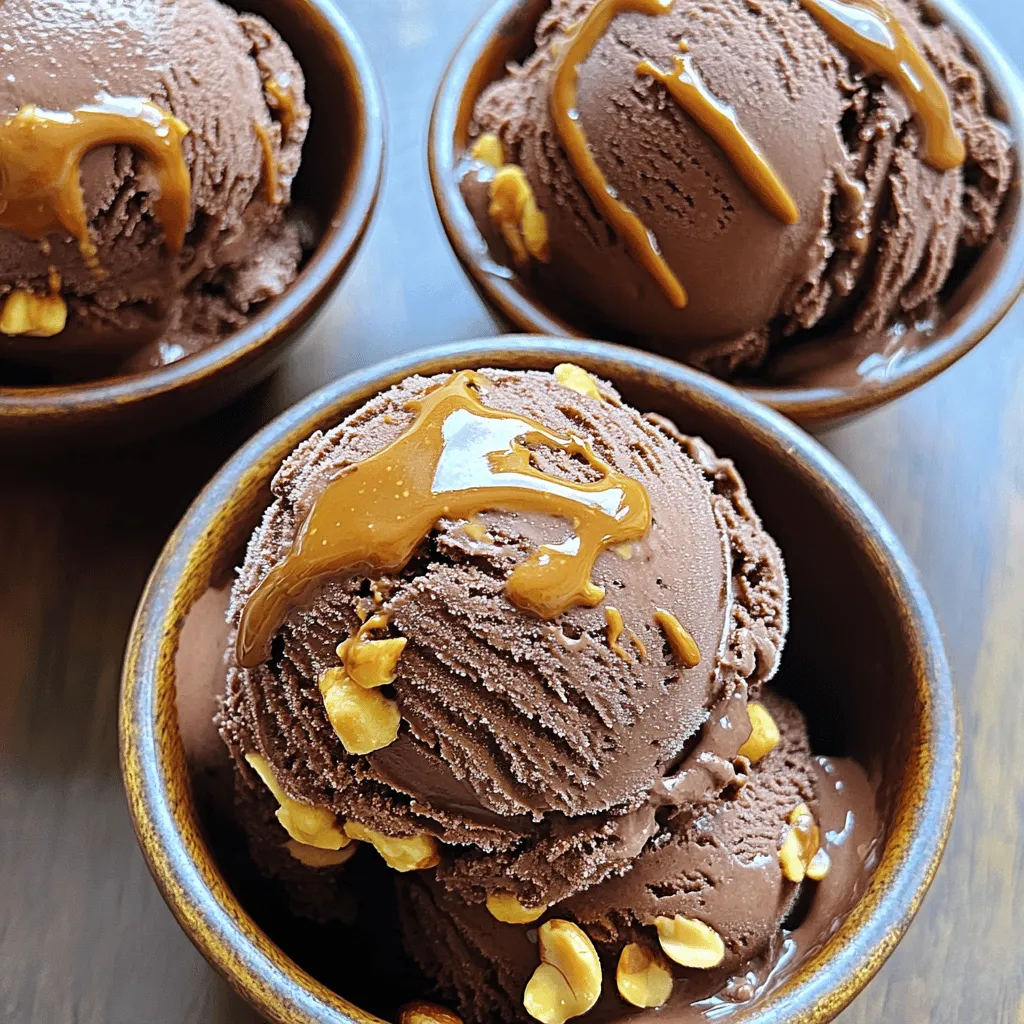
Scoop the ice cream into bowls or cones for serving. You can top it with chopped nuts or chocolate chips for extra crunch. If you like, drizzle a bit of maple syrup on top for added sweetness. This chocolate peanut butter protein ice cream is not just tasty but also healthy. Enjoy your delicious treat!
Tips & Tricks
Achieving the Perfect Creamy Texture
To get that creamy texture, use ripe bananas. They blend smoothly and add sweetness. Frozen bananas work best in this recipe. They create a thick base that mimics ice cream. Blend them with almond milk until smooth. If it’s too thick, add a bit more almond milk. This keeps your ice cream light and fluffy.
Customizing Sweetness and Flavor
You can adjust the sweetness based on your taste. Start with the maple syrup. If you like it sweeter, add more. You can also use honey or agave if you prefer. For flavor, try adding a pinch of cinnamon or a splash of almond extract. These small changes can make a big difference in taste.
Tools and Equipment You’ll Need
Make sure you have a high-speed blender or food processor. This helps blend the ingredients well and makes it creamy. You’ll also need a freezer-safe container. A spatula is helpful for scraping down the sides. Don’t forget bowls or cones for serving. These tools make the process smooth and fun!
Variations
Substitutions for Dietary Needs
You can easily swap out some ingredients in this recipe. If you’re allergic to peanuts, use almond butter or sunflower seed butter. For a lower-carb option, try using a sugar-free sweetener instead of maple syrup. If you need a nut-free milk, coconut milk works great. You can also use soy milk if you prefer. Each change keeps the taste yummy.
Flavor Infusions and Add-ins
Get creative with flavors! You can add a scoop of instant coffee for a mocha twist. Want a fruity kick? Toss in some frozen strawberries or raspberries. For crunch, add chopped nuts or a sprinkle of cacao nibs. Want sweet chunks? Fold in dark chocolate chips before freezing. Each option adds a fun twist to your ice cream.
Dairy-Free and Vegan Options
This recipe is already dairy-free and can easily be vegan. Use a plant-based protein powder to keep it vegan-friendly. Make sure your almond milk is unsweetened and free of any additives. If you like coconut, use coconut cream for a richer taste. These swaps ensure everyone can enjoy this treat.
Storage Info
Best Practices for Freezing
To keep your Chocolate Peanut Butter Protein Ice Cream fresh, store it in an airtight container. I always use a freezer-safe container that seals tightly. This prevents ice crystals from forming. Ice crystals can ruin the creamy texture. Make sure to press the mixture down to remove air pockets before sealing.
Duration and Conditions for Freshness
Your ice cream stays fresh for about two weeks in the freezer. After that, it may lose flavor and texture. To enjoy the best taste, eat it within a week. Keep the freezer at 0°F (-18°C) for optimal storage.
How to Re-Serve Leftover Ice Cream
When you’re ready to serve leftover ice cream, take it out of the freezer. Let it sit for about five minutes at room temperature. This softens it slightly. Use a sturdy scoop or spoon to serve. If it’s too hard, try running the scoop under warm water for easier serving. Enjoy your treat without the fuss!
FAQs
Can I Use Other Protein Powders?
Yes, you can use other protein powders. If you like whey, it works great. Plant-based powders also fit well in this recipe. Just pick a flavor you enjoy. Chocolate or vanilla flavors will blend nicely. Test the taste after blending, and adjust if needed. You want it to be delicious and smooth.
How to Make it Nut-Free?
To make this ice cream nut-free, swap the peanut butter. Sunflower seed butter is a good choice. It gives a creamy texture without nuts. You can also use tahini, made from sesame seeds. Both options work great and keep it tasty. Be sure to check for nut allergies in your home.
What If I Don’t Have Almond Milk?
If you don’t have almond milk, try oat milk or soy milk. Both are great substitutes that add creaminess. You can also use coconut milk for a richer taste. Just make sure whatever milk you choose is unsweetened. This keeps the overall flavor balanced and lets the chocolate shine through.
You now have all you need to create delicious ice cream at home. We covered essential and optional ingredients, plus how to prepare your base mixture and freeze it perfectly. I shared tips for creaminess and sweet adjustments, along with tools to make your process easier. You can customize flavors for all dietary needs and ensure proper storage for freshness. Whether you keep it simple or try something new, the joy of making ice cream is yours. Enjoy your tasty creations and share them with friends!