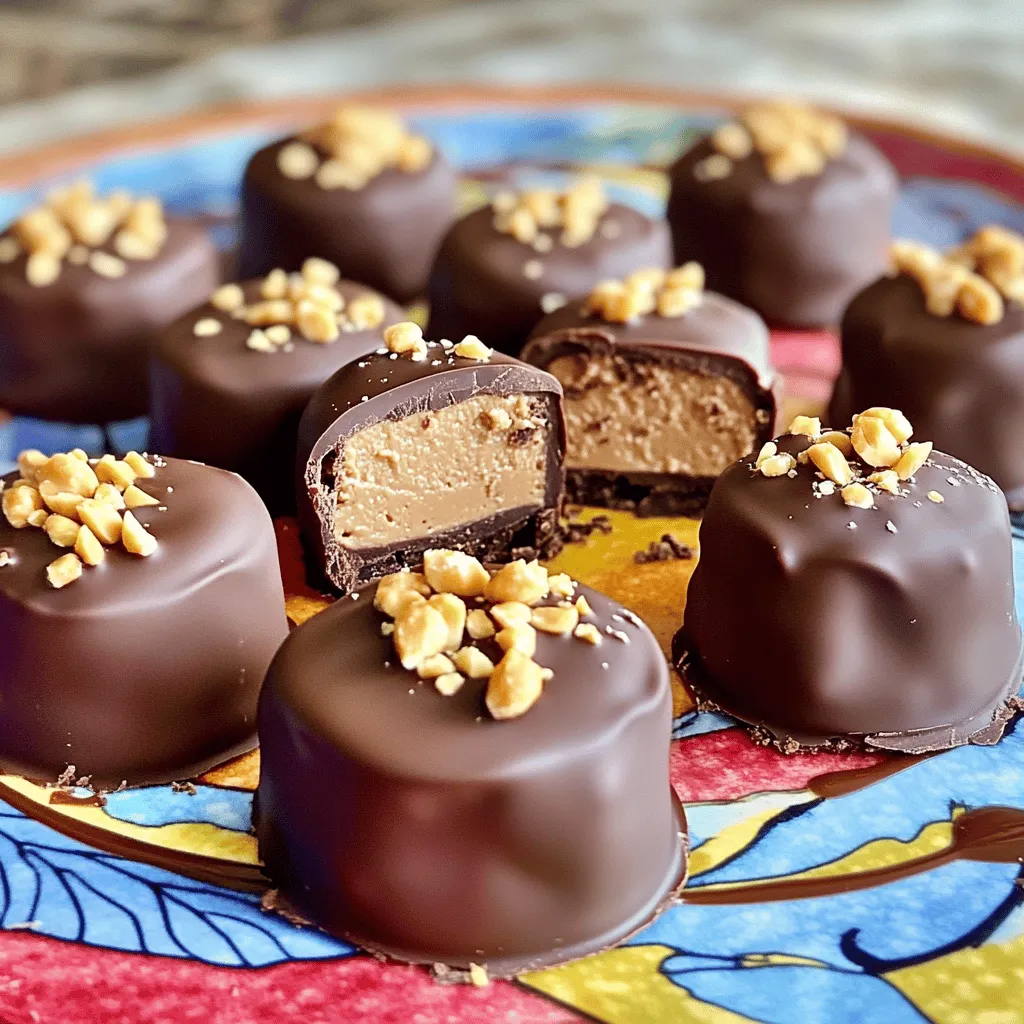
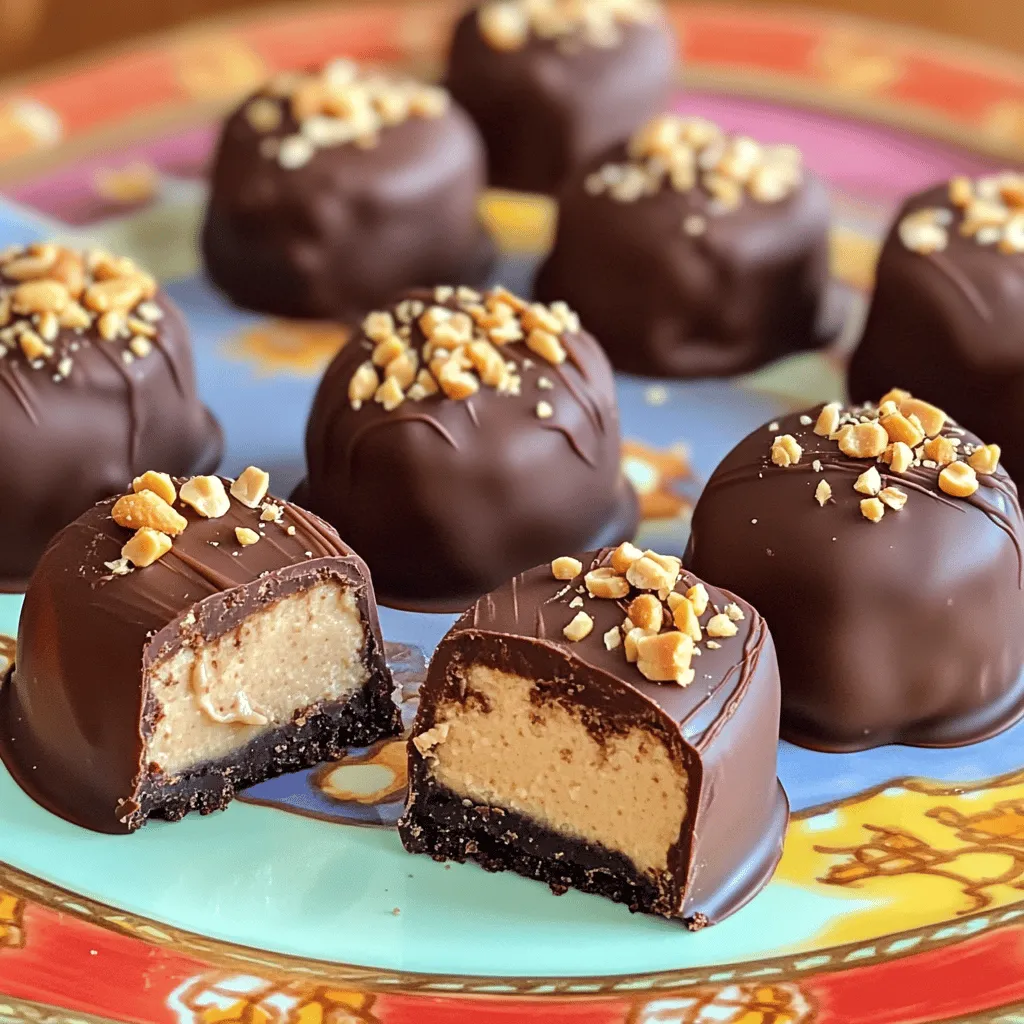
Get ready for a treat with these Chocolate Peanut Butter Cheesecake Bites! No baking is needed, making these bites a quick and fun dessert. With rich chocolate and creamy peanut butter, each bite is pure bliss. I’ll guide you through easy steps, ingredient swaps, and tips for storage. Whether you want a sweet snack or a party treat, these bites are perfect. Let’s dive into making this delightful dessert together!
Ingredients
List of Required Ingredients
To make these Chocolate Peanut Butter Cheesecake Bites, you’ll need:
– 1 cup cream cheese, softened
– 1/2 cup creamy peanut butter
– 1/3 cup powdered sugar
– 1 teaspoon vanilla extract
– 1 cup graham cracker crumbs
– 1/4 cup unsweetened cocoa powder
– 1/2 cup dark chocolate chips, melted
– A pinch of salt
– Chopped peanuts for garnish
Substitutions for Ingredients
If you want to adjust the recipe, here are some easy swaps:
– Use Greek yogurt instead of cream cheese for a lighter version.
– Swap creamy peanut butter with crunchy peanut butter for extra texture.
– Use maple syrup instead of powdered sugar for a natural sweetener.
– Choose almond or cashew butter if you prefer different nut flavors.
– For a gluten-free option, use gluten-free graham crackers.
Tips for Choosing Quality Ingredients
Selecting the best ingredients will enhance your bites. Here’s what to keep in mind:
– Pick full-fat cream cheese for a rich flavor and creamy texture.
– Choose natural peanut butter that has no added sugars or oils.
– Look for high-quality cocoa powder for a deep chocolate flavor.
– Use dark chocolate chips with at least 60% cocoa for a nice contrast.
– Freshly chopped peanuts add crunch and flavor, so buy them whole and chop right before use.
Step-by-Step Instructions
Preparation of the Cheesecake Mixture
Start with a large bowl. Add 1 cup of softened cream cheese and 1/2 cup of creamy peanut butter. Then, add 1/3 cup of powdered sugar and 1 teaspoon of vanilla extract. Use an electric mixer to beat the mix. You want it to be smooth and creamy. Next, add 1 cup of graham cracker crumbs and 1/4 cup of unsweetened cocoa powder. Mix until it forms a thick batter. It should not be too runny.
Forming the Cheesecake Bites
Now it’s time to shape the bites. Take small portions of the mixture, about a tablespoon each. Roll them into balls with your hands. Place each ball on a baking sheet lined with parchment paper. Make sure they are spaced out. Once you form all the bites, put the baking sheet in the freezer. Let them chill for about 15-20 minutes. This helps them firm up for the next step.
Dipping in Chocolate
While the bites chill, melt 1/2 cup of dark chocolate chips. Use a microwave-safe bowl for this. Heat the chips in 30-second intervals. Stir between each interval until smooth. After the bites are firm, take them out of the freezer. Dip each bite into the melted chocolate. Make sure they are fully coated. A fork helps lift them out. Let excess chocolate drip off before placing them back on the parchment. Immediately sprinkle chopped peanuts on top for garnish. This adds a nice crunch. After coating all the bites, return them to the freezer for 10 more minutes. This will help the chocolate set well.
Tips & Tricks
How to Achieve Smooth Cheesecake Mixture
To get a smooth cheesecake mixture, start with softened cream cheese. Cold cream cheese will not blend well. Use an electric mixer on medium speed. Beat the cream cheese and peanut butter together first. Add the powdered sugar and vanilla next. Mix until there are no lumps. Gradually add the graham cracker crumbs and cocoa powder. This will help avoid clumps. Keep mixing until it becomes thick and creamy.
Best Practices for Chocolate Coating
For a great chocolate coating, ensure your chocolate is fully melted. Use a microwave-safe bowl for melting chocolate. Heat it in 30-second bursts to prevent burning. Stir well after each burst until smooth. Dip each cheesecake bite fully in the chocolate. Use a fork to lift them out. Let excess chocolate drip back into the bowl. Place them on parchment paper quickly to set. Sprinkle chopped peanuts right away for a fun look.
Ways to Enhance Flavor and Texture
You can boost flavor by adding a pinch of salt. This helps balance the sweetness. Try using different nut butters for unique tastes. Almond or cashew butter can work well. Add a splash of coffee or espresso powder for depth. Consider mixing in mini chocolate chips for added texture. For a fun twist, drizzle extra melted chocolate on top before serving. These ideas will take your cheesecake bites to the next level!
Variations
Swapping Peanut Butter for Other Nut Butters
You can swap peanut butter for other nut butters. Almond butter works well. Cashew butter adds a creamy touch. Sunflower seed butter is a great option for nut-free diets. Each nut butter brings its own flavor. Try them to find your favorite!
Using Different Chocolate Types
You can use various types of chocolate for these bites. Milk chocolate adds sweetness. Dark chocolate offers a rich taste. White chocolate gives a creamy contrast. Each type changes the flavor profile. Experiment to discover your perfect chocolate match.
Adding Flavor Extracts or Mix-ins
Adding flavor extracts can enhance your bites. A splash of almond extract gives a nice twist. You can also mix in mini chocolate chips for extra texture. Chopped fruits like strawberries or raspberries can add freshness. Be creative and try new combinations!
Storage Info
Recommended Storage Methods
To keep your chocolate peanut butter cheesecake bites fresh, store them in an airtight container. Make sure to place parchment paper between layers to prevent sticking. This keeps them safe and sound for later enjoyment.
Freezing Tips for Cheesecake Bites
Freezing is a great option if you want to save some bites for later. After you coat them in chocolate, let them firm up in the freezer. Once set, place them in a freezer-safe container. They can last up to three months in the freezer. When you’re ready to enjoy them, just let them thaw in the fridge for a bit.
Shelf Life of Cheesecake Bites
These bites will stay fresh in the fridge for about a week. Keep them well-covered to avoid drying out. If you notice any changes in smell or texture, it’s best to toss them out. Enjoying them fresh is always the best choice!
FAQs
Can I make these cheesecake bites ahead of time?
Yes, you can make these cheesecake bites a day or two in advance. Just store them in an airtight container in the fridge. This will keep them fresh and ready to enjoy. If you want to freeze them, they can last up to three months. This is great for parties or snack prep.
What can I use instead of cream cheese?
If you want a dairy-free option, use vegan cream cheese. Silken tofu is another great substitute. Blend it well until smooth for the best texture. These options will still give you that creamy feel without the dairy.
How long do they need to set in the freezer?
The bites need about 15-20 minutes in the freezer after you form them. After coating them in chocolate, freeze them again for about 10 minutes. This helps the chocolate harden and keeps the bites firm.
Are these bites suitable for gluten-free diets?
Yes, these cheesecake bites can be gluten-free. Just use gluten-free graham cracker crumbs in the recipe. Make sure to check the labels on your ingredients to ensure they are gluten-free. This way, everyone can enjoy them!
In this post, we covered the essential ingredients for cheesecake bites and how to choose quality ones. You learned the step-by-step process, from mixing to chocolate dipping. Helpful tips helped ensure a smooth mixture and perfect coating. Variations added fun with nut butters and flavor extracts. Finally, we discussed storage methods and answered common questions.
Cheesecake bites are easy to make and enjoy. With these tips, you can create delicious treats for everyone!