Are you ready to make a delicious and healthy treat? In this guide, I’ll show you how to whip up a quick and easy Chia Berry Jam that bursts with flavor. With just a few simple ingredients like berries, chia seeds, and maple syrup, you'll create a tasty spread in no time! Let’s dive into this fun recipe and sweeten up your breakfast or snack time!
Why I Love This Recipe
- Fresh and Fruity: This jam is made with a mix of berries, capturing their vibrant flavors and natural sweetness.
- Easy to Make: No complicated steps here! Just cook, mash, and mix for a delightful homemade jam.
- Healthy Alternative: With chia seeds as a thickener, this jam is packed with fiber and omega-3 fatty acids.
- Versatile Use: Perfect for spreading on toast, topping yogurt, or adding to desserts for a burst of flavor.
Ingredients
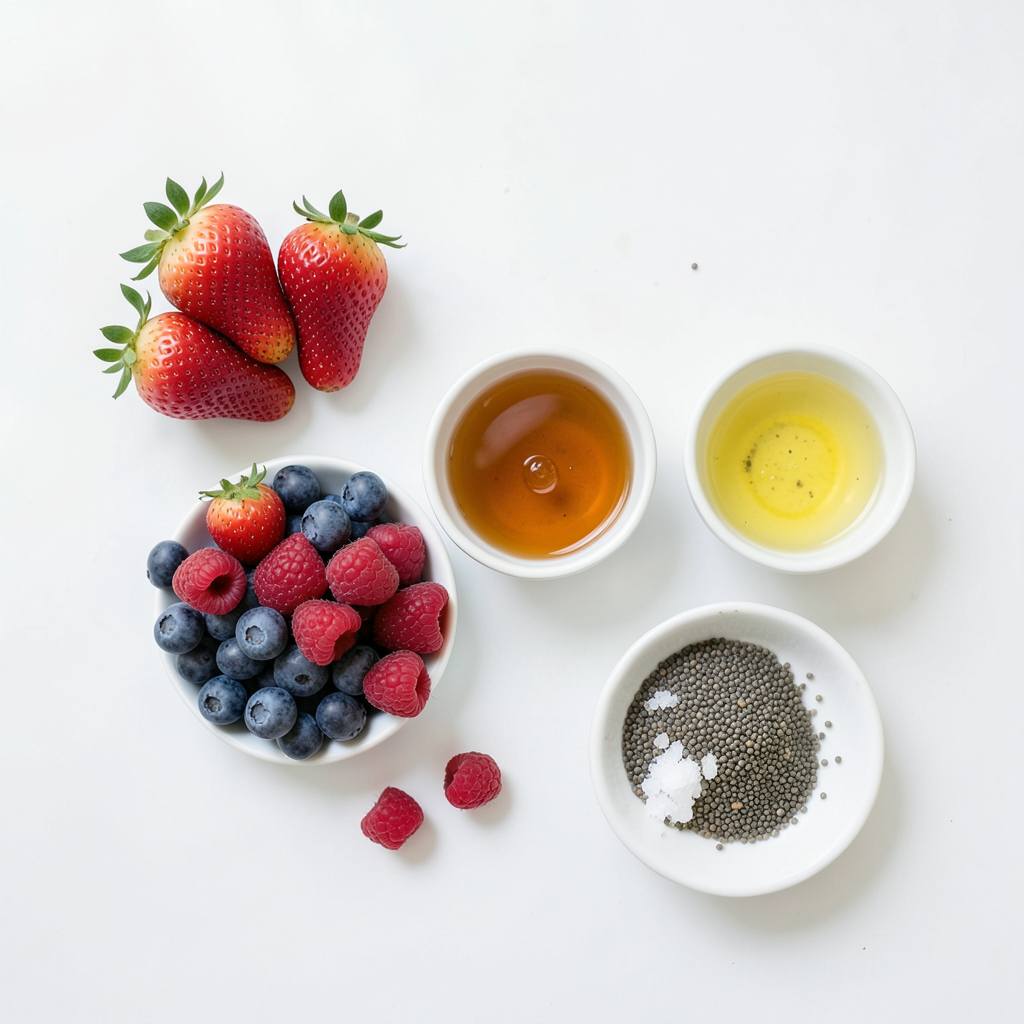
List of Ingredients
- 2 cups mixed berries (strawberries, blueberries, raspberries)
- 1/4 cup maple syrup or honey
- 2 tablespoons chia seeds
- 1 tablespoon lemon juice
- Pinch of salt
To make chia berry jam, gather these simple ingredients. Mixed berries are key. You can use strawberries, blueberries, or raspberries. Fresh or frozen berries work well. Maple syrup or honey adds sweetness. Adjust the amount based on your taste. Chia seeds help thicken your jam. They also add a nice crunch. Lemon juice gives a bright flavor. A pinch of salt balances the sweetness. These ingredients combine to create a tasty jam. You can feel good knowing it is healthy, too. Each ingredient brings its own flavor and nutrition. Use quality berries for the best taste. This jam is easy to make. It’s perfect for breakfast or snacks.
Step-by-Step Instructions
Preparation Overview
Start by cooking the berries. In a medium saucepan, mix 2 cups of your favorite berries with 1/4 cup of maple syrup or honey. Heat this over medium heat for about 5-7 minutes. Stir gently as the berries break down. You will see juices start to flow.
Next, you need to mash the berries. Use a fork or a masher to get the texture you want. You can choose to keep it chunky or make it smooth. This step is key for the jam's feel.
Incorporating Chia Seeds and Other Ingredients
After mashing, take the saucepan off the heat. Stir in 2 tablespoons of chia seeds, 1 tablespoon of lemon juice, and a pinch of salt. These ingredients add flavor and help thicken the jam. Let the mixture sit for about 10-15 minutes. During this time, the chia seeds will soak up the moisture. This is how your jam will start to thicken.
Final Touches
Now, it's time to adjust the sweetness. Taste your jam and see if it needs more sweetness. If you want, add more maple syrup or honey until it is just right for you.
Once thickened, transfer your chia berry jam into a clean jar. Store it in the fridge, where it can last up to 2 weeks. Enjoy this tasty treat on toast, yogurt, or even ice cream.
Tips & Tricks
Perfecting the Jam
To get the best chia berry jam, focus on the right texture. You want it thick but not too stiff. When you cook the berries, they break down and release their juices. Cook them for about 5-7 minutes. This step helps create a nice base for your jam.
After mashing the berries, let the mixture sit for 10-15 minutes. The chia seeds absorb moisture and help thicken it. If it’s still too runny, add a bit more chia seeds and wait a little longer.
For flavor, consider adding a splash of vanilla extract or a dash of cinnamon. These can enhance the natural berry taste. You can also mix in a bit of zest from an orange or lemon. This adds a fresh twist.
Serving Suggestions
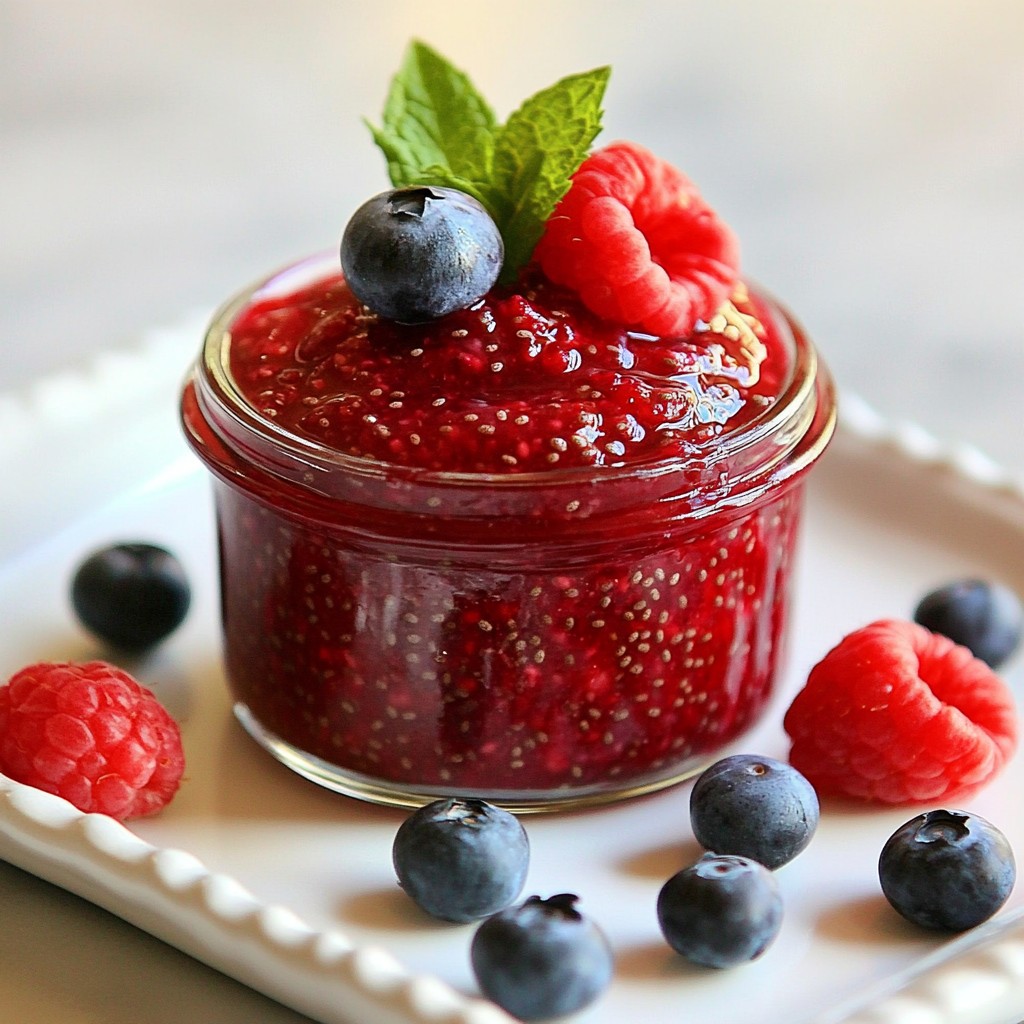
For presentation, use a small glass jar. This looks nice and keeps the jam fresh. You can garnish it with whole berries on top. A sprig of mint adds a lovely touch, too.
Chia berry jam pairs well with many foods. Spread it on toast or pancakes for a sweet breakfast. Add it to yogurt for a tasty snack. You can even use it in desserts like cheesecake or as a topping for ice cream. The options are endless!
Pro Tips
- Use Fresh Berries: Fresh berries will provide the best flavor and texture for your jam. If using frozen berries, allow them to thaw and drain excess liquid before cooking.
- Adjust Sweetness: Taste the mixture before adding the chia seeds. Depending on the sweetness of your berries, you may want to adjust the amount of maple syrup or honey.
- Storage Tip: Ensure your jar is clean and dry before transferring the jam. This helps prolong the shelf life and prevents spoilage.
- Experiment with Flavors: Add spices like cinnamon or vanilla extract for a unique twist on your chia berry jam. You can also try different combinations of berries for variation.
Variations
Different Berry Combinations
You can mix and match berries to create fun flavors. Try seasonal fruits like blackberries or cherries for a twist. Using fresh fruits makes the jam taste bright and lively. You can also add tropical fruits. Pineapple or mango can bring a sweet and tangy taste.
Sweetener Alternatives
If you want a sugar-free jam, consider using stevia or erythritol. These sweeteners will keep the jam low in calories. Natural sweeteners like agave syrup or coconut sugar are great too. They have unique flavors that add depth to your jam. Just remember to adjust the amount, as each sweetener varies in sweetness.
Storage Info
Storing Chia Berry Jam
To keep your chia berry jam fresh, store it in the fridge. Use a clean, airtight jar. This way, your jam stays safe from bacteria. It can last up to two weeks in the refrigerator. Always check for any signs of spoilage before eating.
Freezing for Longer Shelf Life
If you want to keep your jam longer, freezing is a great choice. Pour the jam into a freezer-safe container, leaving space at the top. This space allows for expansion when it freezes. Seal the container tightly to prevent freezer burn.
To thaw, move the jam from the freezer to the fridge. Let it sit overnight. You can also thaw it in a bowl of warm water if you need it faster. Enjoy your delicious jam whenever you want!
FAQs
How long does chia berry jam last?
Chia berry jam lasts about two weeks in the fridge. Store it in a clean jar with a tight lid. The cool air slows spoilage. If you see mold or bad smells, throw it away.
Can I use frozen berries?
Yes, you can use frozen berries. They work well in this jam recipe. Just add them to the pan without thawing. Cook them a bit longer to break them down. The jam will still taste great!
What are the health benefits of chia seeds?
Chia seeds are small but mighty. They pack a lot of nutrients. Here are some benefits:
- High in fiber: Chia seeds help with digestion.
- Rich in omega-3: They support heart health.
- Good protein source: Great for muscle repair.
- Vitamins and minerals: They contain calcium, magnesium, and more.
Adding chia seeds to your diet boosts nutrition without extra calories!
You learned how to make chia berry jam using simple steps and fresh ingredients. We covered key tips for perfecting your jam and discussed fun variations. Remember to store it right to enjoy the best flavor. This jam is easy, healthy, and great for any meal. Try different berries and sweeteners to find your favorite. Now, get cooking and enjoy your homemade jam!