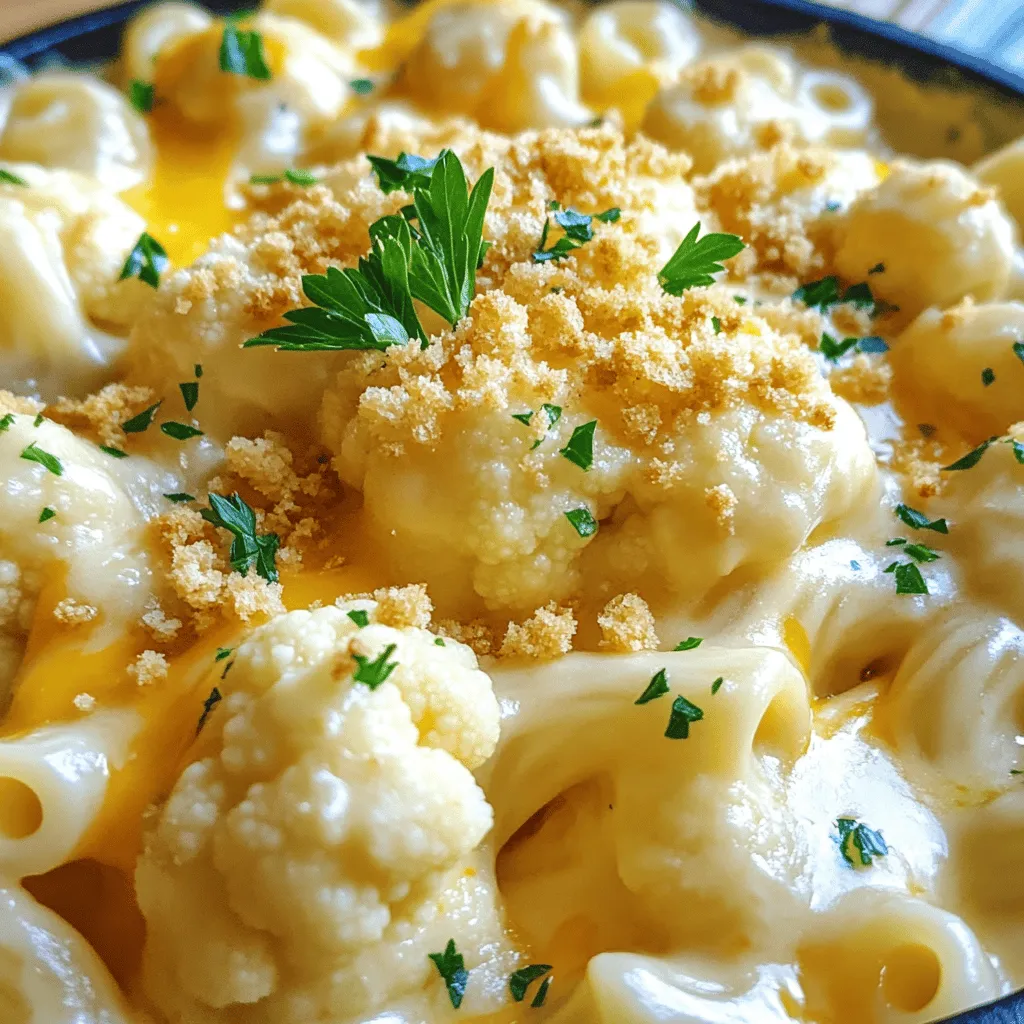
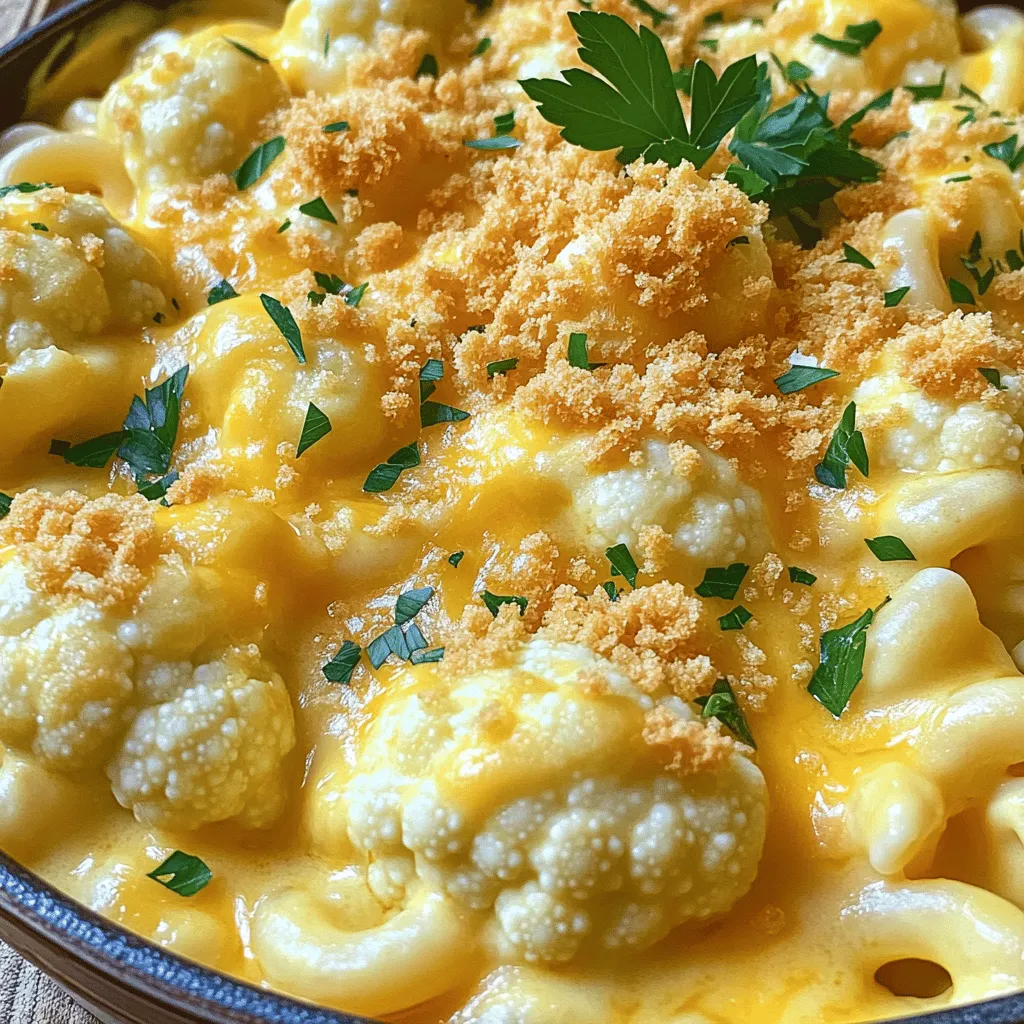
Craving a dish that’s both creamy and comforting? My Cauliflower Mac and Cheese hits the spot! This meal swaps traditional pasta for cauliflower, making it a guilt-free favorite. With sharp cheddar and Parmesan, each bite is rich and cheesy. Plus, it’s easy to make and ready in no time! Let’s dive into the ingredients and get you started on this delicious twist on a classic.
Ingredients
Main Ingredients
– 1 large head of cauliflower, cut into florets
– 1 cup elbow macaroni (or gluten-free pasta of choice)
– 2 cups shredded sharp cheddar cheese
– 1 cup grated Parmesan cheese
– 2 cups milk (dairy or plant-based)
– 1/4 cup unsalted butter
– 1/4 cup all-purpose flour (or gluten-free flour)
Seasonings and Extras
– 1 teaspoon garlic powder
– 1 teaspoon onion powder
– 1/2 teaspoon mustard powder
– Salt and pepper to taste
– 1/2 cup breadcrumbs (optional, for topping)
– Fresh parsley for garnish (optional)
Cauliflower mac and cheese uses simple, fresh ingredients. The head of cauliflower gives this dish its unique twist. Cauliflower adds a mild flavor and boosts nutrition. The elbow macaroni provides that classic comfort food feel. I like using sharp cheddar cheese for its rich taste. Parmesan cheese adds depth and creaminess to the sauce.
For the sauce, I start with butter and flour. This roux thickens the milk and makes it creamy. Garlic and onion powder enhance the flavor. Mustard powder adds a slight zing. I season with salt and pepper to taste.
You can easily make it your own. Add breadcrumbs on top for crunch. A sprinkle of fresh parsley brightens the dish.Enjoy this comforting meal that warms the heart!
Step-by-Step Instructions
Preparing Cauliflower and Pasta
1. Blanching cauliflower florets: Start by bringing a large pot of salted water to a boil. Once boiling, add the cauliflower florets. Blanch them for about 3-4 minutes. You want them tender but still firm. After blanching, use a slotted spoon to remove the florets and set them aside. This step keeps the cauliflower bright and tasty.
2. Cooking macaroni to al dente: In the same pot of boiling water, add the elbow macaroni. Cook it according to the package instructions until it is al dente. This means it should be firm to the bite. Drain the pasta and set it aside. This method ensures a perfect balance of textures.
Making the Cheese Sauce
1. Creating the roux with butter and flour: In a saucepan, melt 1/4 cup of unsalted butter over medium heat. Once it’s melted, whisk in 1/4 cup of all-purpose flour. Stir this mixture for about 1-2 minutes until it turns light golden. This roux forms the base of your cheese sauce.
2. Thickening the sauce with milk: Gradually whisk in 2 cups of milk, stirring constantly to avoid lumps. Keep cooking until the sauce thickens and bubbles, which takes around 5-7 minutes. This step creates a smooth, creamy sauce that will coat your pasta perfectly.
Combining Ingredients and Baking
1. Mixing pasta, cauliflower, and cheese sauce: In a large mixing bowl, combine the drained pasta, blanched cauliflower florets, and your creamy cheese sauce. Stir well so everything is evenly coated. This blend makes each bite rich and flavorful.
2. Optional baking for a crispy top: If you want a crispy top, preheat your oven to 350°F (175°C). Pour the mac and cheese mixture into a greased baking dish. Sprinkle breadcrumbs on top for added crunch. Bake for 20-25 minutes until the top is golden-brown. This adds a delightful texture to your dish.
Tips & Tricks
Perfecting the Cheese Sauce
To make a smooth cheese sauce, start with a roux. Melt butter in a pot, then whisk in flour. Cook it for about two minutes. This helps thicken your sauce and prevents lumps.
For the best flavor and texture, I recommend using sharp cheddar and Parmesan. Sharp cheddar gives a rich taste, and Parmesan adds a nice depth. Mix them well until they melt completely into the sauce.
Blanching Cauliflower
Blanching cauliflower is key to keeping it crisp. Boil the florets for about 3-4 minutes. You want them tender but firm. This helps them cook evenly in the oven later.
To boost flavor while blanching, add a pinch of salt to the water. You can also squeeze in a bit of lemon juice. This adds a fresh taste that enhances the dish.
Serving Suggestions
Garnish your Cauliflower Mac and Cheese with fresh parsley for a pop of color. It also adds a nice herbal note.
For a complete meal, serve it with a simple green salad or grilled chicken. This balances the rich and creamy dish, making it a satisfying dinner.
Variations
Gluten-Free Options
You can make this dish gluten-free with some simple swaps. Start by using gluten-free pasta. There are many great options available in stores. You can also replace the all-purpose flour with gluten-free flour in the cheese sauce. This keeps the dish creamy without the gluten.
Vegan Alternatives
If you want a vegan version, try plant-based cheese and milk. Almond milk or oat milk works well for the sauce. For the cheese, look for brands that melt nicely. You can also make vegan breadcrumbs using crushed nuts or oats. This adds a great crunch without dairy.
Flavor Additions
To boost the taste, consider adding veggies. Spinach or broccoli mixes well with the cheese sauce. You can also try spices like paprika or cayenne for a kick. Experimenting with flavor helps you find your perfect balance.
Storage Info
Refrigerating Leftovers
To keep your Cauliflower Mac and Cheese fresh, store it in an airtight container. Let it cool before sealing it. This helps prevent condensation. You can refrigerate leftovers for about 3 to 5 days. If you want to enjoy it later, make sure to check for any off smells or changes in color before eating.
Freezing Instructions
You can freeze Cauliflower Mac and Cheese for longer storage. First, allow it to cool completely. Then, place it in a freezer-safe container or bag. Press out any extra air before sealing. This helps avoid freezer burn. It can last up to 3 months in the freezer.
When you’re ready to eat, thaw it in the fridge overnight. For reheating, place it in the oven at 350°F (175°C) until warmed through. You can also microwave it, stirring occasionally to heat evenly. For a crispy top, consider broiling for a few minutes. Enjoy this comforting dish anytime!
FAQs
Can I make Cauliflower Mac and Cheese ahead of time?
Yes, you can prepare this dish in advance. Cook it, then cool it down. Store it in the fridge for up to three days. When ready, just heat it up. This makes your meal easy and quick.
Is this recipe suitable for meal prepping?
Absolutely! Cauliflower Mac and Cheese works great for meal prep. You can portion it into containers. It stores well and reheats nicely. This makes it a perfect choice for busy weeks.
What are the health benefits of using cauliflower instead of pasta?
Using cauliflower has many health perks. It is low in carbs and calories. Cauliflower is high in fiber, which helps digestion. Plus, it is packed with vitamins C and K. You get a tasty dish with more nutrients.
How can I make it spicier or more flavorful?
To add spice, try these tips. Mix in red pepper flakes or hot sauce. You can also add diced jalapeños for heat. For more flavor, toss in herbs like thyme or rosemary. These changes will elevate your dish.
What’s the best way to reheat frozen Cauliflower Mac and Cheese?
To reheat, first, let it thaw in the fridge overnight. When ready, preheat your oven to 350°F. Place it in an oven-safe dish and cover with foil. Bake for about 20-25 minutes until hot. This method keeps it creamy and delicious.
You learned how to make a tasty Cauliflower Mac and Cheese in this post. We covered the ingredients, including cauliflower, pasta, and cheese. You saw step-by-step instructions to create a rich, creamy sauce. I shared tips to perfect your dish and suggestions for variations, like gluten-free or vegan options.
In closing, this dish is fun to make and easy to adapt. Enjoy cooking, and don’t hesitate to get creative with flavors!