Are you ready to elevate your veggie game? Balsamic glazed green beans are easy, delicious, and perfect for any meal. With fresh green beans and a simple glaze, you can impress your family in no time. I’ll guide you through every step, from prep to serving. Let’s transform this humble veggie into a star dish that everyone will love!
Ingredients
Fresh Green Beans
For this recipe, you need 1 pound of fresh green beans. Look for bright green beans that snap easily. Trim the ends to prepare them for cooking. Fresh beans give the best flavor and texture.
Essential Condiments
You will need a few key condiments:
– 2 tablespoons olive oil
– 1 tablespoon balsamic vinegar
– 2 tablespoons honey
– 2 cloves garlic, minced
– Salt and pepper to taste
Olive oil adds richness. Balsamic vinegar brings tanginess. Honey adds sweetness, while salt and pepper enhance all flavors.
Optional Garnishes
For a little extra flair, consider these garnishes:
– 1 teaspoon toasted sesame seeds
– Fresh parsley, chopped
Toasted sesame seeds add crunch. Fresh parsley adds color and freshness. These garnishes make your dish look and taste even better.
Step-by-Step Instructions
Preparing the Green Beans
Start by washing the green beans well. Trim the ends to remove any tough bits. This makes them easier to eat. Next, fill a large pot with water and add salt. Bring the water to a boil. Once boiling, add the green beans. Blanch them for three to four minutes. You want them bright green and tender-crisp. After cooking, quickly drain the green beans. Transfer them to an ice bath to stop cooking. This keeps their color vibrant.
Cooking Process
In a large skillet, heat the olive oil over medium heat. Wait until the oil is hot. Add minced garlic and sauté it for about 30 seconds. You want the garlic to smell great but not brown. Drain the green beans from the ice bath. Add them to the skillet with the garlic oil. Toss the beans to coat them well. This step infuses flavor into the beans.
Adding the Balsamic Glaze
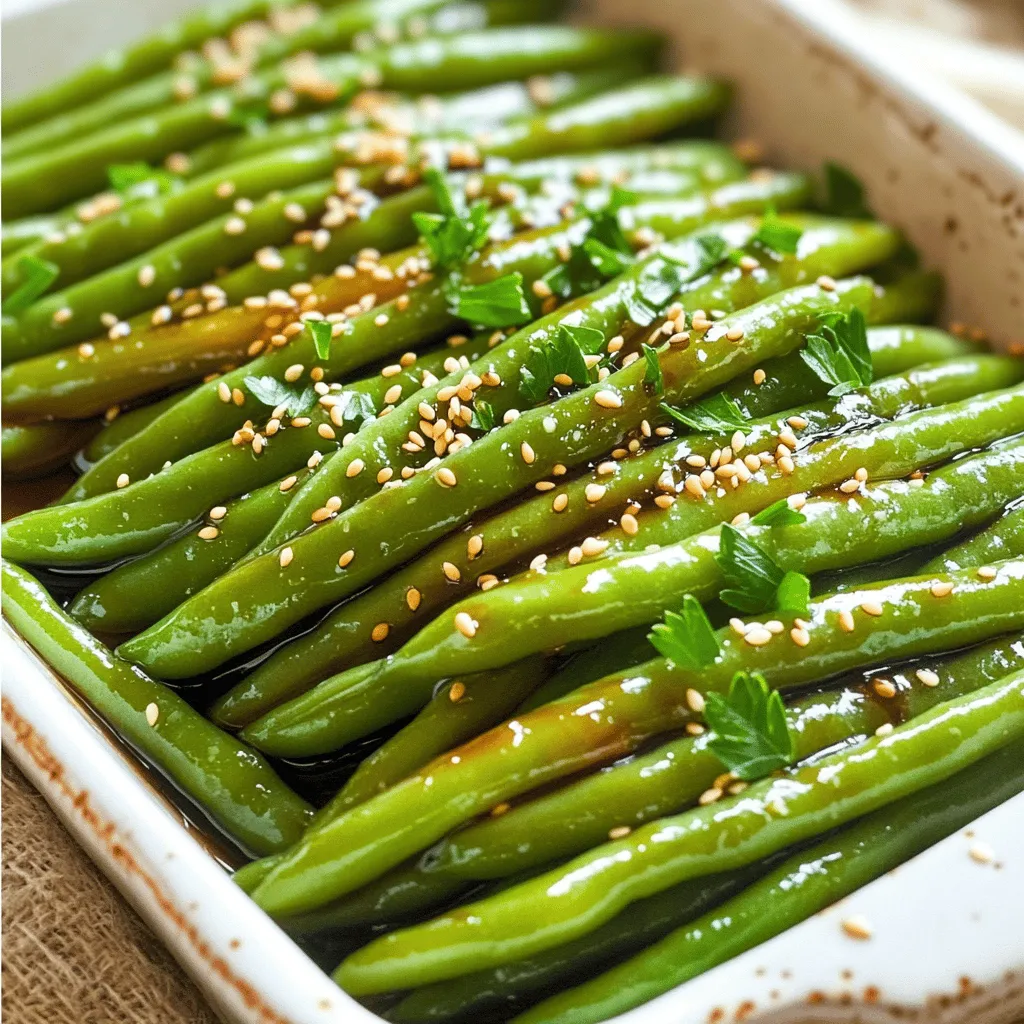
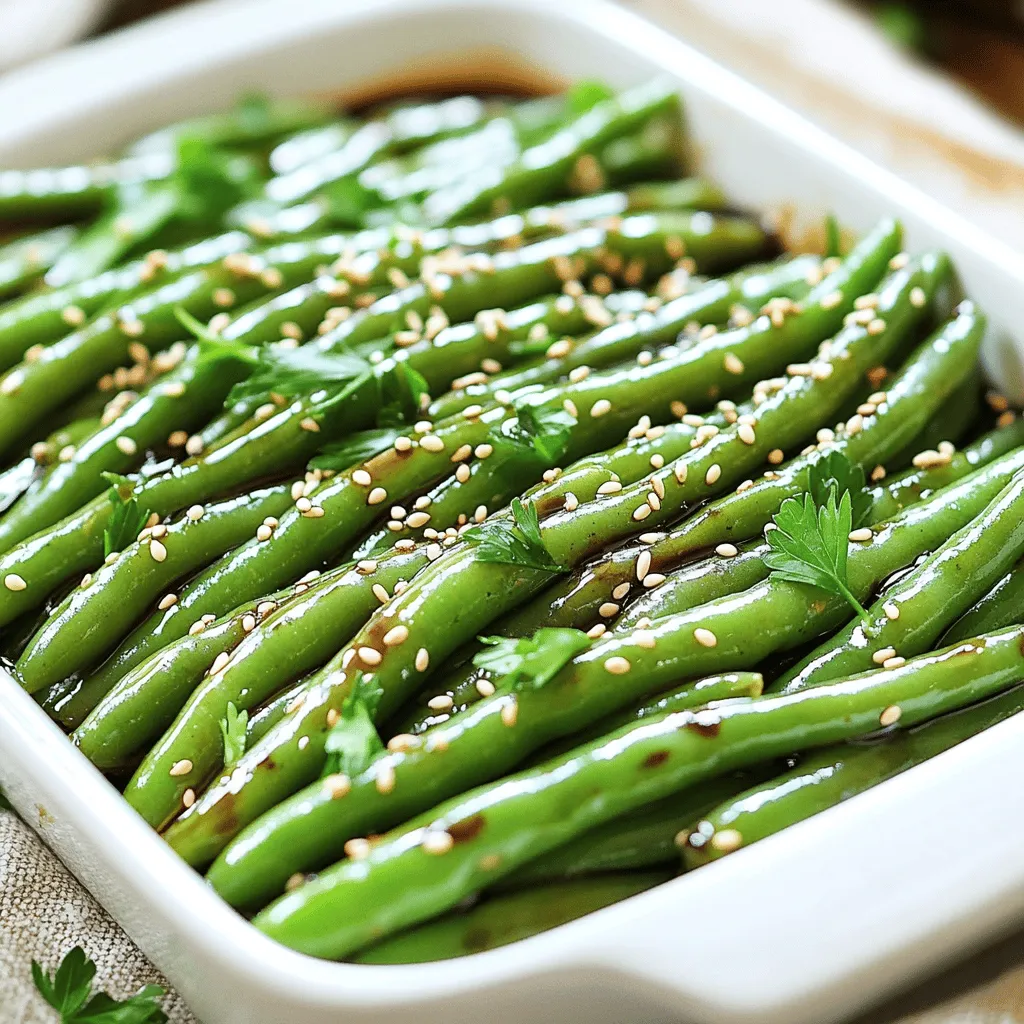
In a small bowl, whisk together balsamic vinegar and honey. Mix until well combined. Pour this mixture over the green beans in the skillet. Cook everything for two to three minutes. This allows the glaze to thicken slightly. Season the green beans with salt and pepper to taste. Toss them again to coat evenly. Finally, remove from heat and transfer to a serving dish. Garnish with toasted sesame seeds and fresh parsley. Enjoy your tasty balsamic glazed green beans!
Tips & Tricks
Perfecting the Blanching Technique
Blanching keeps green beans bright and crisp. Start by boiling salted water. Add the green beans for 3-4 minutes. This quick cook makes them tender but still firm. After blanching, transfer the beans to an ice bath. This stops cooking and locks in color. Aim for a vibrant green that looks fresh and appealing.
Enhancing Flavor with Seasoning
Seasoning is key to great flavor. After cooking, sprinkle salt and pepper to taste. The balsamic glaze adds sweetness and tang. Use 1 tablespoon of balsamic vinegar and 2 tablespoons of honey for balance. Garlic adds a savory note. Sauté it until fragrant before adding the beans. Each step builds layers of flavor.
Tips for a Beautiful Presentation
Presentation matters, especially for guests. Serve the green beans on a nice platter. Sprinkle with toasted sesame seeds for crunch. Add fresh parsley for color. This not only adds taste but also makes the dish look fancy. A beautiful plate makes the meal feel special.
Variations
Adding Other Vegetables
You can make this dish even better by adding other veggies. Carrots, bell peppers, or snap peas work well. Slice them thin so they cook at the same time. Toss them in the skillet with the green beans. The colors will pop, and the flavors will mix delightfully.
Vegan and Gluten-Free Options
This recipe is easy to adapt for vegan and gluten-free diets. Replace honey with maple syrup or agave nectar. Check that your balsamic vinegar is gluten-free. This way, everyone can enjoy the dish without worry.
Alternate Glazes and Seasonings
Feel free to switch up the glaze. Try soy sauce for a salty kick or lemon juice for a tangy taste. Adding a pinch of red pepper flakes can give it a nice heat. These changes will keep the recipe fresh and exciting every time you make it.
Storage Info
Refrigeration Tips
You can store leftover balsamic glazed green beans in the fridge. Place them in an airtight container. They will stay fresh for about 3 to 5 days. Make sure they cool down before sealing. This helps keep their taste and texture.
Reheating Instructions
To reheat, use a skillet over medium heat. Add a splash of water or olive oil to keep them moist. Stir often until they are heated through. You can also use the microwave. Place them in a microwave-safe dish and cover. Heat for 1 to 2 minutes, stirring halfway.
Freezing for Future Use
You can freeze these green beans too! First, blanch them as in the recipe. Cool them in an ice bath, then drain. Place in a freezer bag, removing as much air as possible. They can last up to 3 months in the freezer. When ready to use, thaw in the fridge overnight before reheating.
FAQs
Can I use frozen green beans for this recipe?
Yes, you can use frozen green beans. They are convenient and save time. Just remember to thaw them first. After thawing, you can skip the blanching step. Cook them in the skillet with garlic and the glaze until heated through. This keeps them tender and flavorful.
How long can I store balsamic glazed green beans?
You can store them in the fridge for up to three days. Place them in an airtight container. When you want to eat them again, just reheat in a skillet. This helps to keep the flavors fresh.
What are some good side dishes to serve with this recipe?
Balsamic glazed green beans pair great with many dishes. You can serve them alongside grilled chicken or fish. They also go well with roasted potatoes or a fresh salad. For a full meal, try adding rice or quinoa. This makes a balanced plate and will impress your guests.
This blog post covered how to make balsamic glazed green beans. We started with fresh ingredients, then walked through simple steps to prepare and cook them. You learned tips to enhance flavor and present the dish beautifully. We also explored variations for different diets and how to store your beans.
In summary, this dish is easy to make and tasty. You can impress others with your cooking skills. Enjoy your green beans!