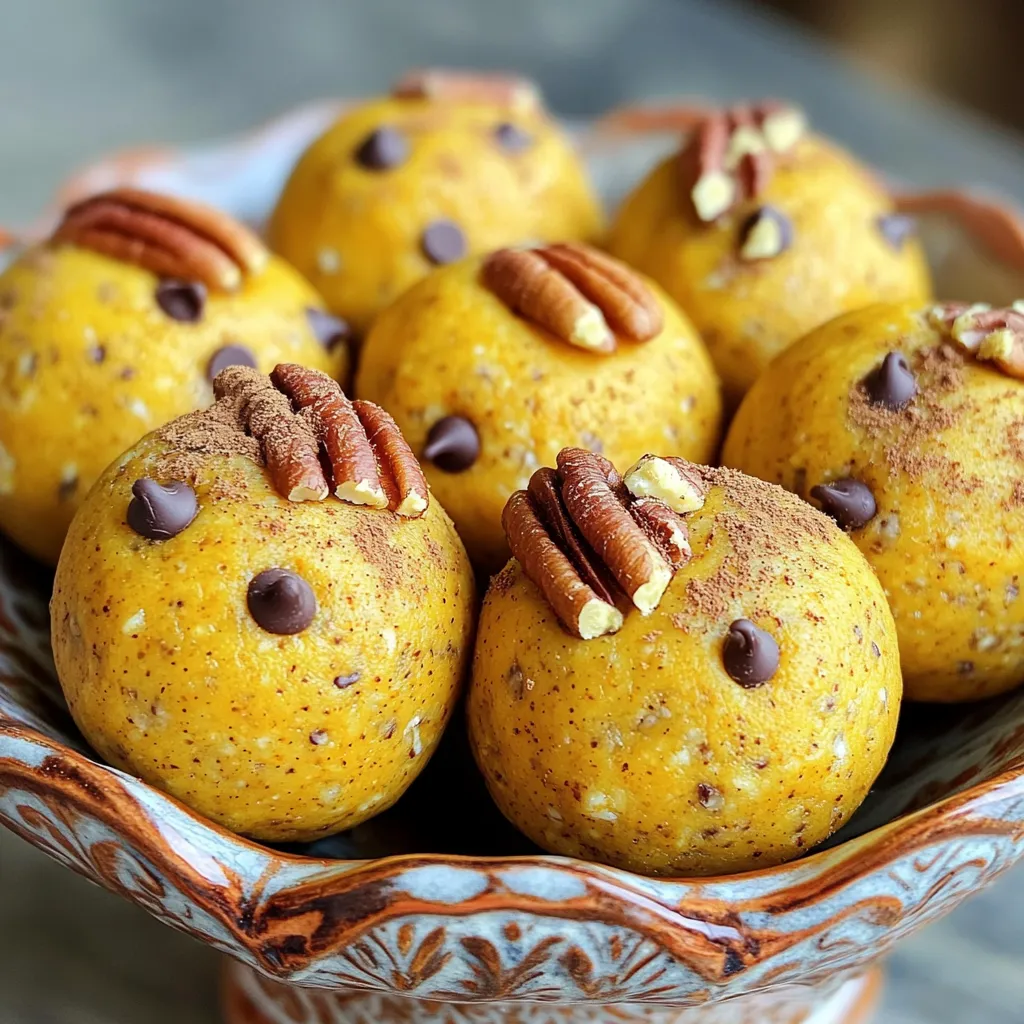
Pumpkin Cheesecake Energy Balls Powerful and Easy Treat
Are you ready for a bite-sized treat that packs a punch? These Pumpkin Cheesecake Energy Balls are my go-to for

Are you ready for a bite-sized treat that packs a punch? These Pumpkin Cheesecake Energy Balls are my go-to for
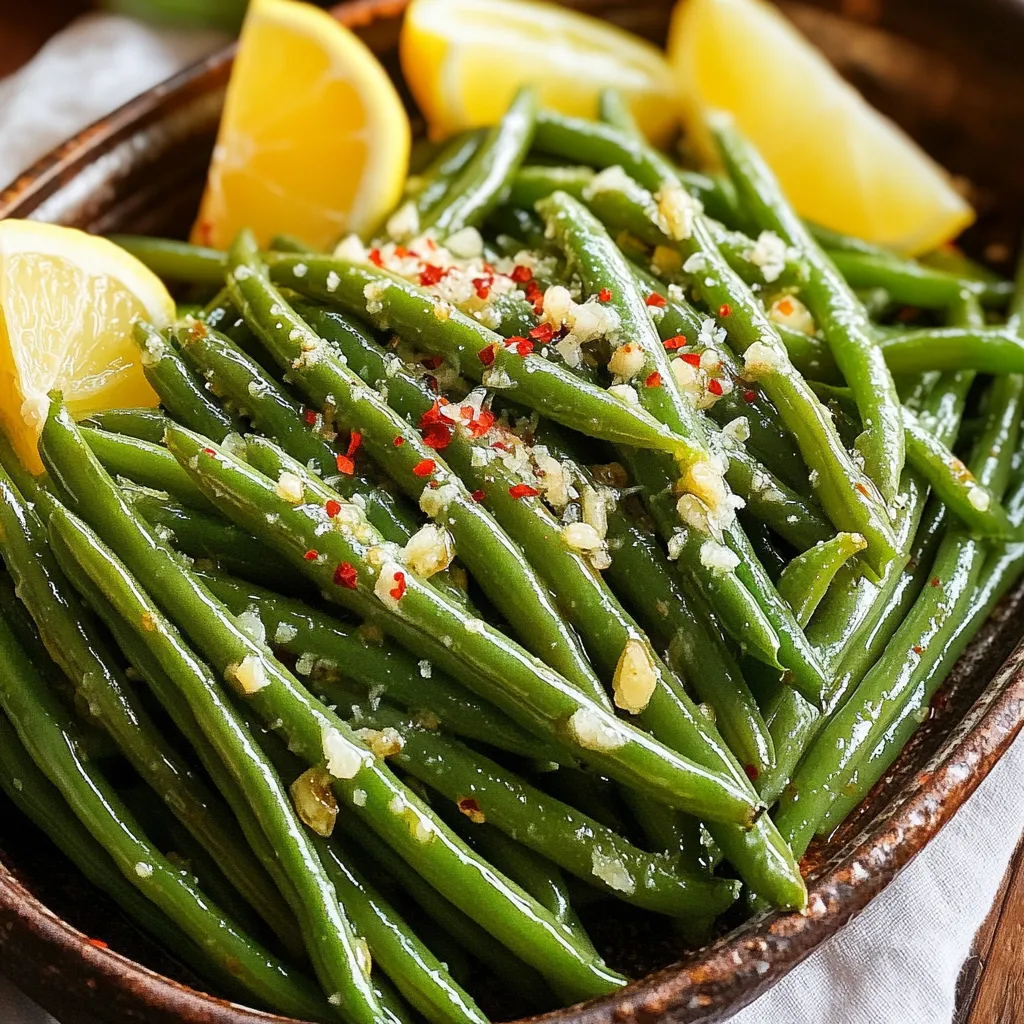
Want a tasty side dish that’s easy to make? My Air Fryer Garlic Parmesan Green Beans are just what you
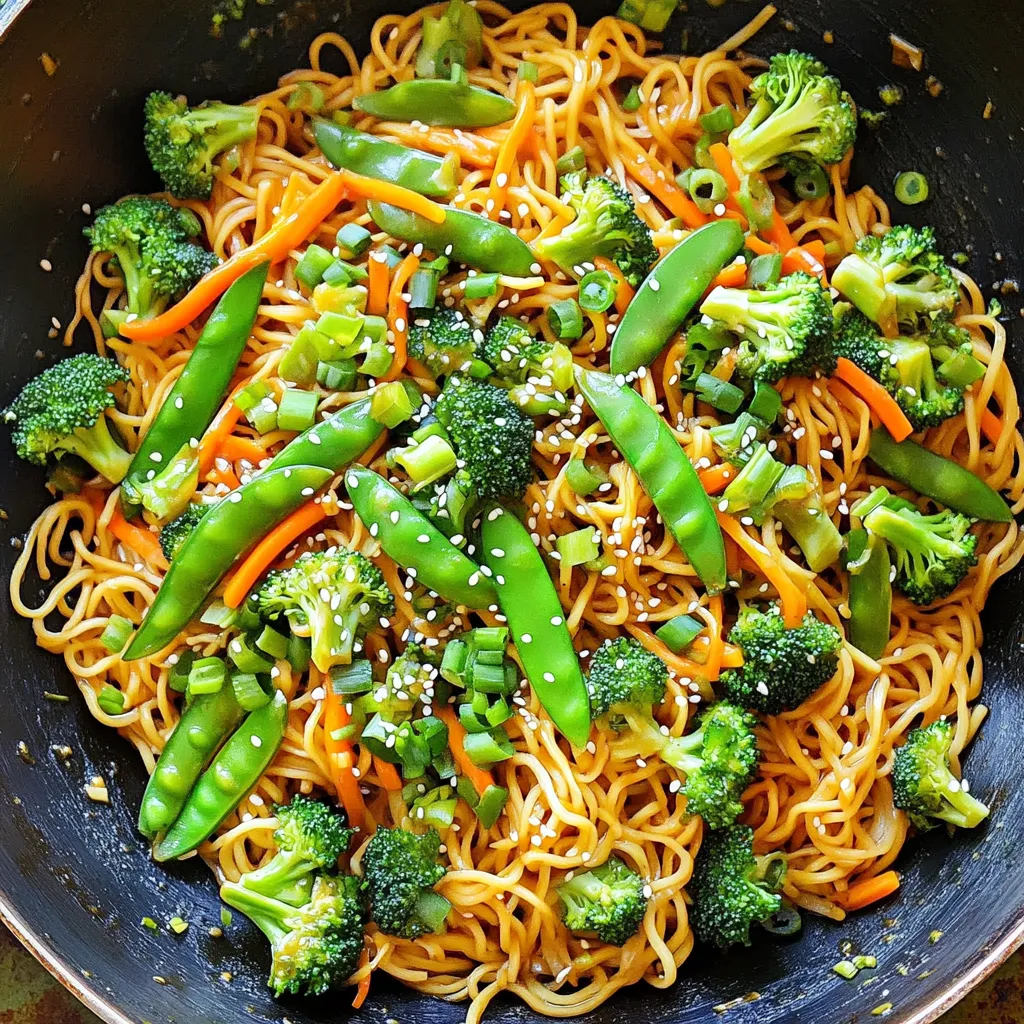
Looking for a quick and tasty meal? Veggie Lo Mein is your answer! This easy stir-fry combines fresh vegetables, savory
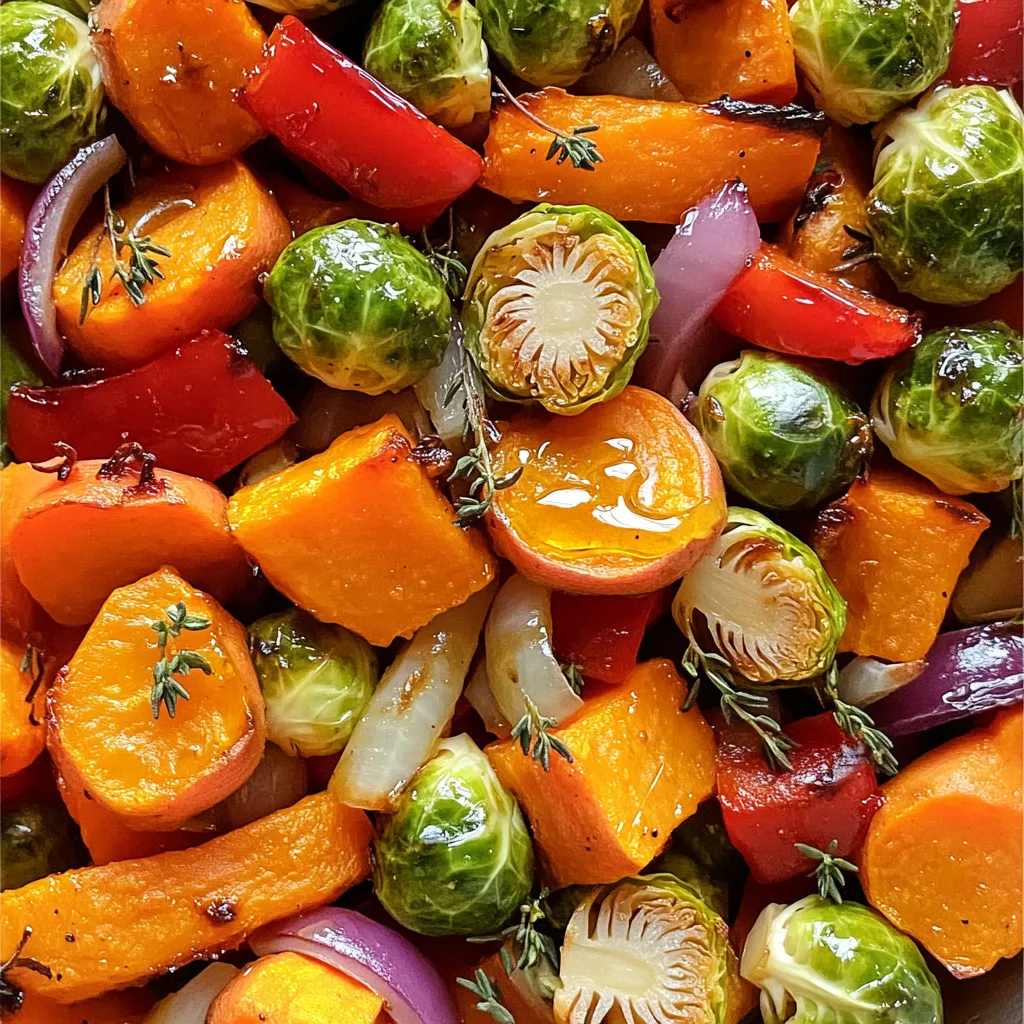
Fall is the perfect time to enjoy the delicious flavors of roasted veggies. In this blog post, I’ll show you
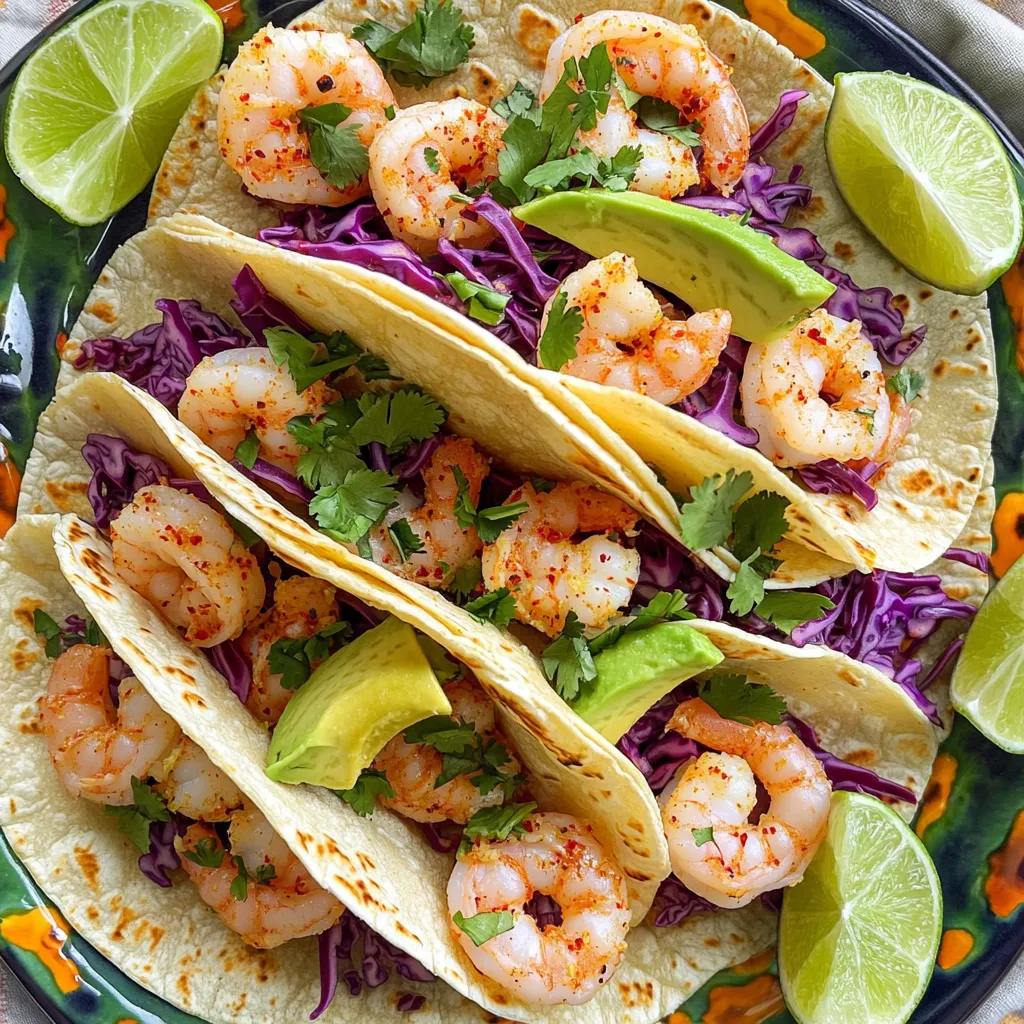
If you’re seeking a quick and tasty meal, Garlic Chili Shrimp Tacos are the answer! This dish is packed with

Craving a sweet snack that combines the best of fall flavors? You’re in the right spot! These Caramel Apple Popcorn
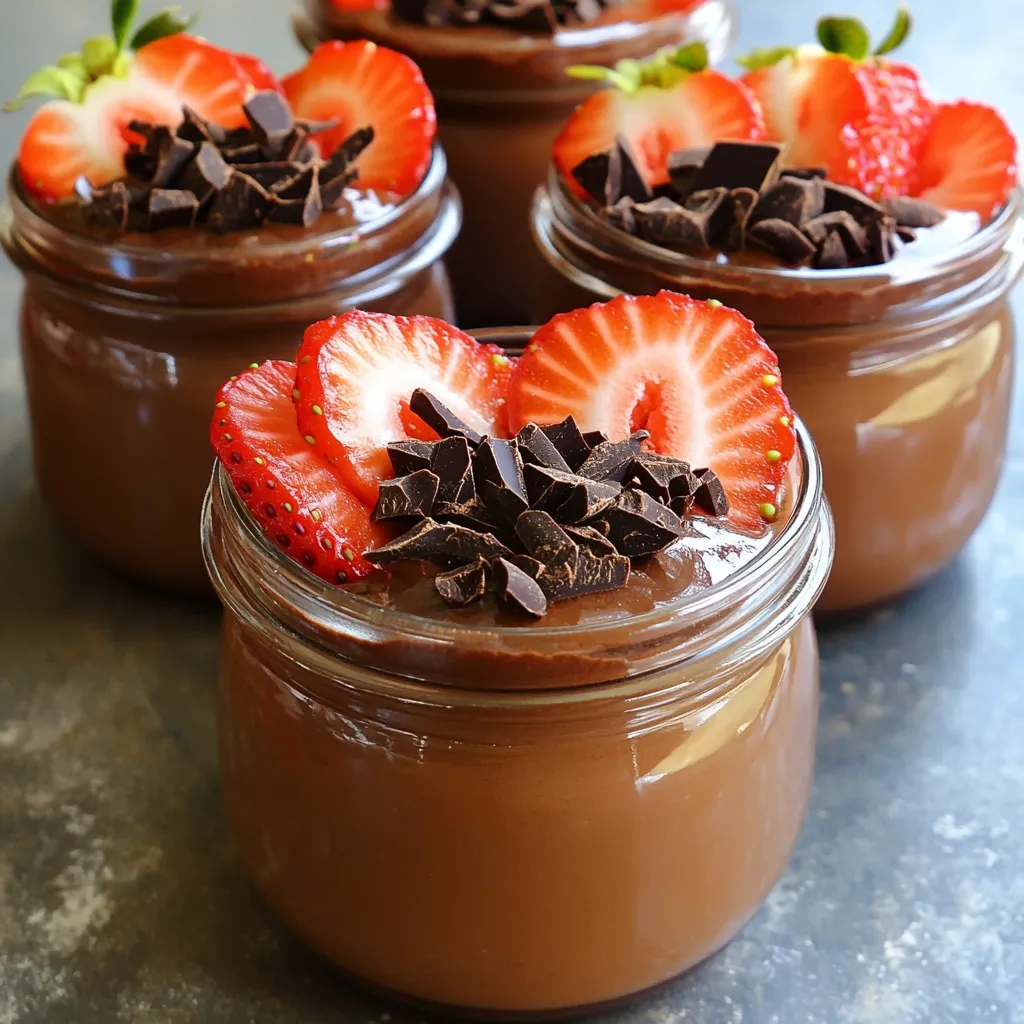
Are you craving a sweet treat that’s easy, delicious, and healthy? This Greek Yogurt Chocolate Pudding recipe checks all the
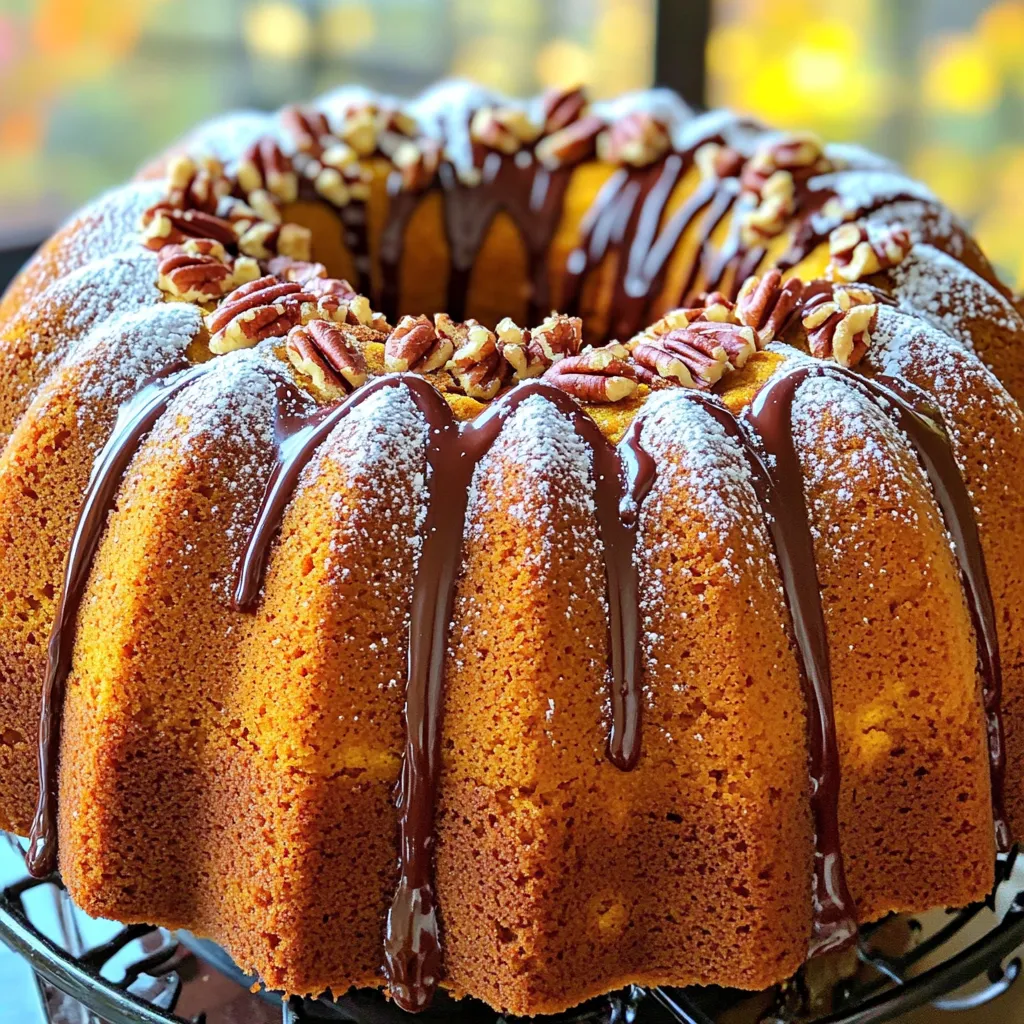
Fall is the perfect time to indulge in a cozy treat, and nothing beats a Pumpkin Chocolate Chip Bundt Cake.
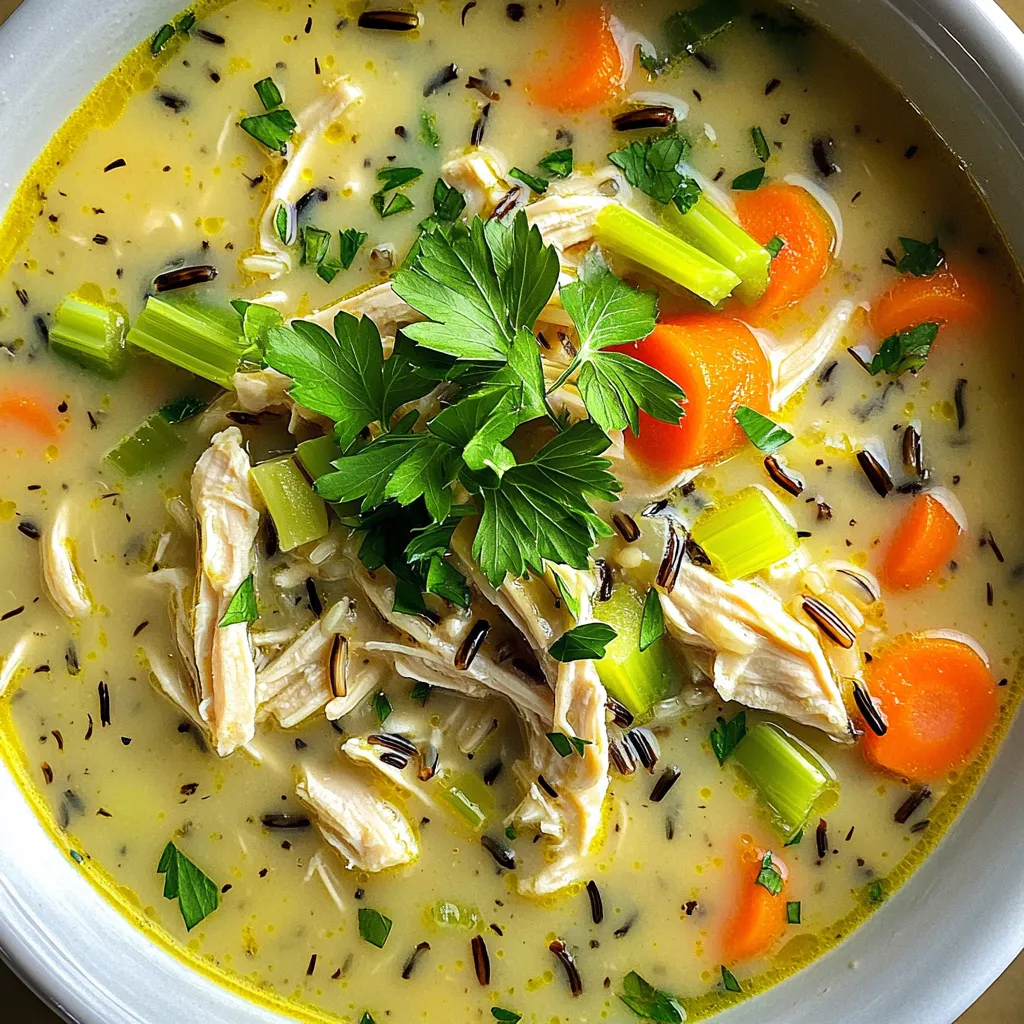
Looking for a warm and hearty meal that’s easy to make? Try my Slow Cooker Chicken & Wild Rice Soup!

Looking for an easy yet delicious meal? Garlic Herb Shrimp Scampi checks all the boxes! It’s quick to make, packed