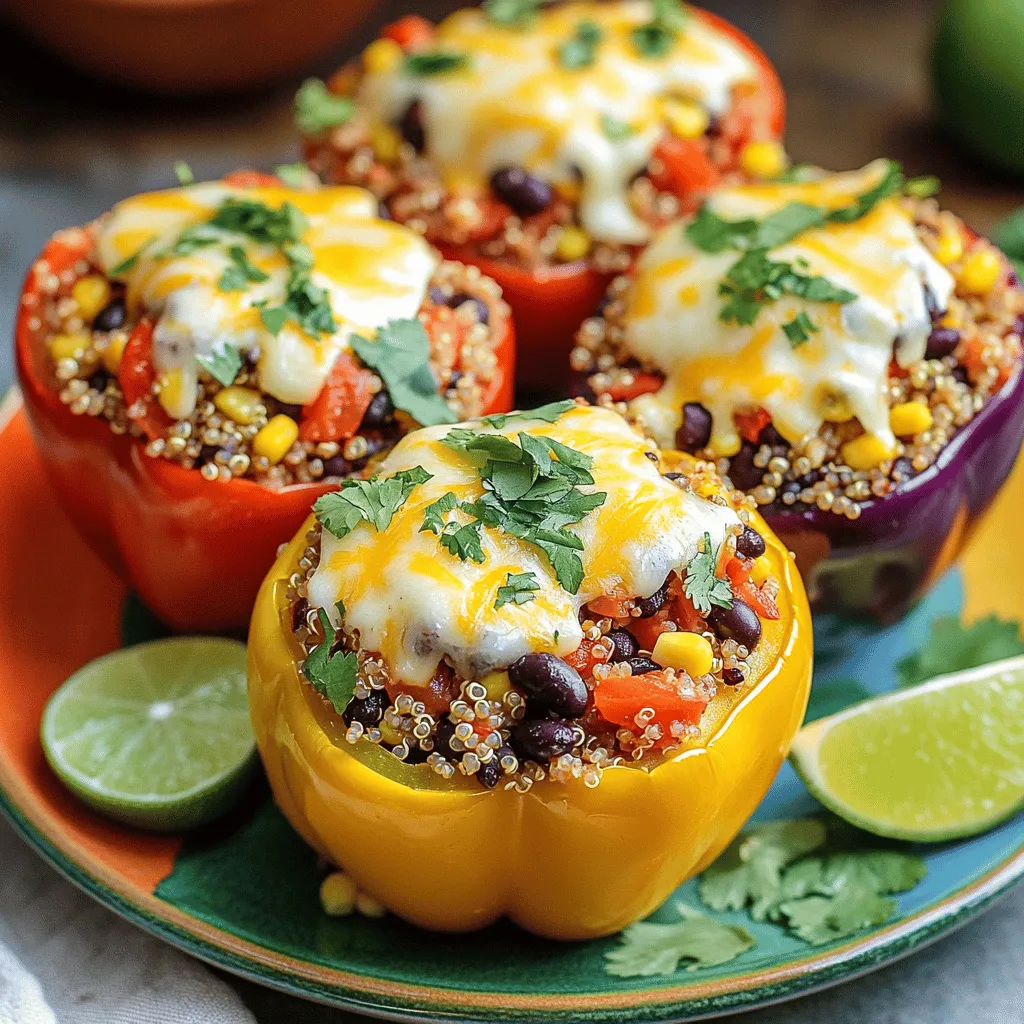
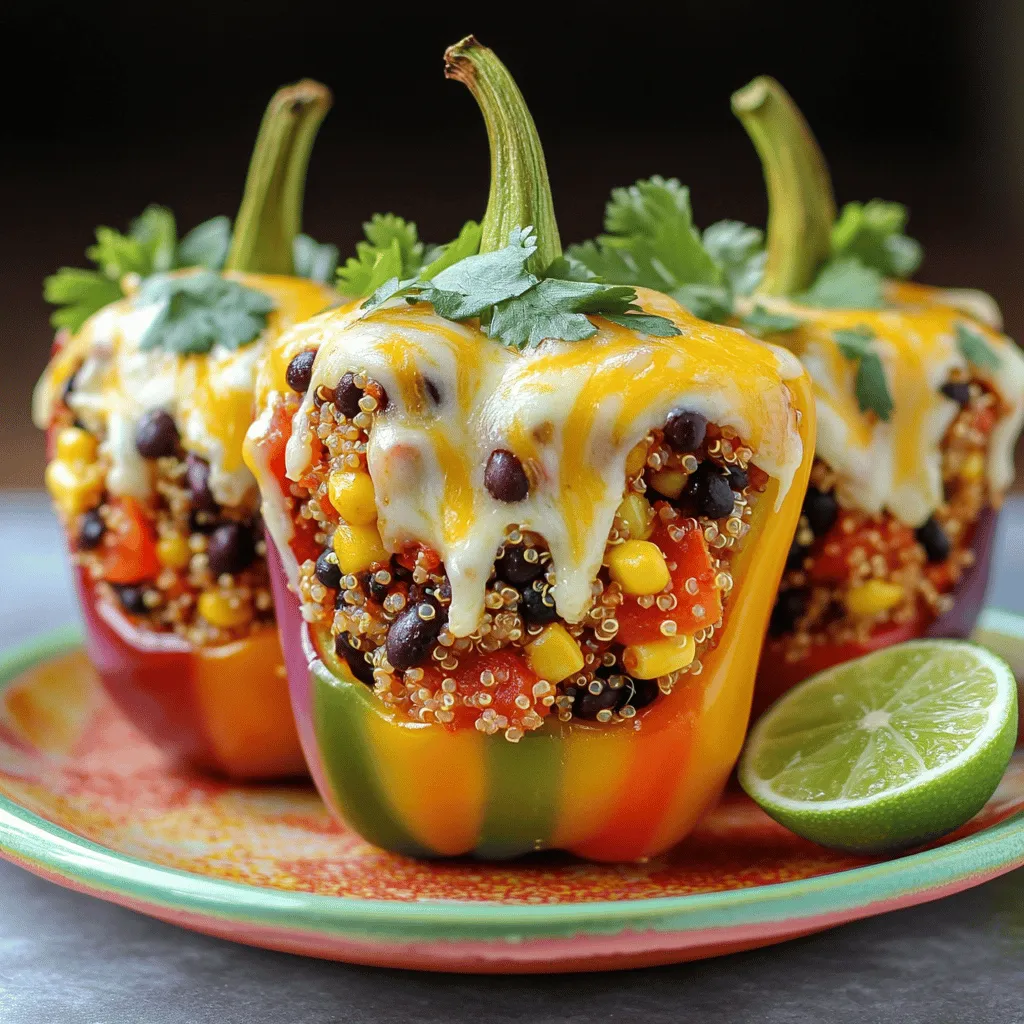
Stuffed bell peppers with quinoa are a fun, healthy meal everyone will love. These colorful creations are not just pleasing to the eye; they’re packed with flavor and nutrition too. I’ll guide you through each step, from selecting the perfect ingredients to cooking techniques that ensure every bite delights your taste buds. Get ready to discover a delicious, easy dish that can fit any diet! Let’s dive in!
Ingredients
List of Ingredients for Stuffed Bell Peppers
To make these stuffed bell peppers, gather the following items:
– 4 large bell peppers (any color)
– 1 cup quinoa, rinsed
– 2 cups vegetable broth or water
– 1 cup black beans, drained and rinsed
– 1 cup corn (fresh, frozen, or canned)
– 1 small red onion, finely chopped
– 1 medium tomato, diced
– 1 teaspoon cumin
– 1 teaspoon smoked paprika
– 1 teaspoon garlic powder
– Salt and pepper to taste
– 1/2 cup shredded cheese (optional, like cheddar or mozzarella)
– Fresh cilantro for garnish
Nutritional Information (per serving)
Each serving of these stuffed bell peppers is not only tasty but also nutritious. Here’s what you get:
– Calories: 300
– Protein: 12g
– Carbohydrates: 45g
– Fiber: 10g
– Fat: 10g
This dish is a great balance of protein, fiber, and healthy fats.
Ingredient Substitutes
If you need to swap some ingredients, here are a few ideas:
– Quinoa: Use brown rice or couscous.
– Black beans: Substitute with kidney beans or lentils.
– Corn: Swap for diced zucchini or peas.
– Red onion: White or yellow onion works well too.
– Cheese: Try nutritional yeast for a vegan option or skip it altogether.
Feel free to mix and match to suit your taste or dietary needs.
Step-by-Step Instructions
Preparation Overview
To start, gather all your ingredients. You need fresh bell peppers, quinoa, black beans, and more. Next, preheat your oven to 375°F (190°C). This helps cook the peppers evenly. Cut the tops off the bell peppers and remove the seeds. Brush the outsides with olive oil. Place them in a baking dish with the open side facing up. This makes stuffing easy.
Cooking Techniques for Quinoa
Rinse the quinoa under cool water. This removes bitter flavors. In a pot, combine the rinsed quinoa with vegetable broth or water. Bring it to a boil. Once boiling, lower the heat and cover the pot. Let it simmer for about 15 minutes. The quinoa should absorb all the liquid. When done, fluff it with a fork. This helps keep it light and airy.
Stuffing and Baking the Peppers
In a large bowl, mix the cooked quinoa with black beans, corn, onion, and tomato. Add spices like cumin, smoked paprika, and garlic powder. Season with salt and pepper to taste. Spoon this mixture into each bell pepper. Press down gently to pack the filling well. If you like cheese, sprinkle some on top. Pour a bit of water into the bottom of the dish. This helps steam the peppers as they bake. Cover with foil and bake for 30 minutes. After that, remove the foil and bake for another 10-15 minutes. The peppers should be tender, and the cheese will be melted. Let them cool a bit and add fresh cilantro on top for a bright touch.
Tips & Tricks
Tips for Perfectly Stuffed Bell Peppers
To make your stuffed bell peppers truly shine, here are some great tips:
– Choose ripe peppers: Look for firm and shiny bell peppers. They should have rich colors and no blemishes.
– Add moisture: Include a small amount of broth or water in the baking dish. This helps steam the peppers and keeps them tender.
– Pack the filling: Fill each pepper tightly with your quinoa mixture. This ensures every bite is flavorful.
– Top with cheese: If you like cheese, sprinkle some on top before baking. It adds a nice melt and extra flavor.
Recommended Cooking Tools
To make cooking easier, gather these tools:
– Baking dish: A good-sized dish to fit all your peppers.
– Pot: For cooking quinoa and mixing ingredients.
– Mixing bowl: A large bowl to combine your filling.
– Spoon: A sturdy spoon for stuffing the peppers.
– Aluminum foil: To cover the dish while baking.
Common Mistakes to Avoid
Avoid these common pitfalls for perfect stuffed peppers:
– Overcooking quinoa: Keep an eye on the quinoa. It should be fluffy, not mushy.
– Under-seasoning: Don’t skip the spices! They add depth and flavor to your dish.
– Not prepping peppers: Remove all seeds and membranes. This will help the peppers cook evenly.
– Skipping the garnish: Fresh cilantro on top adds color and freshness. Don’t skip it!
Variations
Different Protein Options
You can change the protein in stuffed bell peppers to fit your taste. Try using cooked chicken for a hearty bite. Shredded rotisserie chicken works well. You can also use ground turkey or beef. For a lighter option, use diced tofu. Tofu soaks up flavors and adds protein, too.
Vegetarian and Vegan Alternatives
Making stuffed peppers for vegans is simple. Skip the cheese and use plant-based cheese instead. You can also add more vegetables. Zucchini, mushrooms, or spinach add freshness and flavor. Beans like chickpeas or lentils are great for protein. They make the dish filling and healthy.
Flavor Profile Variations
Spices and herbs can change the flavor of stuffed peppers. Use chili powder and cumin for a southwestern twist. Add basil and oregano for an Italian vibe. A dash of curry powder gives a warm flavor. Taste as you go, and adjust to your liking. Fresh herbs like cilantro or parsley brighten every bite.
These variations make stuffed bell peppers fun and exciting. You can explore different tastes and textures.
Storage Info
How to Store Leftovers
I love enjoying stuffed bell peppers again. To store leftovers, let them cool down first. Then, place them in an airtight container. You can keep them in the fridge for up to 4 days. Make sure to label the container with the date. This helps you remember when you made them.
Freezing Stuffed Bell Peppers
Freezing these peppers is a great option. Wrap each stuffed pepper in plastic wrap. Then, place them in a freezer-safe bag. They can last up to 3 months in the freezer. When you’re ready to eat, take them out and let them thaw in the fridge overnight. This keeps them fresh and tasty.
Reheating Instructions
Reheating stuffed bell peppers is easy. Preheat your oven to 350°F (175°C). Place the peppers in a baking dish. Add a splash of water to keep them moist. Cover the dish with foil to prevent drying out. Bake for about 20 minutes or until heated through. You can also use a microwave if you’re in a hurry. Heat them on medium for 2-3 minutes. Just check that they’re hot all the way through. Enjoy your meal!
FAQs
How long do stuffed bell peppers last in the fridge?
Stuffed bell peppers last about 3 to 5 days in the fridge. I recommend storing them in an airtight container to keep them fresh. You can also cover them with plastic wrap or foil. This helps keep moisture in and prevents drying.
Can I make stuffed bell peppers ahead of time?
Yes, you can make stuffed bell peppers ahead of time. You can stuff the peppers and store them in the fridge for up to a day before baking. Just cover them well. This saves time on busy days. You can also prep the filling and store it separately. Just stuff the peppers when you are ready to cook.
What can I serve with quinoa-stuffed bell peppers?
Quinoa-stuffed bell peppers pair well with many sides. Here are a few great options:
– A fresh green salad, like a simple mixed greens salad.
– Rice or cauliflower rice for a hearty side.
– A side of roasted vegetables for extra flavor.
– Avocado slices or guacamole for creaminess.
– Cornbread or crusty bread for a filling meal.
Explore these ideas to find what you like best!
Stuffed bell peppers are a fun and tasty dish. We covered the key ingredients and their nutrition, plus substitutes. You learned step-by-step how to prepare, cook, and bake these peppers. I shared tips for perfect results and common mistakes to watch for. We also explored variations with proteins and flavors. Lastly, we discussed storing and reheating leftovers. You have all you need to enjoy this dish your way. Now, get cooking and make a delicious meal you’ll love!