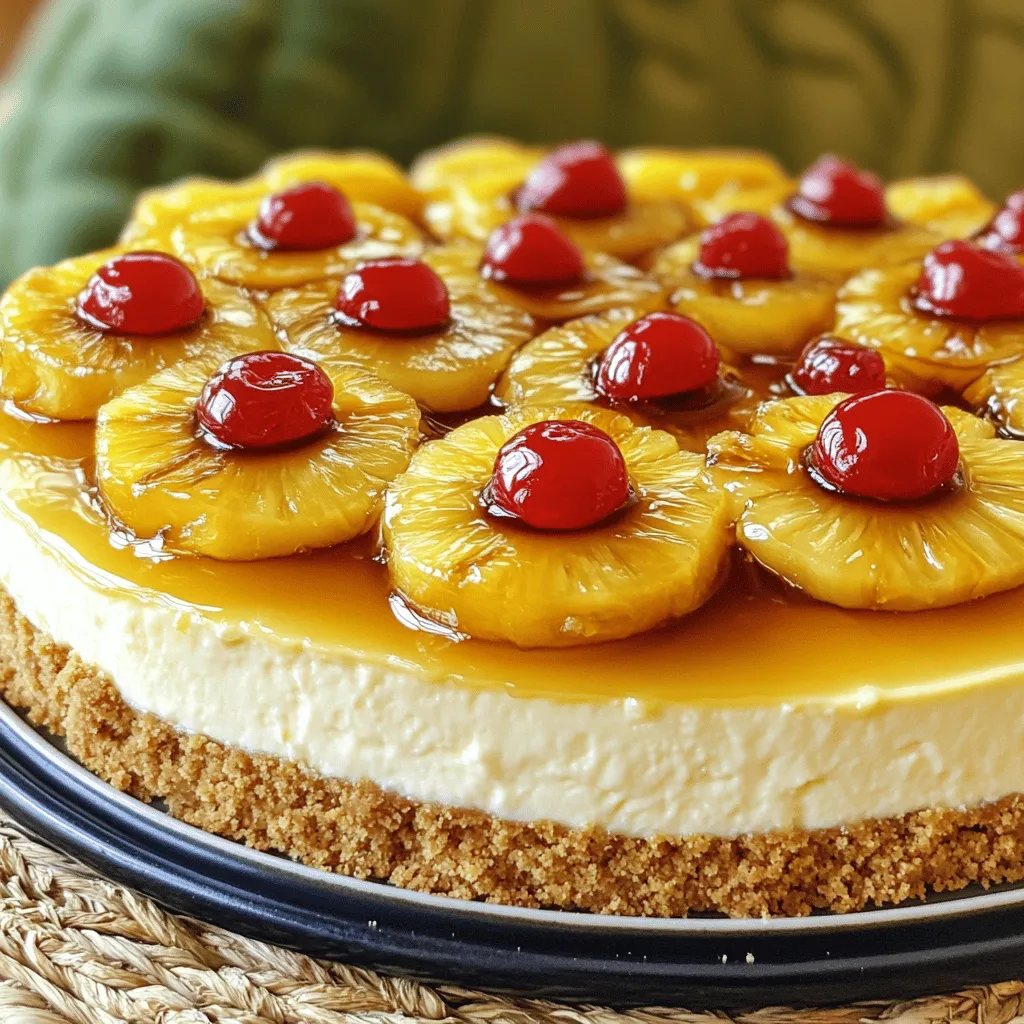
Are you ready to try a treat that combines your favorite flavors? This Pineapple Upside-Down Cheesecake is a twist on two classic desserts. With a sweet pineapple topping, creamy filling, and buttery crust, each bite will wow your taste buds. I’ll guide you through the easy steps, tips, and variations to make it perfect. Let’s dive into this delightful recipe and impress your friends and family!
Ingredients
Pineapple Topping Ingredients
– 1 can (20 oz) sliced pineapple rings, drained
– 1/2 cup brown sugar
– 1/4 cup unsalted butter, melted
– 1/4 teaspoon ground cinnamon
– Maraschino cherries for garnish (optional)
Cheesecake Ingredients
– 1 1/2 cups cream cheese, softened
– 1 cup granulated sugar
– 1 teaspoon vanilla extract
– 3 large eggs
– 1 cup sour cream
– 1 tablespoon lemon juice
– 1/4 cup all-purpose flour
Crust Ingredients
– 1 1/2 cups graham cracker crumbs
– 1/3 cup granulated sugar
– 1/3 cup unsalted butter, melted
I love how these ingredients come together for the perfect Pineapple Upside-Down Cheesecake. The sweet, juicy pineapple pairs so well with the creamy cheesecake. The crust adds a nice crunch. Each bite is a delightful mix of flavors.
Step-by-Step Instructions
Preheat the Oven
First, set your oven to 350°F (175°C). This ensures the cheesecake bakes evenly.
Prepare the Pineapple Topping
In a bowl, mix melted butter, brown sugar, and cinnamon. Stir until it looks smooth. Pour this mix into a 9-inch springform pan. Spread it evenly across the bottom. Next, lay the pineapple rings on top. If you like, add a maraschino cherry in the center of each ring. This adds a nice pop of color.
Make the Crust
In another bowl, combine graham cracker crumbs and sugar. Stir in melted butter until it feels like wet sand. Press this mixture firmly into the bottom of the springform pan over the pineapple. Bake for 8 minutes. Let it cool slightly before adding the cheesecake filling.
Prepare the Cheesecake Filling
Grab a large bowl and beat the cream cheese with an electric mixer. Make it smooth and creamy. Slowly add granulated sugar, mixing well. Now, add the eggs one at a time. Mix after each one. Next, incorporate sour cream, lemon juice, and flour until it’s all smooth.
Assemble and Bake
Carefully pour the cheesecake filling over the crust and pineapple. Bake for 55 to 65 minutes. The center should be set but still slightly jiggly. Once done, turn off the oven and crack the door open. Let the cheesecake cool in the oven for about an hour. This helps keep cracks from forming.
Chill the Cheesecake
After cooling, cover the cheesecake with plastic wrap or foil. Place it in the fridge for at least 4 hours, but overnight is best. This step is key for a great texture.
Invert and Serve
When ready to serve, run a knife around the edge of the pan. Gently release the springform pan. Place a plate on top of the cheesecake and flip it over. The pineapple topping should now be on top. Slice and serve chilled, adding extra cherries if you want. Enjoy this delightful treat!
Tips & Tricks
How to Avoid Cracks in Cheesecake
To keep your cheesecake smooth, follow these tips:
– Mix Slowly: When combining ingredients, mix on low speed. This adds less air and helps keep cracks away.
– Don’t Overmix: Once your eggs are in, mix just until combined. Overmixing can cause cracks as it adds air.
– Cool Gradually: After baking, turn off the oven and leave the door slightly open. This helps the cheesecake cool slowly, reducing cracks.
– Water Bath: Bake your cheesecake in a water bath. This adds moisture to the oven, preventing cracks.
Best Serving Suggestions
Serve your Pineapple Upside-Down Cheesecake with these fun ideas:
– Fresh Fruit: Add slices of fresh pineapple or berries on top for a bright touch.
– Whipped Cream: A dollop of whipped cream makes every slice even better.
– Toasted Nuts: Sprinkle toasted coconut or chopped nuts for a crunchy contrast to the creamy cheesecake.
– Dessert Wine: Pair your cheesecake with a sweet dessert wine for a fancy treat.
Equipment Recommendations
Using the right tools makes baking easier. Here are my top picks:
– Springform Pan: A 9-inch springform pan is perfect for easy removal and presentation.
– Electric Mixer: A good mixer helps you achieve a smooth filling without lumps.
– Rubber Spatula: Use a spatula to scrape the bowl and get every bit of batter out.
– Food Thermometer: A thermometer can help check if your cheesecake is fully set.

Variations
Different Fruit Toppings
You can change the fruit to match your taste. Try using peaches, cherries, or even mangoes. Each fruit brings a fresh twist. For example, cherries add a tart flavor that balances the sweetness. Just slice the fruit evenly and arrange it on top like the pineapple.
Alternative Crust Options
The classic graham cracker crust works well, but you can mix it up! Use crushed Oreos for a chocolate flavor. You could also try almond flour for a gluten-free option. Just remember to adjust the butter if needed for binding. Each crust adds a unique touch to the cheesecake.
Unique Flavor Additions
You can enhance the flavor of your cheesecake, too. Try adding coconut extract for a tropical vibe. A touch of rum or bourbon can give it a rich depth. You could even swirl in some caramel or chocolate sauce for extra indulgence. These changes make the dish truly yours and delight your guests.
Storage Info
How to Store Leftover Cheesecake
To keep your leftover cheesecake fresh, first cover it. Use plastic wrap or foil. Place it in the fridge. It will stay good for about 4 to 5 days. Ensure it is well wrapped to prevent drying out. If you have a slice, place it in an airtight container.
Reheating Tips
When you want to enjoy a slice, you can eat it cold straight from the fridge. If you prefer it warm, use a microwave. Heat it for just 15 to 20 seconds. Make sure not to overheat, as it can change the texture. Let it sit for a minute before enjoying.
Freezing Instructions
If you want to save some for later, freezing works well. Slice the cheesecake first. Wrap each slice in plastic wrap tightly. Then, place the wrapped slices in a freezer bag. You can freeze them for up to 3 months. To thaw, move a slice to the fridge for a few hours or overnight. Enjoy the flavors of your Pineapple Upside-Down Cheesecake even after freezing!
FAQs
What can I do if my cheesecake cracks?
If your cheesecake cracks, don’t worry! This can happen. To fix it, you can cover the cracks with whipped cream or fruit. Another tip is to bake it slowly at a lower temperature. Also, letting the cheesecake cool in the oven helps. This keeps it from cooling too fast, which causes cracks.
Can I use fresh pineapples instead of canned?
Yes, you can use fresh pineapples! Fresh pineapples add a bright, juicy flavor. Just peel and slice the pineapples into rings. Make sure to cook them lightly to soften them and bring out their sweetness. This will give your cheesecake a fresh taste.
How long does Pineapple Upside-Down Cheesecake last?
Pineapple Upside-Down Cheesecake lasts about 4 to 5 days in the fridge. Store it in an airtight container to keep it fresh. The flavor will stay great for several days, but it’s best to eat it sooner for the best taste.
Can I make this cheesecake ahead of time?
Absolutely! Making this cheesecake ahead of time is a smart move. You can prepare it a day or two before your event. Just remember to chill it in the fridge for at least four hours. This allows the flavors to meld and makes slicing easier.
What is the best way to slice a cheesecake?
To slice a cheesecake well, use a sharp, long knife. Dip the knife in hot water before cutting. Wipe it clean after each slice. This method gives you clean, even slices. You can also use a dental floss method for a smooth cut without sticking.
This blog post covered all you need for a Pineapple Upside-Down Cheesecake. We discussed key ingredients, step-by-step baking instructions, and tips to avoid cracks. You also learned about variations, storage, and FAQs to help you succeed.
Making this cheesecake can be fun and rewarding. With these insights, you can create a tasty treat that impresses every time!