
Caprese Grilled Cheese Delightful and Easy Recipe
If you love cheesy, fresh flavors, you’ll adore my Caprese Grilled Cheese recipe. This delightful dish combines creamy mozzarella, juicy

If you love cheesy, fresh flavors, you’ll adore my Caprese Grilled Cheese recipe. This delightful dish combines creamy mozzarella, juicy
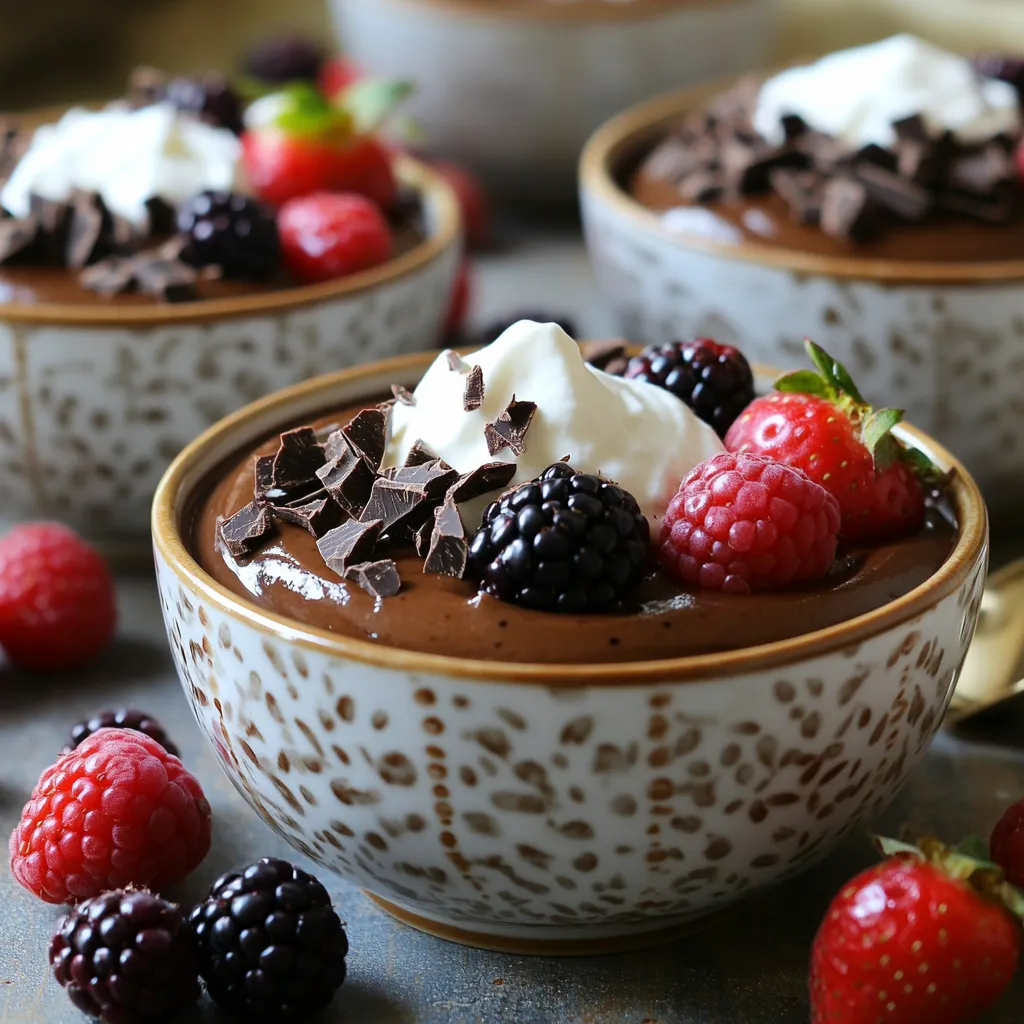
Are you ready for a healthy dessert that tastes amazing? My Chocolate Cottage Cheese Pudding is both simple and delightful.
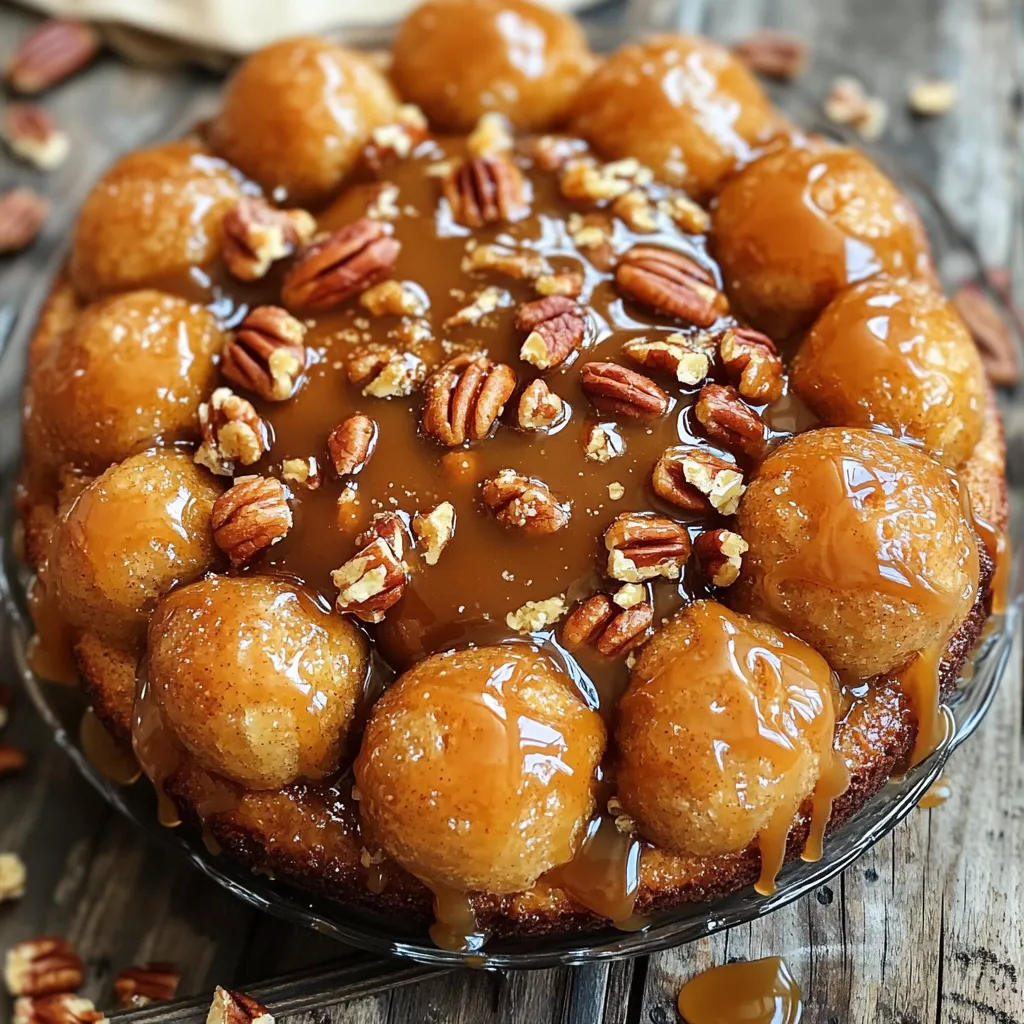
If you crave a sweet treat that brings joy to your table, try this Caramel Monkey Bread! This delightful dessert
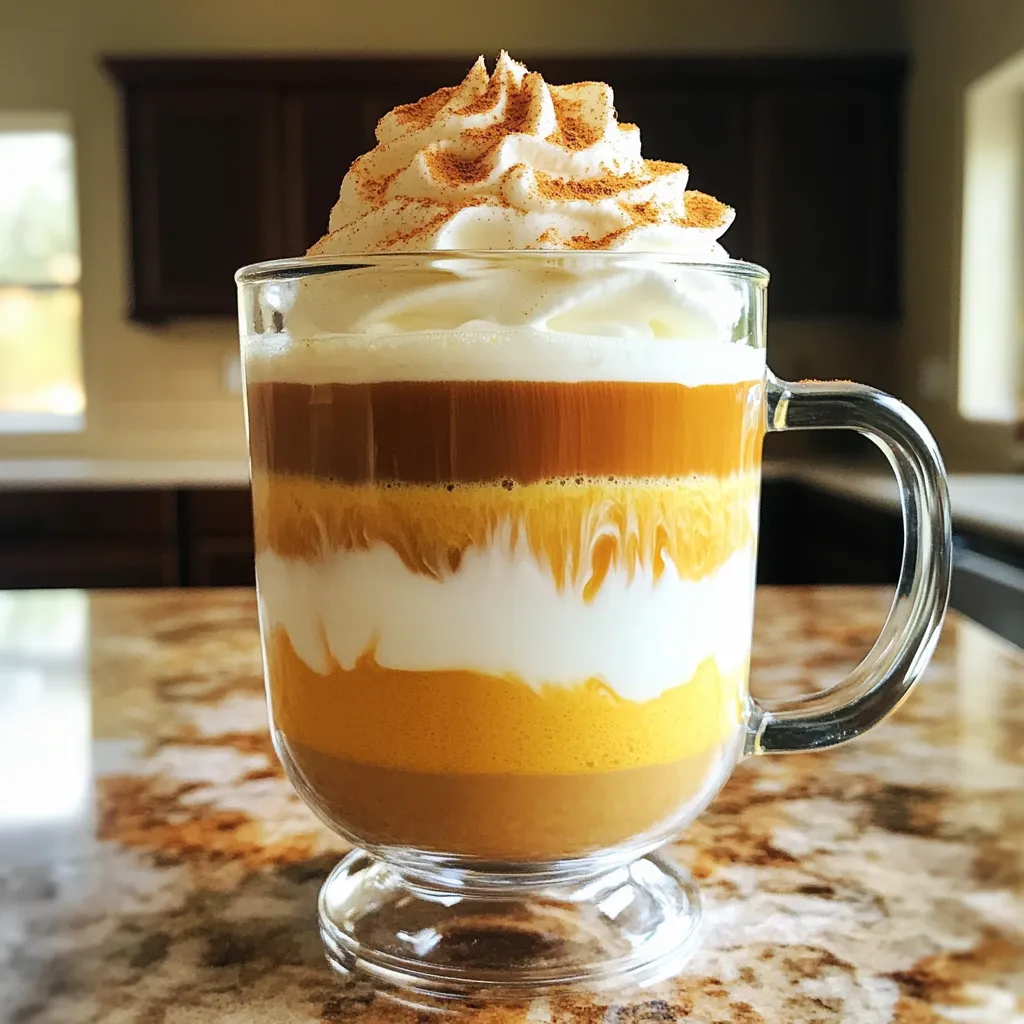
Fall is here, and so is the perfect drink to celebrate! Pumpkin Whipped Coffee is a tasty blend of rich
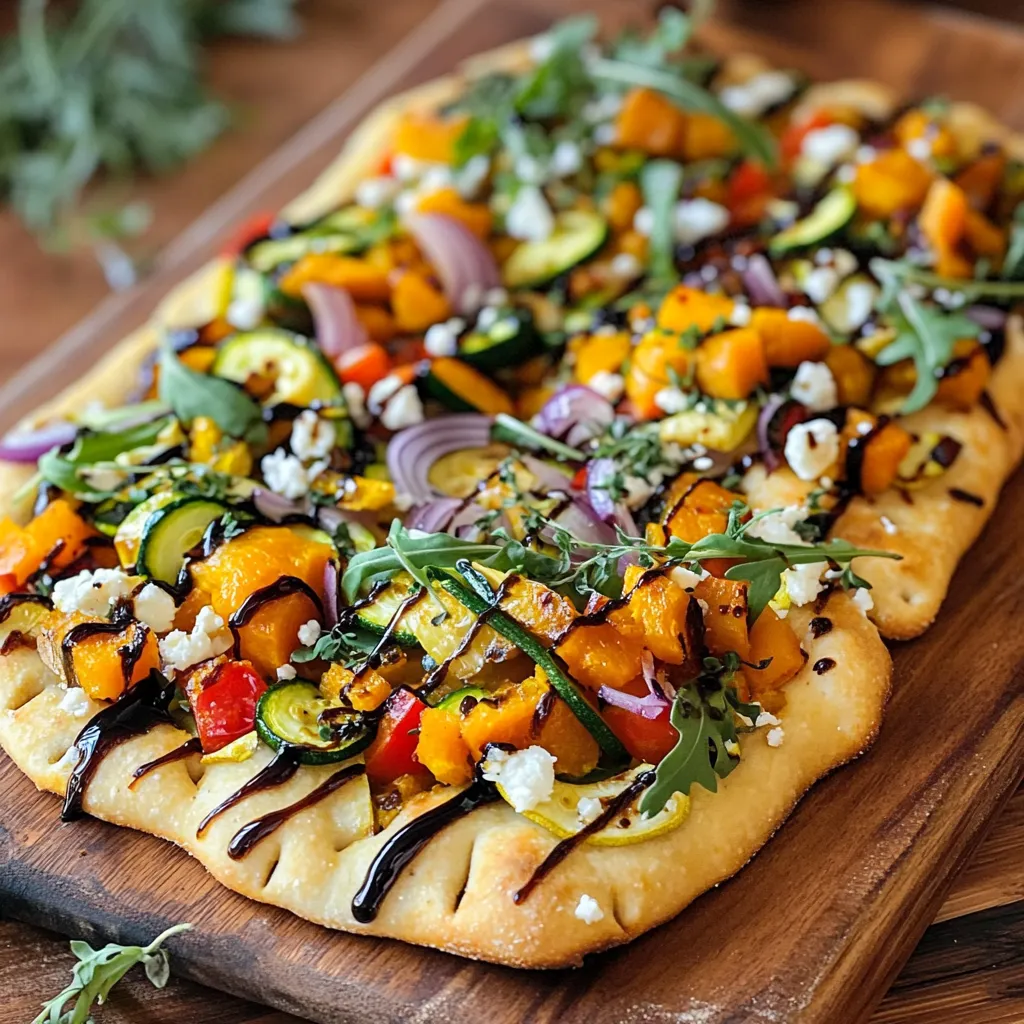
If you love fresh flavors and easy cooking, you’re in for a treat! My Harvest Veggie Flatbreads recipe is not

Welcome to your next favorite recipe: Butternut Squash Coconut Curry Soup! This creamy, flavorful soup is a hug in a

Are you ready to indulge in a dessert that combines the warmth of cinnamon rolls with the fruity goodness of
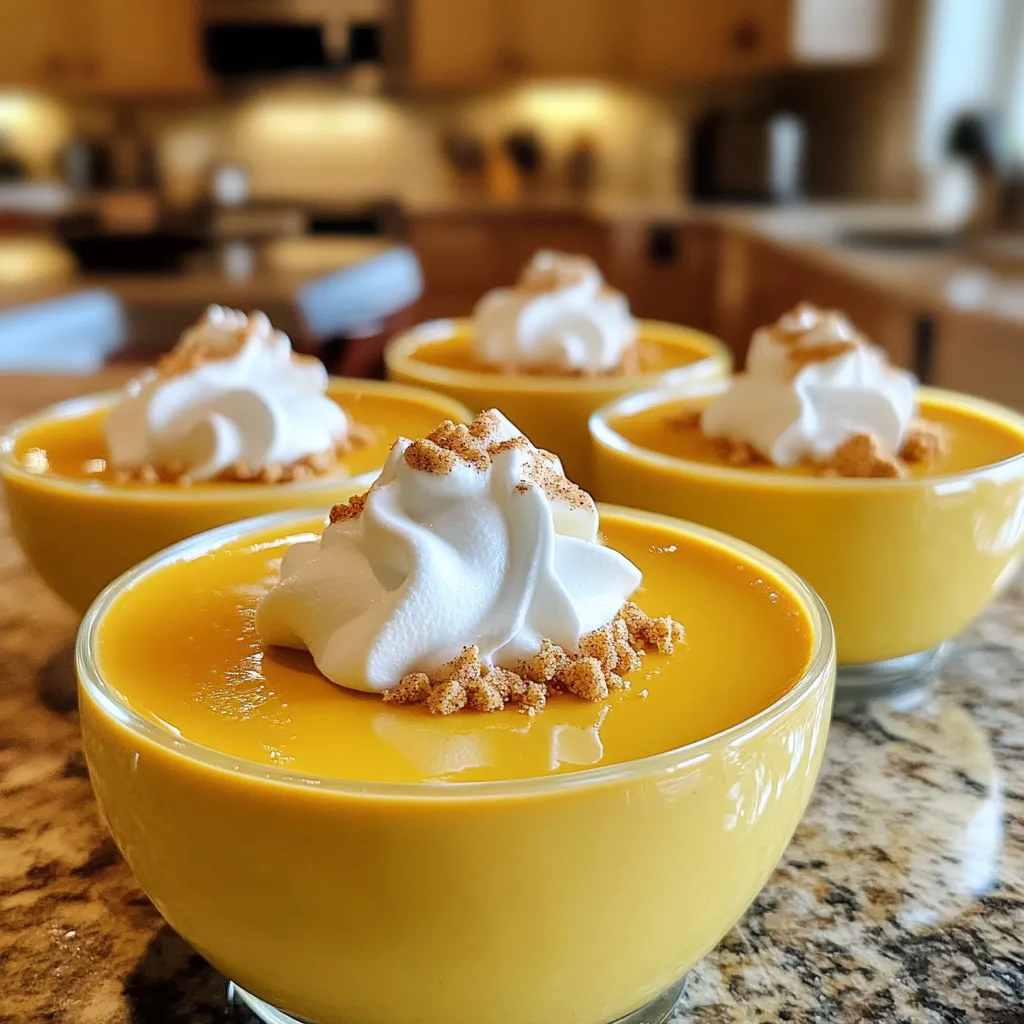
Fall is here, and it’s time for a sweet treat that captures the season’s essence! Let’s make a Pumpkin Spice
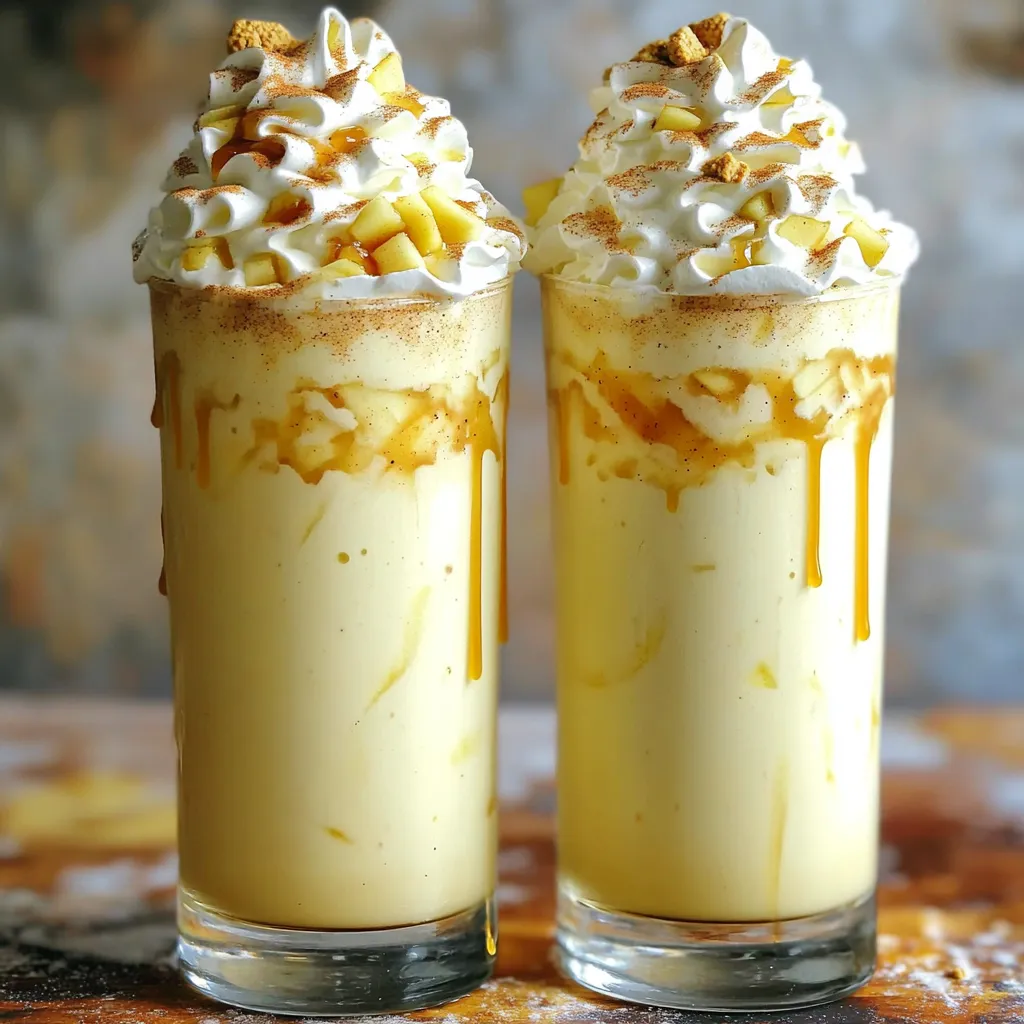
Craving a sweet, creamy treat that blends classic flavors? Look no further than the delicious Apple Pie Milkshake! This tasty
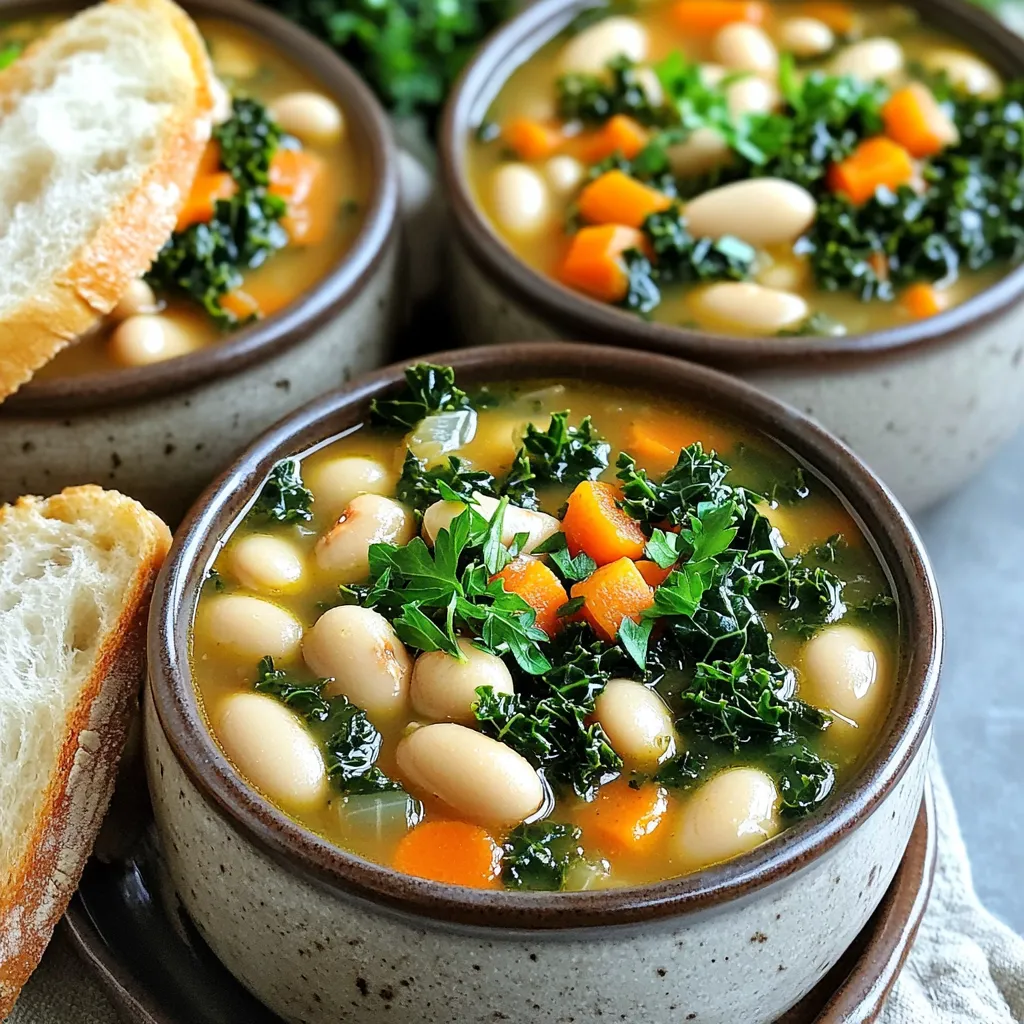
Looking for a hearty comfort meal? This Slow Cooker White Bean Kale Stew is packed with flavor and nutrition. You’ll