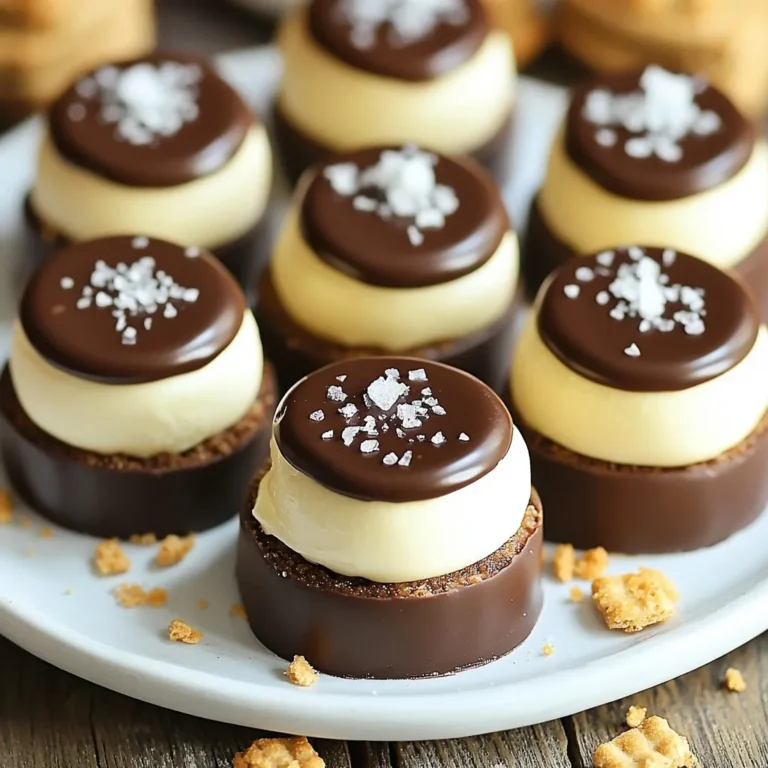

Are you ready to whip up a treat that will impress everyone? Chocolate Covered Cheesecake Bites are easy to make and oh-so-delicious. Perfect for parties or just a sweet snack at home, these bites are a chocolate lover’s dream. In this post, I’ll guide you through the ingredients, simple steps, and creative ideas to make these bites stand out. Let’s dive into this delightful recipe together!
Why I Love This Recipe
- Decadent Flavor: The creamy cheesecake filling paired with rich chocolate creates a perfect balance of sweetness and indulgence.
- Easy to Make: With simple ingredients and straightforward steps, you can whip these up in no time, making them perfect for any occasion.
- Fun to Customize: Add your favorite toppings or mix-ins to the cheesecake filling, such as fruit or nuts, for a unique twist.
- Perfect for Sharing: These bite-sized treats are great for parties or gatherings, allowing guests to indulge without overdoing it!
Ingredients
Detailed ingredient list
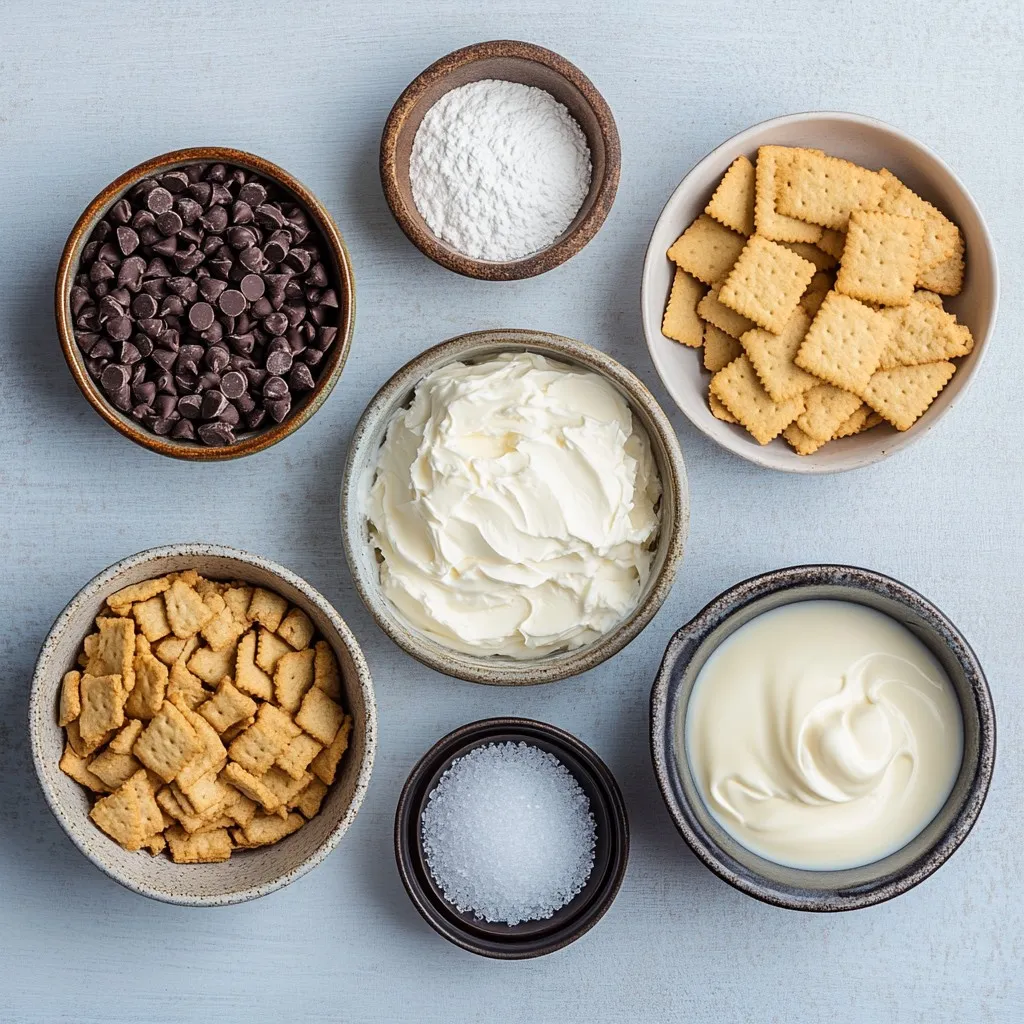
To make these chocolate covered cheesecake bites, you will need:
- 8 oz cream cheese, softened
- 1/2 cup powdered sugar
- 1 teaspoon vanilla extract
- 1/4 cup heavy cream
- 1 cup crushed graham crackers
- 1 cup semisweet chocolate chips
- 1 tablespoon coconut oil
- Sea salt for garnish (optional)
Substitutions for key ingredients
You can swap the cream cheese with a dairy-free option if needed. For a lighter taste, use Greek yogurt instead of cream cheese. You can also use maple syrup or honey in place of powdered sugar. If you like dark chocolate, use dark chocolate chips instead of semisweet ones.
Tips for choosing high-quality ingredients
Always pick the best cream cheese you can find. Look for brands with minimal additives for a pure taste. Fresh vanilla extract makes a big difference. Avoid imitation vanilla for the best flavor. Use real chocolate chips instead of chocolate-flavored chips. They melt better and taste richer. When choosing graham crackers, look for whole grain options for added texture.
Step-by-Step Instructions
Preparation overview
Making chocolate covered cheesecake bites is fun and easy. You will mix, chill, and dip. This simple process gives you creamy bites covered in rich chocolate.
Detailed breakdown of each step
1. Mix the cream cheese: Start by beating 8 oz of softened cream cheese in a bowl until it’s smooth.
2. Add powdered sugar: Gradually mix in 1/2 cup of powdered sugar and 1 teaspoon of vanilla extract. Blend until smooth.
3. Whip the cream: In another bowl, whip 1/4 cup of heavy cream. You want soft peaks.
4. Combine: Gently fold the whipped cream into the cream cheese mix until it blends well.
5. Add graham crackers: Stir in 1 cup of crushed graham crackers until combined.
6. Form bites: Use a small cookie scoop or spoon to make bite-sized balls. Place them on a parchment-lined baking sheet.
7. Chill: Freeze the bites for 30-45 minutes until they are firm.
8. Melt chocolate: In a microwave-safe bowl, melt 1 cup of semisweet chocolate chips and 1 tablespoon of coconut oil. Heat in 30-second bursts, stirring until smooth.
9. Dip the bites: Once firm, dip each bite in the melted chocolate using a fork. Shake off any extra chocolate and place them back on the parchment.
10. Garnish: If you want, sprinkle a tiny pinch of sea salt on each bite before the chocolate sets.
11. Final chill: Refrigerate the bites for 30 minutes to let the chocolate harden.
Common mistakes to avoid while making
- Not chilling enough: If the bites are not firm, they will fall apart in the chocolate.
- Overheating chocolate: Melt slowly; high heat can burn the chocolate.
- Skipping the sea salt: This adds a nice contrast to the sweetness. Don’t miss it!
- Not using parchment paper: It helps prevent sticking. Always line your baking sheet.
Tips & Tricks
Decorating ideas for cheesecake bites
You can make your cheesecake bites look fun and fancy. Try rolling them in crushed nuts or sprinkles. You can also drizzle white chocolate over them for a nice touch. Use a piping bag to create fun designs with melted chocolate. You might even add fresh fruit, like berries, on top for color and taste.
Serving suggestions (pairings, presentation)
Present your cheesecake bites on a nice platter. Arrange them in groups of five or ten for a great look. Pair these bites with coffee or tea for a nice treat. You can also serve them with fresh fruit or a scoop of vanilla ice cream. It adds a sweet touch that everyone will love.
How to achieve the perfect chocolate coating
To get the best chocolate coating, always use high-quality chocolate. Melt the chocolate with a bit of coconut oil to help it flow smoothly. Dip each cheesecake bite quickly to cover it fully. Make sure to shake off any extra chocolate before it sets. This way, you will have a nice, even coat that looks great!
Pro Tips
- Chill the Mixture: For easier handling, make sure to chill the cheesecake mixture after combining all ingredients. This will help it firm up and make it easier to scoop into balls.
- Choose Quality Chocolate: Use high-quality chocolate chips for melting. The better the chocolate, the richer and smoother the coating will be on your cheesecake bites.
- Experiment with Flavors: Feel free to add different extracts, such as almond or peppermint, to the cheesecake mixture for a unique twist on classic cheesecake flavor.
- Storage Tips: Store any leftovers in an airtight container in the refrigerator for up to a week, or freeze them for longer storage. Just make sure to separate layers with parchment paper if freezing.

Variations
Different flavor options
You can change the flavor of your cheesecake bites easily. For a fruity twist, you can add fruit puree. Raspberry or strawberry works great. Just mix in two tablespoons of your chosen puree with the cream cheese. You could also use citrus zest, like lemon or orange, for a fresh taste.
If you love spices, try adding cinnamon or nutmeg. A pinch can give your bites a warm flavor. You can also use different extracts. Almond or coconut extracts can bring a new layer of taste. Just remember to start small, about 1/4 teaspoon, and taste as you mix.
Gluten-free or vegan alternatives
If you want a gluten-free treat, swap the graham crackers for gluten-free cookies. Many brands now offer great options. You can also make your own using ground nuts or oats.
For vegan bites, use vegan cream cheese and coconut whipped cream. Make sure to check the labels for dairy-free ingredients. You can also use dairy-free chocolate chips. They melt well and taste delicious. Just follow the same steps, and you’ll have a creamy, vegan dessert.
Seasonal adaptations
You can make your cheesecake bites special for the seasons. In the fall, add pumpkin puree and spices like cinnamon and nutmeg. It will give a cozy flavor, perfect for autumn.
During the holidays, try adding peppermint extract. You can mix in crushed candy canes for crunch. These flavors make great gifts too! For summer, consider adding fresh berries or a lemon-lime zest for a refreshing touch. The possibilities are endless, so get creative with your flavors!
Storage Info
Best practices for storing cheesecake bites
To keep your chocolate covered cheesecake bites fresh, store them in an airtight container. This helps prevent them from drying out. Place a piece of parchment paper between layers to avoid sticking. Keep them in the fridge for up to a week. If you notice any changes in texture or smell, it’s best to discard them.
Freezing for long-term storage
If you want to save some for later, freezing is a great option. After you form the bites, freeze them on a tray for 30-45 minutes until firm. Once frozen, transfer them to a freezer-safe bag or container. They can last up to three months in the freezer. This way, you’ll have a sweet treat ready whenever you crave it.
How to thaw and serve after freezing
When you’re ready to enjoy your frozen bites, remove them from the freezer. Let them sit at room temperature for about 15-20 minutes. This gives them time to soften a bit. You can also place them in the fridge overnight for a slow thaw. Serve them chilled for the best flavor and texture. Enjoy your delicious cheesecake bites!
FAQs
Can I use different types of chocolate?
Yes, you can use many types of chocolate. Dark, milk, or white chocolate all work. Each type brings its own taste. Dark chocolate has a rich flavor. Milk chocolate offers sweetness. White chocolate gives a creamy touch. Experiment to find your favorite!
How long do chocolate covered cheesecake bites last?
These bites last about one week in the fridge. Store them in an airtight container. If you want them to last longer, try freezing them. They can stay good for up to three months in the freezer. Just remember to thaw them in the fridge.
Can these bites be made in advance?
Yes, you can make these bites in advance. Prepare them a day or two before your event. Just keep them in the fridge or freezer until you serve them. This way, you save time and stress when it’s time to enjoy!
Is there a non-dairy cream cheese option available?
Yes, there are many non-dairy cream cheese options. Look for brands made from nuts or soy. They work well in this recipe. Just make sure to choose one with a smooth texture for the best results. Enjoy your bites without dairy!
In this article, we explored the key ingredients for chocolate-covered cheesecake bites and how to choose them wisely. I shared detailed step-by-step instructions to make the process easy and fun. We discussed creative decorating ideas and variations to personalize your treats. Lastly, we covered storage tips to keep your bites fresh.
Remember, small changes can make a big difference. Enjoy making your cheesecake bites and impress your friends and family with your skill

Chocolate Covered Cheesecake Bites
Ingredients
- 8 oz cream cheese, softened
- 1/2 cup powdered sugar
- 1 teaspoon vanilla extract
- 1/4 cup heavy cream
- 1 cup crushed graham crackers
- 1 cup semisweet chocolate chips
- 1 tablespoon coconut oil
- to taste sea salt for garnish (optional)
Instructions
- In a mixing bowl, beat the softened cream cheese until smooth and creamy.
- Gradually add powdered sugar and vanilla extract, mixing until well incorporated.
- In a separate bowl, whip the heavy cream until soft peaks form. Gently fold the whipped cream into the cream cheese mixture until fully blended.
- Add the crushed graham crackers to the cheesecake mixture and fold until combined.
- Using a small cookie scoop or spoon, form bite-sized balls of the mixture and place them on a baking sheet lined with parchment paper.
- Freeze the cheesecake bites for about 30-45 minutes, or until firm.
- While the bites are chilling, melt the chocolate chips and coconut oil together in a microwave-safe bowl, heating in 30-second intervals and stirring until smooth.
- Once the cheesecake bites are firm, dip each one into the melted chocolate using a fork, ensuring they are fully covered. Shake off excess chocolate and return to the parchment-lined baking sheet.
- If desired, sprinkle a tiny pinch of sea salt on top of each chocolate-covered bite before the chocolate sets.
- Refrigerate the bites for another 30 minutes to allow the chocolate to harden completely.