Cookie Butter Pumpkin Cheesecake Bars No Bake Delight

WANT TO SAVE THIS RECIPE?

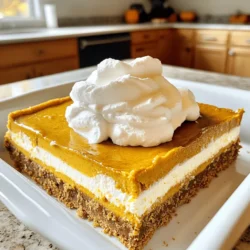
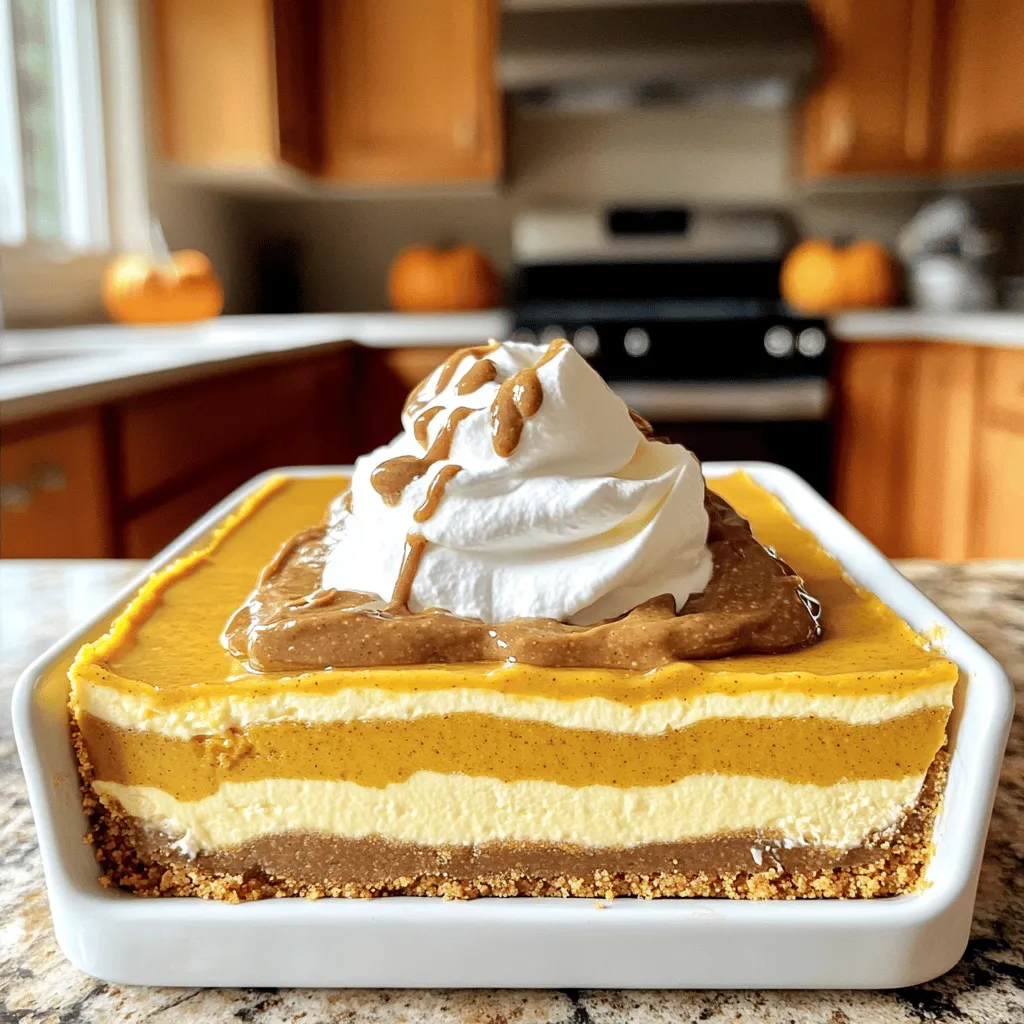
Are you ready to whip up something sweet and simple? These No-Bake Cookie Butter Pumpkin Cheesecake Bars combine creamy cheesecake with the warm flavors of pumpkin and cookie butter. You don’t need to turn on the oven for this easy treat! In this guide, I’ll share all the ingredients, tips, and tricks you need for a delightful dessert that’s sure to impress. Let’s dive in and get started!

Ingredients

Complete List of Ingredients

To make these cookie butter pumpkin cheesecake bars, gather the following:

  • 1 ½ cups crushed graham crackers
  • ½ cup melted butter
  • 1 cup cookie butter
  • 1 cup cream cheese, softened
  • 1 cup pumpkin puree
  • ¾ cup powdered sugar
  • 1 teaspoon vanilla extract
  • 1 teaspoon pumpkin pie spice
  • 1 cup whipped cream for topping
  • Optional: additional cookie butter for drizzling on top

Ingredient Substitutions

You can change some ingredients based on what you have. Here are some options:

  • Graham crackers: Use digestive biscuits or vanilla wafers.
  • Butter: Coconut oil works great as a dairy-free option.
  • Cream cheese: Try using a vegan cream cheese for a dairy-free version.
  • Pumpkin puree: Sweet potato or butternut squash puree can work too.
  • Powdered sugar: Use regular granulated sugar, but blend it until fine.
  • Whipped cream: You can substitute with a dairy-free whipped topping if needed.

Recommended Tools and Equipment

To make your baking experience easier, have these tools on hand:

  • Mixing bowls (2 large)
  • A whisk or electric mixer
  • A spatula for folding
  • An 8×8-inch square baking dish
  • Plastic wrap for covering
  • A knife for cutting the bars

These tools will help you create the perfect no-bake dessert without any fuss!

Step-by-Step Instructions

Detailed Preparation Steps

1. Start by mixing the crushed graham crackers and melted butter in a bowl.

2. Press this mixture into the bottom of an 8×8-inch baking dish.

3. Chill the crust in the fridge for about 10 minutes.

4. In another bowl, beat the softened cream cheese and cookie butter until smooth.

5. Add pumpkin puree, powdered sugar, vanilla extract, and pumpkin pie spice.

6. Mix all these ingredients until they are fully combined.

7. Next, gently fold in the whipped cream until no streaks show.

8. Pour the cheesecake mixture over the chilled crust.

9. Spread it evenly and smooth the top with a spatula.

10. Cover with plastic wrap and chill for at least 4 hours.

11. After chilling, cut into squares and serve cold.

12. Drizzle more cookie butter on top if you want an extra treat.

Tips for Achieving the Perfect Crust

  • Use finely crushed graham crackers for a smooth crust.
  • Make sure to press the crust firmly to avoid crumbling.
  • Chilling the crust helps it set and stay firm.
  • If you like, add a pinch of salt to balance the sweetness.
  • You can also use other cookies for a unique flavor twist.

Ensuring Creamy Cheesecake Consistency

  • Always use softened cream cheese for a smooth mix.
  • Beat the cream cheese and cookie butter until creamy, with no lumps.
  • Fold in whipped cream gently to keep the texture light.
  • Avoid over-mixing after adding whipped cream to maintain airiness.
  • Let the bars chill long enough to firm up properly for the best texture.

Tips & Tricks

Expert Tips for No-Bake Cheesecake

  • Use room temperature cream cheese. This helps it mix easily with cookie butter.
  • Chill the crust well. A firm crust gives good support to the creamy filling.
  • Taste as you mix. Adjust sweetness with more powdered sugar if needed.
  • Keep the whipped cream cold. This maintains its volume when folded in.

Common Mistakes to Avoid

  • Don’t skip the chilling time. It helps the cheesecake bars set well.
  • Avoid over-mixing the whipped cream. This can lead to a dense texture.
  • Use fresh pumpkin puree. Canned pumpkin works too, but check for quality.
  • Make sure your ingredients are measured correctly. This keeps the balance right.

How to Achieve a Light and Airy Texture

  • Fold the whipped cream in gently. This keeps air in and makes it fluffy.
  • Use a spatula to mix. This prevents deflating the whipped cream too much.
  • Don’t rush any steps. Take time to ensure everything is well combined.
  • Let the mixture sit a bit before pouring it onto the crust. This helps air bubbles escape.

Variations

Alternative Flavors for Cheesecake Bars

You can swap pumpkin for other purees. Try sweet potato or butternut squash. Each brings a unique taste. You can also play with the cookie butter. Use a chocolate or cinnamon flavor to change the base. This makes each bite special and fun. You can mix in some peanut butter for a nutty twist. Just remember to keep the ratios right for a creamy texture.

Different Toppings and Garnishes

Toppings can really change the vibe. Try crushed cookies, nuts, or even chocolate chips. If you want a fresh taste, add fruit. Sliced strawberries or raspberries work well. Drizzling caramel or chocolate sauce can add a fun touch. You can use whipped cream as a light topping, too. Just make sure to pile it high for a great look.

Seasonal Variations for the Recipe

Seasonal flavors can make this dish shine. For a winter treat, add peppermint extract. This gives a festive feel to your bars. In spring, try using lemon zest for a bright taste. In summer, fresh berries can add color and sweetness. Adjust the spices to match the season, too. Cinnamon and nutmeg are perfect for fall, while lighter flavors suit spring and summer.

Storage Info

How to Properly Store Cheesecake Bars

To keep your cookie butter pumpkin cheesecake bars fresh, store them in the fridge. Use an airtight container to prevent any odors from getting in. Place parchment paper between layers if you stack them. This method helps maintain their smooth texture and flavor. Make sure to consume them within five days for the best taste.

Freezing Instructions and Tips

You can freeze these cheesecake bars if you want to save some for later. Cut the bars into squares first. Wrap each square in plastic wrap and place them in a freezer bag. Try to remove as much air as possible. They will stay fresh for up to three months. When you’re ready to eat, take them out and let them thaw in the fridge overnight.

Best Practices for Reheating

These cheesecake bars are best served cold, so reheating isn’t necessary. However, if you like them a bit softer, let them sit at room temperature for about 15 minutes. This step helps bring out their creamy texture without losing quality. Enjoy your bars chilled or at room temp, whichever you prefer!

FAQs

Can I use different types of cookie butter?

Yes, you can use many types of cookie butter. Each type gives a unique taste. For example, you can try speculoos cookie butter or even chocolate cookie butter. Just remember, the flavor may change a bit. It is fun to experiment with what you like best!

How long do these bars last in the fridge?

These bars can last up to five days in the fridge. Keep them in a sealed container to stay fresh. If you want them to last longer, try freezing them! They can stay good for up to three months when frozen.

Can I make this recipe vegan or gluten-free?

Yes, it is possible to make this recipe vegan or gluten-free. For a vegan version, use dairy-free cream cheese and whipped cream. Swap the graham crackers for gluten-free cookies to make it gluten-free. Both options will still taste great!

This blog post covered the essential steps to make delicious cheesecake bars. We explored key ingredients, tools, and step-by-step instructions. I shared tips for a smooth cheesecake and ways to avoid common mistakes. You also learned about fun flavor variations and storage tips.

Always remember, with the right methods, you can create a treat everyone will love. Happy baking!

To make these cookie butter pumpkin cheesecake bars, gather the following: - 1 ½ cups crushed graham crackers - ½ cup melted butter - 1 cup cookie butter - 1 cup cream cheese, softened - 1 cup pumpkin puree - ¾ cup powdered sugar - 1 teaspoon vanilla extract - 1 teaspoon pumpkin pie spice - 1 cup whipped cream for topping - Optional: additional cookie butter for drizzling on top You can change some ingredients based on what you have. Here are some options: - Graham crackers: Use digestive biscuits or vanilla wafers. - Butter: Coconut oil works great as a dairy-free option. - Cream cheese: Try using a vegan cream cheese for a dairy-free version. - Pumpkin puree: Sweet potato or butternut squash puree can work too. - Powdered sugar: Use regular granulated sugar, but blend it until fine. - Whipped cream: You can substitute with a dairy-free whipped topping if needed. To make your baking experience easier, have these tools on hand: - Mixing bowls (2 large) - A whisk or electric mixer - A spatula for folding - An 8x8-inch square baking dish - Plastic wrap for covering - A knife for cutting the bars These tools will help you create the perfect no-bake dessert without any fuss! 1. Start by mixing the crushed graham crackers and melted butter in a bowl. 2. Press this mixture into the bottom of an 8x8-inch baking dish. 3. Chill the crust in the fridge for about 10 minutes. 4. In another bowl, beat the softened cream cheese and cookie butter until smooth. 5. Add pumpkin puree, powdered sugar, vanilla extract, and pumpkin pie spice. 6. Mix all these ingredients until they are fully combined. 7. Next, gently fold in the whipped cream until no streaks show. 8. Pour the cheesecake mixture over the chilled crust. 9. Spread it evenly and smooth the top with a spatula. 10. Cover with plastic wrap and chill for at least 4 hours. 11. After chilling, cut into squares and serve cold. 12. Drizzle more cookie butter on top if you want an extra treat. - Use finely crushed graham crackers for a smooth crust. - Make sure to press the crust firmly to avoid crumbling. - Chilling the crust helps it set and stay firm. - If you like, add a pinch of salt to balance the sweetness. - You can also use other cookies for a unique flavor twist. - Always use softened cream cheese for a smooth mix. - Beat the cream cheese and cookie butter until creamy, with no lumps. - Fold in whipped cream gently to keep the texture light. - Avoid over-mixing after adding whipped cream to maintain airiness. - Let the bars chill long enough to firm up properly for the best texture. - Use room temperature cream cheese. This helps it mix easily with cookie butter. - Chill the crust well. A firm crust gives good support to the creamy filling. - Taste as you mix. Adjust sweetness with more powdered sugar if needed. - Keep the whipped cream cold. This maintains its volume when folded in. - Don’t skip the chilling time. It helps the cheesecake bars set well. - Avoid over-mixing the whipped cream. This can lead to a dense texture. - Use fresh pumpkin puree. Canned pumpkin works too, but check for quality. - Make sure your ingredients are measured correctly. This keeps the balance right. - Fold the whipped cream in gently. This keeps air in and makes it fluffy. - Use a spatula to mix. This prevents deflating the whipped cream too much. - Don't rush any steps. Take time to ensure everything is well combined. - Let the mixture sit a bit before pouring it onto the crust. This helps air bubbles escape. {{image_2}} You can swap pumpkin for other purees. Try sweet potato or butternut squash. Each brings a unique taste. You can also play with the cookie butter. Use a chocolate or cinnamon flavor to change the base. This makes each bite special and fun. You can mix in some peanut butter for a nutty twist. Just remember to keep the ratios right for a creamy texture. Toppings can really change the vibe. Try crushed cookies, nuts, or even chocolate chips. If you want a fresh taste, add fruit. Sliced strawberries or raspberries work well. Drizzling caramel or chocolate sauce can add a fun touch. You can use whipped cream as a light topping, too. Just make sure to pile it high for a great look. Seasonal flavors can make this dish shine. For a winter treat, add peppermint extract. This gives a festive feel to your bars. In spring, try using lemon zest for a bright taste. In summer, fresh berries can add color and sweetness. Adjust the spices to match the season, too. Cinnamon and nutmeg are perfect for fall, while lighter flavors suit spring and summer. To keep your cookie butter pumpkin cheesecake bars fresh, store them in the fridge. Use an airtight container to prevent any odors from getting in. Place parchment paper between layers if you stack them. This method helps maintain their smooth texture and flavor. Make sure to consume them within five days for the best taste. You can freeze these cheesecake bars if you want to save some for later. Cut the bars into squares first. Wrap each square in plastic wrap and place them in a freezer bag. Try to remove as much air as possible. They will stay fresh for up to three months. When you’re ready to eat, take them out and let them thaw in the fridge overnight. These cheesecake bars are best served cold, so reheating isn't necessary. However, if you like them a bit softer, let them sit at room temperature for about 15 minutes. This step helps bring out their creamy texture without losing quality. Enjoy your bars chilled or at room temp, whichever you prefer! Yes, you can use many types of cookie butter. Each type gives a unique taste. For example, you can try speculoos cookie butter or even chocolate cookie butter. Just remember, the flavor may change a bit. It is fun to experiment with what you like best! These bars can last up to five days in the fridge. Keep them in a sealed container to stay fresh. If you want them to last longer, try freezing them! They can stay good for up to three months when frozen. Yes, it is possible to make this recipe vegan or gluten-free. For a vegan version, use dairy-free cream cheese and whipped cream. Swap the graham crackers for gluten-free cookies to make it gluten-free. Both options will still taste great! This blog post covered the essential steps to make delicious cheesecake bars. We explored key ingredients, tools, and step-by-step instructions. I shared tips for a smooth cheesecake and ways to avoid common mistakes. You also learned about fun flavor variations and storage tips. Always remember, with the right methods, you can create a treat everyone will love. Happy baking!

Cookie Butter Pumpkin Cheesecake Bars No Bake

Indulge in the deliciousness of Cookie Butter Pumpkin Cheesecake Bars! These creamy, dreamy treats combine the flavors of cookie butter and pumpkin in a light, airy dessert that's perfect for fall. With just a few simple ingredients and easy steps, you can create a delightful treat that will impress your family and friends. Click to explore the full recipe and make these irresistible cheesecake bars today!

Ingredients
  

1 ½ cups crushed graham crackers

½ cup melted butter

1 cup cookie butter

1 cup cream cheese, softened

1 cup pumpkin puree

¾ cup powdered sugar

1 teaspoon vanilla extract

1 teaspoon pumpkin pie spice

1 cup whipped cream for topping

Optional: additional cookie butter for drizzling on top

Instructions
 

In a mixing bowl, combine the crushed graham crackers and melted butter until well mixed. Press the mixture firmly into the bottom of an 8x8-inch square baking dish to form a crust. Refrigerate for about 10 minutes to set.

    In another large mixing bowl, beat together the softened cream cheese and cookie butter until creamy and smooth.

      Add the pumpkin puree, powdered sugar, vanilla extract, and pumpkin pie spice to the cream cheese mixture. Mix until fully combined and smooth.

        Fold in the whipped cream gently until no streaks remain. This will give the cheesecake bars a light and airy texture.

          Pour the pumpkin cheesecake mixture over the chilled crust and spread it evenly. Smooth the top with a spatula.

            Cover the dish with plastic wrap and refrigerate for at least 4 hours, or until firm.

              Once set, cut the bars into squares and serve chilled. Drizzle additional cookie butter on top if desired for an extra treat!

                Prep Time: 15 minutes | Total Time: 4 hours 15 minutes | Servings: 16

                  WANT TO SAVE THIS RECIPE?

                  Leave a Comment

                  Recipe Rating