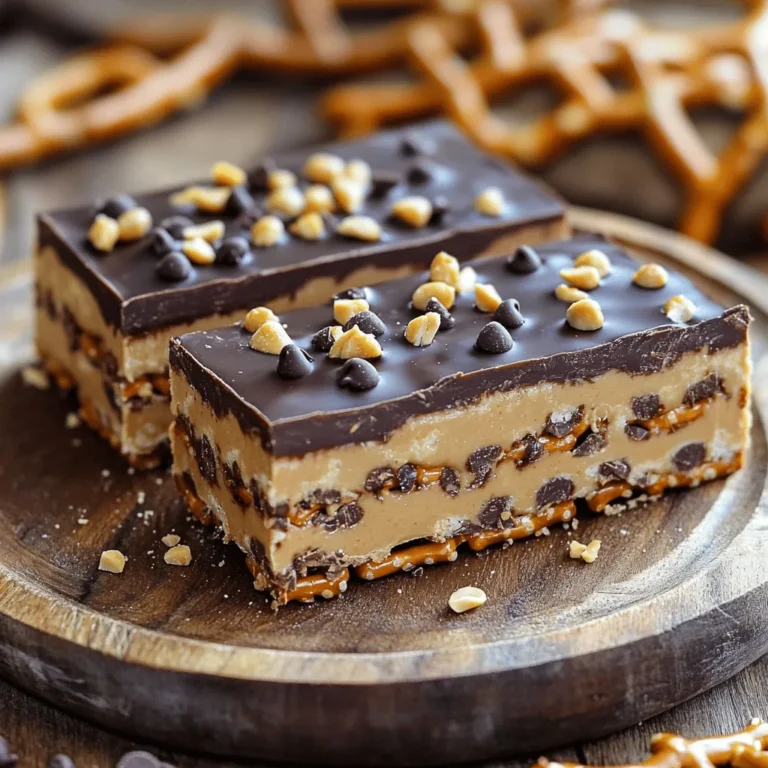
If you’re craving a sweet and salty treat, you will love these No-Bake Chocolate Peanut Butter Pretzel Bars. They are quick to make and require no baking, perfect for any skill level. With a crunchy pretzel base and a rich peanut butter layer, these bars satisfy every craving. I’ll guide you step-by-step, making it easy to whip them up. Let’s get started on this delicious adventure!
Ingredients
To make no-bake chocolate peanut butter pretzel bars, you need a few simple ingredients. Here’s what you’ll need:
- 2 cups pretzel sticks
- 1 cup creamy peanut butter
- 1/2 cup honey or maple syrup
- 1 cup rolled oats
- 1/2 cup chocolate chips (dark or semi-sweet)
- 1/4 tsp sea salt
- 1/2 cup additional chocolate chips for topping
- Optional: chopped peanuts for garnish
These ingredients work together to create a tasty mix of sweet and salty. The pretzel sticks add a nice crunch. The creamy peanut butter gives a rich flavor. Honey or maple syrup provides sweetness. Rolled oats add texture and heartiness. Chocolate chips melt beautifully on top, making a decadent layer.
You can also use chopped peanuts as a fun garnish. They add extra crunch and flavor. Feel free to mix and match based on your taste. This recipe is flexible and fun!
Step-by-Step Instructions
Preparation of Pretzels
- First, take 2 cups of pretzel sticks.
- Use a rolling pin or your hands to crush them into small pieces. Aim for about 1-inch bits.
- In another bowl, mix the crushed pretzels with 1 cup of rolled oats and 1/4 teaspoon of sea salt.
Creating the Peanut Butter Mixture
- In a microwave-safe bowl, combine 1 cup of creamy peanut butter and 1/2 cup of honey or maple syrup.
- Heat this mix in the microwave for 30 seconds. Stir it until it is smooth and well combined.
Assembling the Bars
- Add the crushed pretzel mixture and 1/2 cup of chocolate chips to the peanut butter mix. Stir until all ingredients are mixed well.
- Line an 8×8-inch baking dish with parchment paper. Pour the mixture into the dish and press it down firmly.
- Next, melt 1/2 cup of additional chocolate chips in the microwave. Do this in 30-second intervals, stirring until smooth.
- Pour the melted chocolate over the pressed mixture. If you want, sprinkle chopped peanuts on top for extra crunch.
Chilling and Serving
- Place the dish in the fridge for at least 1-2 hours. This helps the bars firm up nicely.
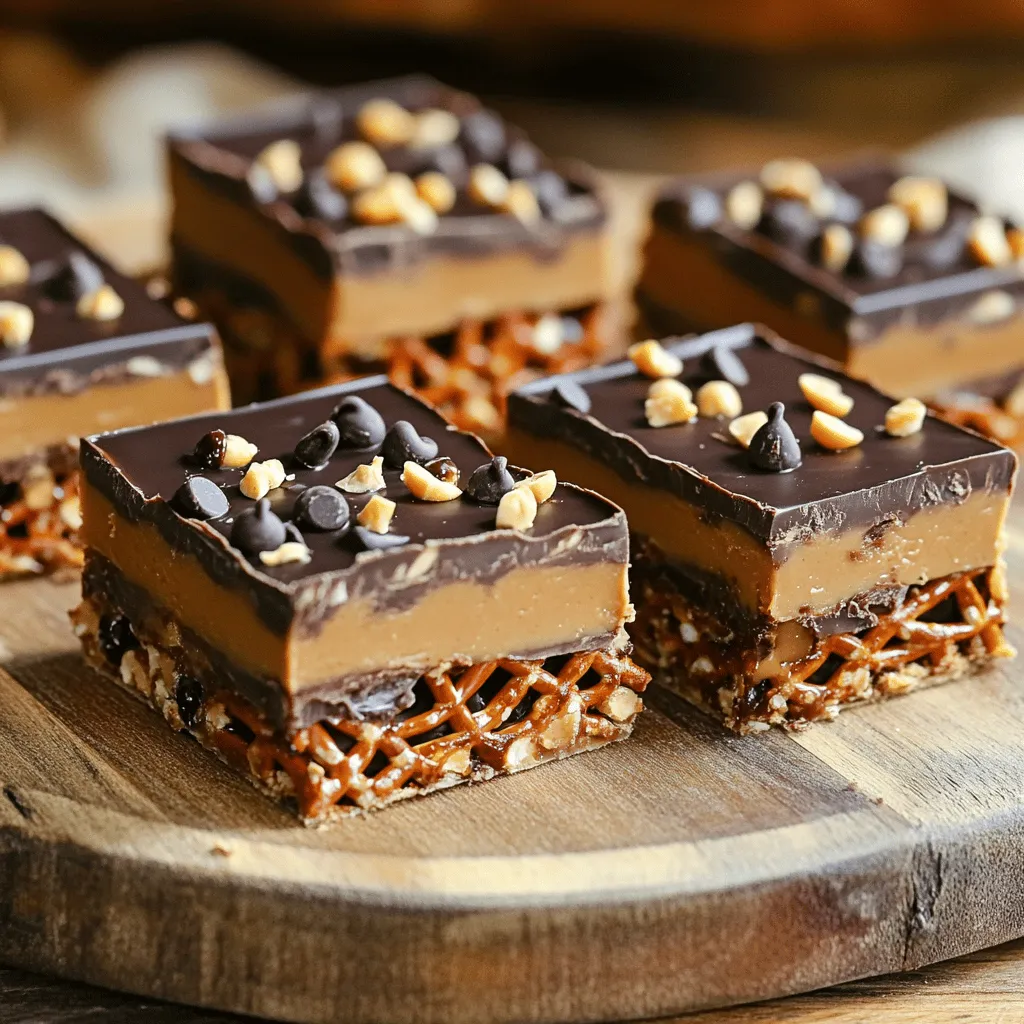
- Once firm, take the bars out and slice them into squares or bars. Enjoy your delicious treat!
Tips & Tricks
Perfect Texture
To get the right texture, crush your pretzel sticks into 1-inch pieces. This keeps some crunch. Mix the pretzels well with the other ingredients. Pressing the mixture firmly in the pan is key. It helps the bars hold together once chilled. Use a spatula or your hands to press down hard. An even layer makes for nice, neat bars.
Storage Suggestions
To keep your bars fresh, store them in an airtight container. Use a large container if you stack them. You can also wrap them in parchment paper. This helps keep them from getting too sticky. The bars can last up to a week in the fridge. If you need more time, consider freezing them.
Presentation Ideas
Serve these bars on a nice platter for gatherings. You can cut them into squares or rectangles. For gifts, wrap each bar in parchment paper. Tie them with twine for a cute touch. This makes them look special and homemade. They are great for sharing!
Variations
Flavor Swaps
You can swap out the peanut butter for other nut butters. Almond or cashew butter works great. If you want a fun twist, add a splash of vanilla or a dash of cinnamon. These small changes can change the whole taste.
Ingredient Substitutions
If you need gluten-free options, use gluten-free pretzels. They still taste great! For sweeteners, you can use agave syrup or brown rice syrup instead of honey. Each option gives a unique flavor.
Dietary Adjustments
For a vegan version, use maple syrup and a vegan chocolate. You can also try sun butter or soy nut butter for nut-free alternatives. These swaps keep the bars tasty for everyone.
Storage Info
How to Store
To keep your no-bake chocolate peanut butter pretzel bars fresh, store them in an airtight container. Place parchment paper between layers to avoid sticking. This helps keep each bar intact and easy to grab. These treats stay fresh for about one week in the fridge. The cool temperature keeps them firm and tasty.
Freezing Options
If you want to save some for later, freezing works great! Wrap each bar in plastic wrap, then place them in a freezer bag. This way, they stay fresh and don’t get freezer burn. These bars can last up to three months in the freezer.
When you’re ready to enjoy, take out the bars and thaw them in the fridge. This keeps their texture nice and smooth. If you’re in a hurry, you can leave them at room temperature for about 30 minutes. Enjoy your delicious treat anytime!
FAQs
Can I use crunchy peanut butter instead of creamy?
Yes, you can use crunchy peanut butter. It will add texture to the bars. The bits of peanut will give a nice crunch. This change makes the bars even more fun to eat!
How long do no-bake chocolate peanut butter pretzel bars last?
These bars last about a week in the fridge. Store them in an airtight container. If you want them to last longer, you can freeze them for up to three months.
Can I make these bars ahead of time?
Absolutely! These bars are great for meal prep. You can make them a few days in advance. Just keep them stored in the fridge until you are ready to enjoy.
What should I do if my mixture is too crumbly?
If your mixture is too crumbly, add a bit more peanut butter or honey. This will help it stick together better. Mix well after adding, and you should see a smoother texture.
Can I add other mix-ins like dried fruit or nuts?
Yes! Feel free to add dried fruits or nuts. Raisins, cranberries, or almonds work well. Just keep the ratios balanced so the bars hold together nicely.
These no-bake chocolate peanut butter pretzel bars are easy and fun to make. From crushing pretzels to adding chocolate on top, each step brings joy. Be sure to store them right for the best taste. Remember, you can swap ingredients to match your needs. Making these bars allows for creativity in the kitchen. Enjoy sharing them with friends or family, or keep them as a tasty treat for yourself. Now, get started and enjoy the process!
